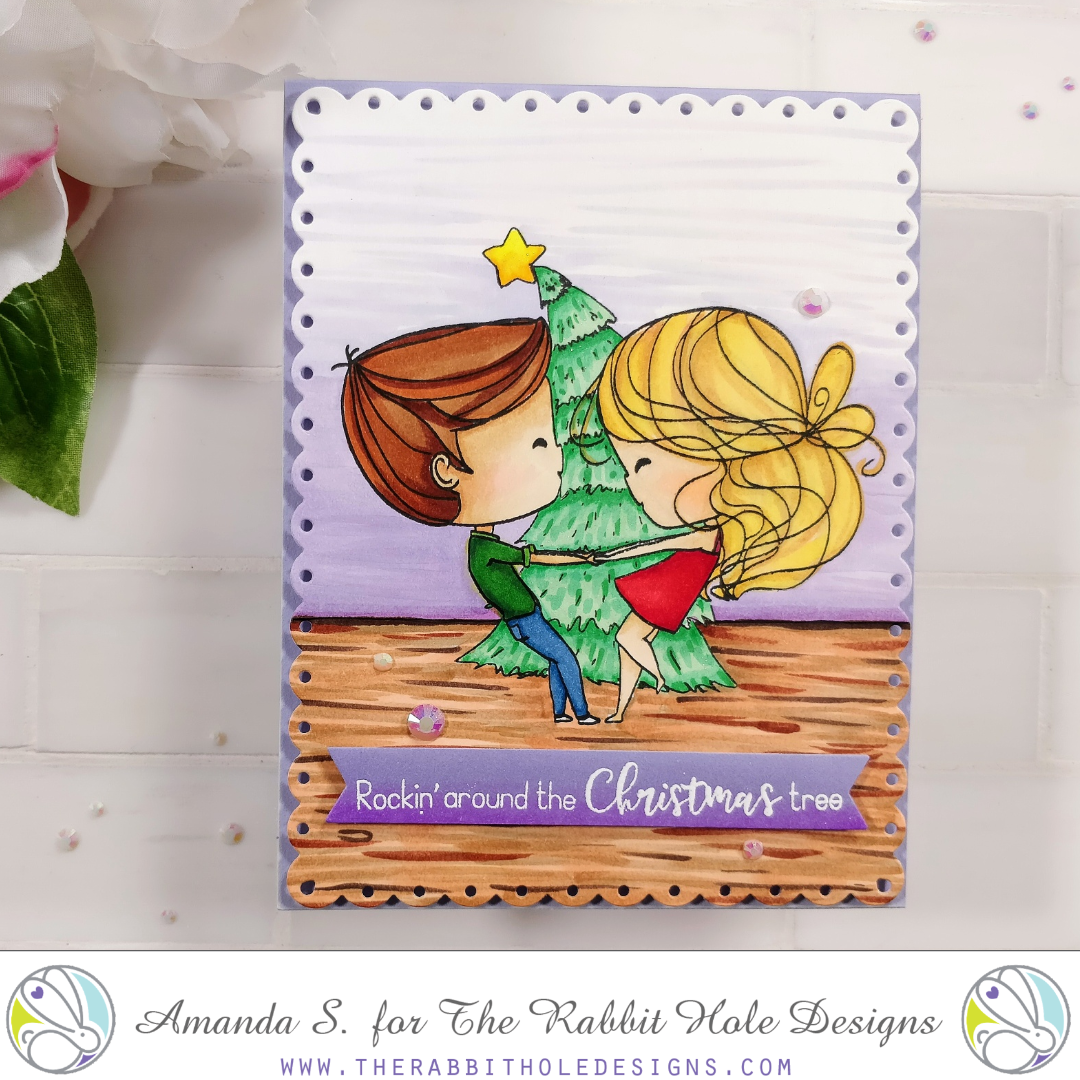
It’s Christmas Eve, so I wanted to share one last Christmas card with you this year. I stepped outside of my comfort zone to color a whole scene using images from The Rabbit Hole Designs. I really tried to create a flat, one-layer card, but in the end, I couldn’t do it. Lol, one of these days I’ll actually make a completely flat card. Maybe that can be one of my new year’s resolutions? (Who am I kidding, I won’t keep that one either!)

This card was very simple to make. I stamped the couple from the Love You More Heart Dance set. Then, I masked them off and stamped only the Christmas tree from the Love You More Christmas Frost set on top. When I removed the mask, the tree appeared to be in the background behind them. I used Copic markers to color the images, as well as the floor and wall. It was surprisingly easy to create the wood floor. I just used a ruler to mark a straight line separating the floor and wall. Then, I used several shades of E markers (browns) to draw in lines and a few ovals. I used the last and lightest shade to color over the whole floor. That toned down the contrast and helped blend the colors a little. For the wall, I used three shades of BV markers (blue violet), darkest at the bottom and worked my way up to feather off into white. I used the Colorless Blender marker to soften the last lines at the top and help them blend. I really like the wispy lines at the top, they give the wall texture without too much contrast.

My plan was to stamp the sentiment onto the wood floor, but I was afraid it would get lost. So I stamped it onto a piece of pale violet cardstock and die cut it with a fishtail banner. At this point, I knew the card wasn’t going to be a single layer, so I decided to decorate it a little more by cutting the scene out with a scalloped rectangle and layering it onto a pale violet card base. I used foam to pop up both the scene and the sentiment. Yes, that means my flat card has three layers, but that’s still less than normal for me, right? I played with the placement of the flat-backed gems, trying them first as ornaments on the tree, but I decided I liked them scattered on the scene better. To keep the tree from feeling naked, I added some sparkle with an Aqua Shimmer pen.
What do you think of my almost flat card? Do you prefer lots of layers, or stamping/drawing a scene? If I had thought about it more, I probably could have moved the images down on the panel and stamped the sentiment at the top. Then I might have actually made it one layer. Knowing me, I probably wouldn’t have been happy with it though. I should probably buy stock in foam tape companies. 😉
Happy holidays my crafty friend! I’ll be back soon with more fun cards! (It’s almost time for the new release from The Rabbit Hole Designs; I hope Santa brings you a gift certificate from them because you are going to want it all!) In the mean time, you can find more inspiration for the Love You More sets here and here. You can also find the sister post to this article on The Rabbit Hole Designs blog today.
This site uses affiliate links whenever possible (at no additional cost to you), but only for products I actually use and love.

So cute and you use as many layers as you want! Youre a genius. Happy Holidays to you and yours!🎅
WHAAT? They don’t sing and dance? 🙂 Adorable! And as to your coloring…the proof is in the realistic faces. Care to share details on how those faces got so real? Happy and Merry to you and Micah!