Have you seen the new release from Heartcraft Paper yet? I’ve been having a blast playing with the new Alice in Wonderland themed digi-stamps! They are really cute. Today, I’m sharing this un-birthday card I made with them. Why an un-birthday? Well, as the song goes…
Now, statistics prove, prove that you’ve one birthdayImagine, just one birthday every yearAh, but there are three hundred and sixty four un-birthdays!Precisely why we’re gathered here to cheerA very merry un-birthday to you…
If you’ve ever been on the teacup ride at Disneyland, you know the song by heart and it’s going to be stuck in your head for the next few hours 🙂
While you’re singing along, let’s make an eclipse card…(If you’re unfamiliar with the term, it refers to cutting a word or shape out of a panel, building up height behind it, and then gluing it back in place. The cut out section pops up from the card and creates an awesome effect.)
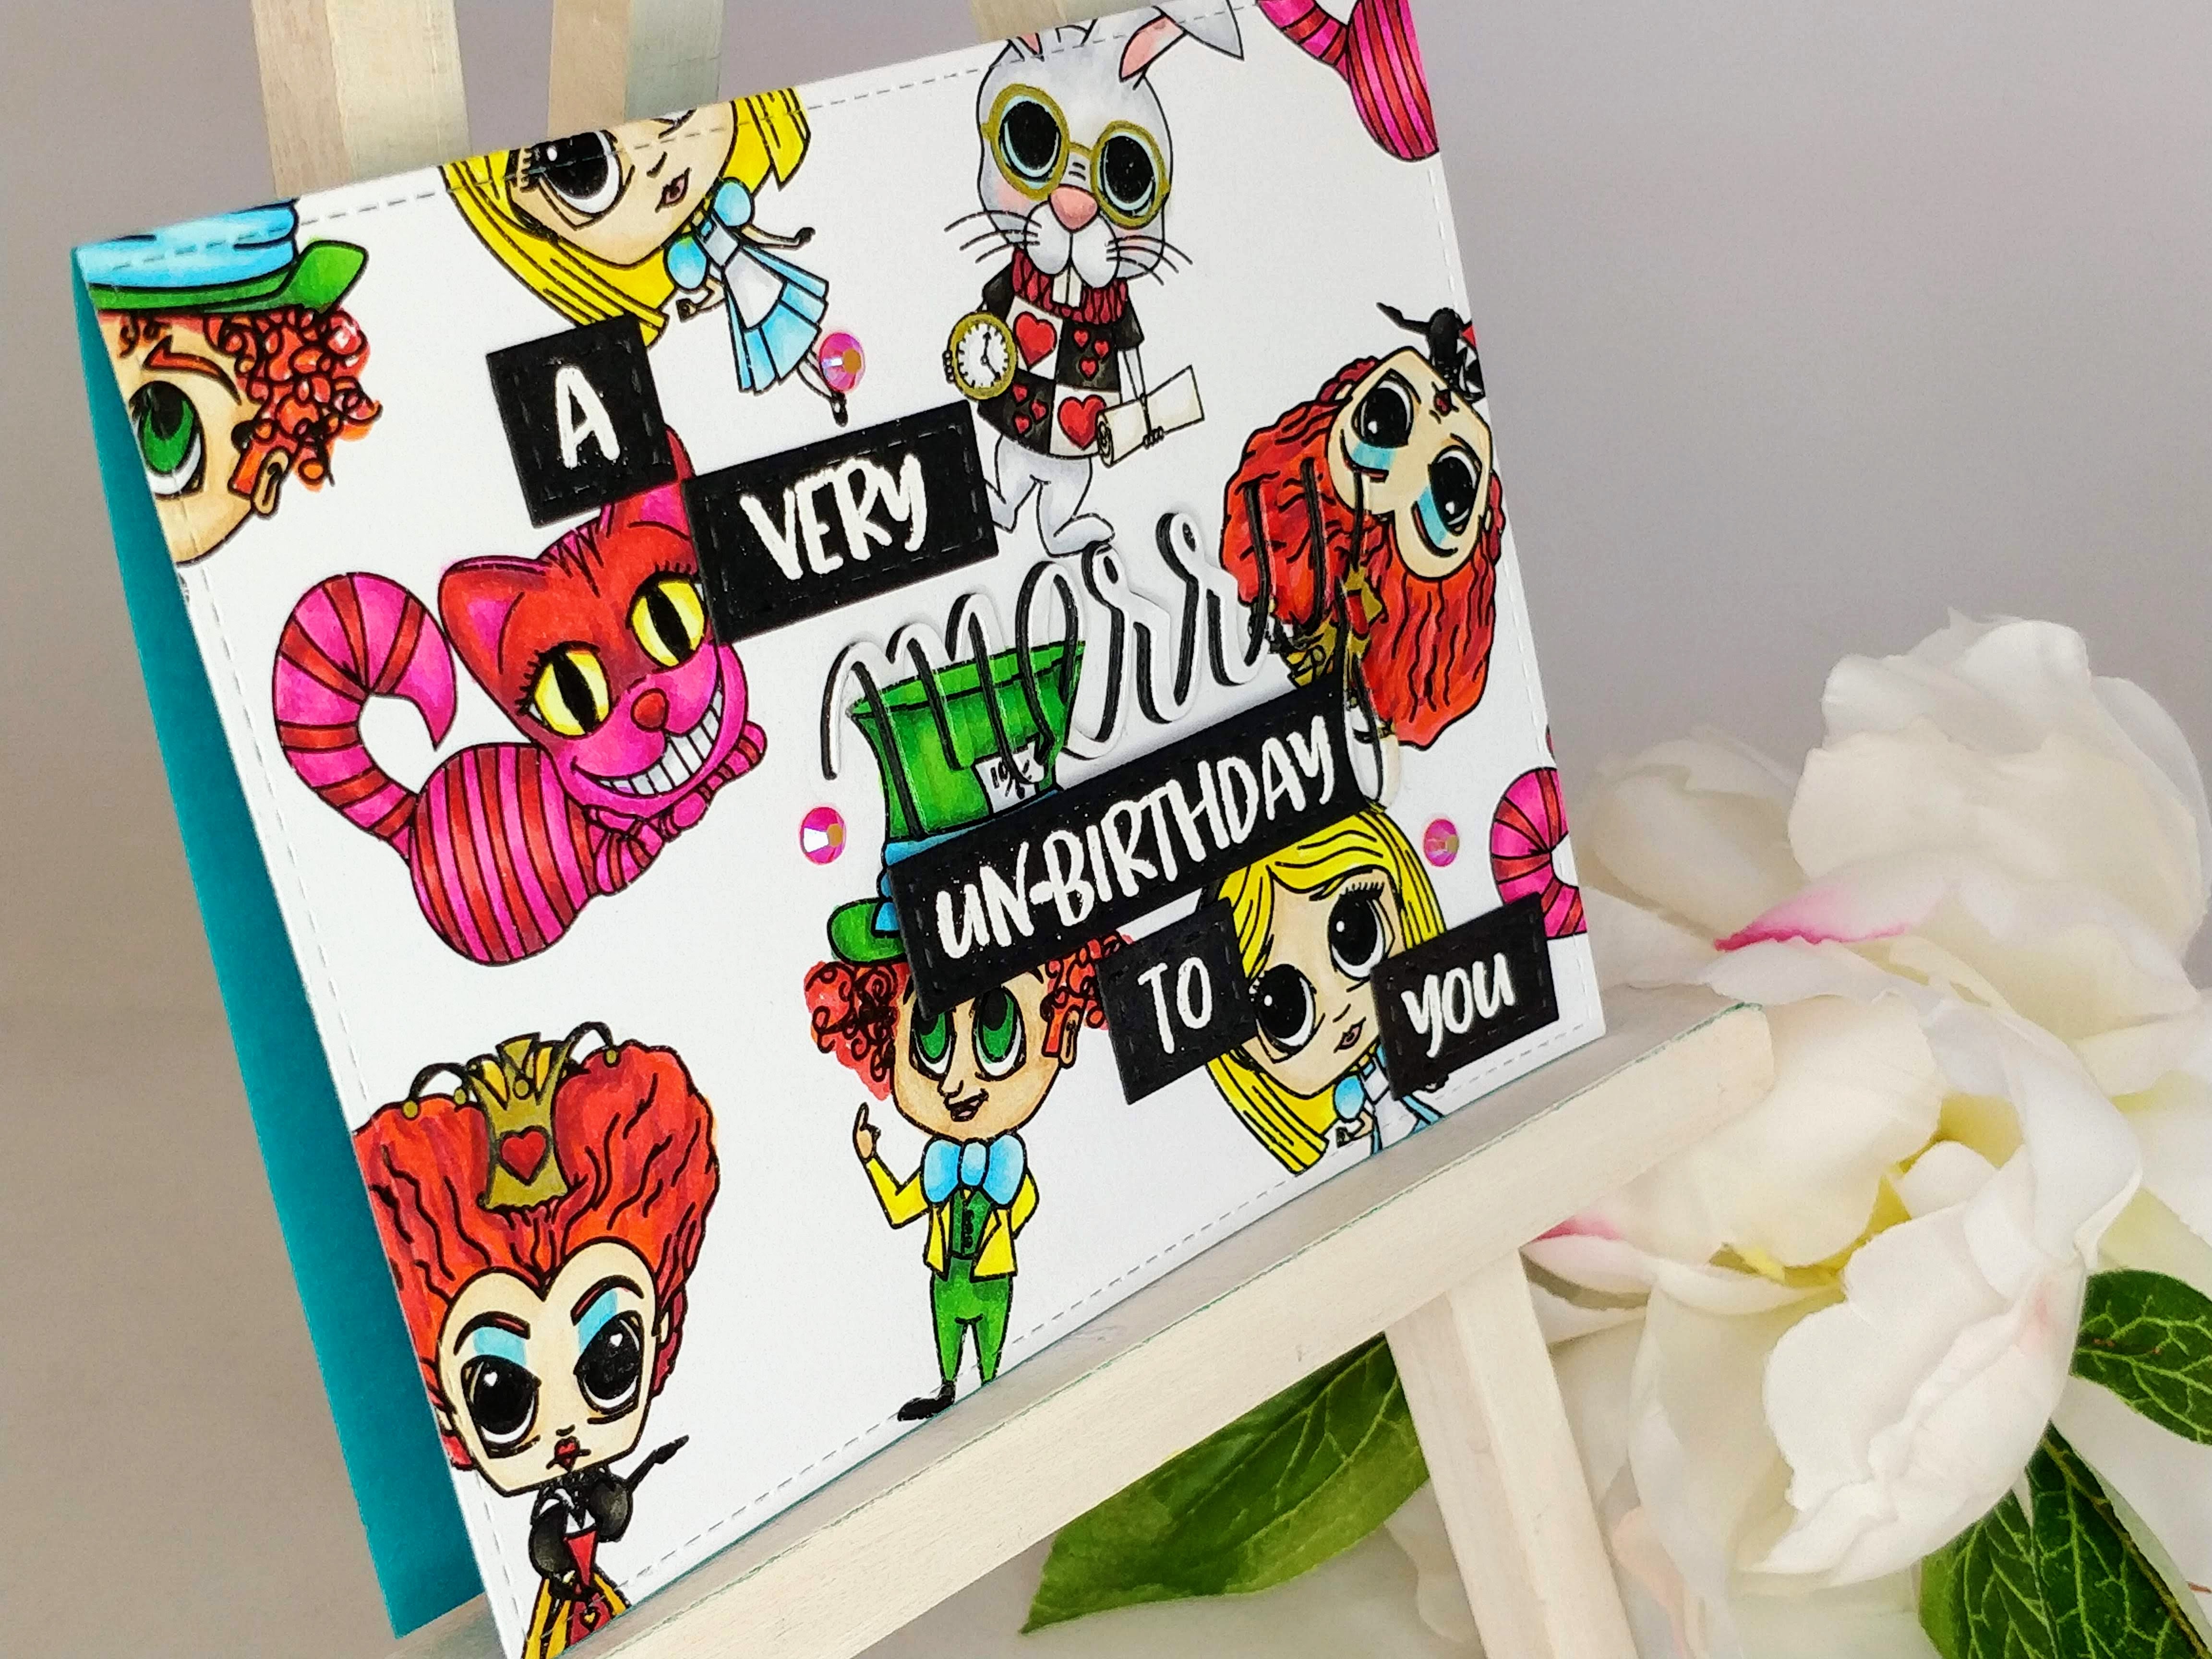
I started by creating a background with Alice, the Mad Hatter, the White Rabbit, the Cheshire Cat, and the Queen of Hearts. Then, I printed it onto cardstock and colored the images with Copic Markers. I trimmed the panel down with an A2 sized stitched rectangle die. I die cut the word Merry from the panel, and I made sure to reserve the tiny pieces from inside the letters too. Then I cut the word out four more times from black cardstock. (There is no need to save the inner pieces from the black words.)

I used several stamp sets for the rest of my sentiment. I stamped out the words onto die cut stitched strips in Versamark ink, then embossed them with white embossing powder and heat set them. I used the same die to shorten the strips, so the stitching would be on all four edges, except for un-birthday. I trimmed the right edge with the Y on the Merry die, so the strip would line up next to it perfectly.
To assemble my card, I glued the panel to a turquoise A2 card base. Then I used my new Glue Sponge to glue the first black cardstock word into the cutout in the panel. I took the reserved tiny pieces from inside the letters and glued them into the remaining holes. (At this point, the turquoise card base was completely covered.) Next I build up the word Merry with the remaining black layers and topped it with the colored layer. I used a strip of thin fun foam to pop up the un-birthday strip (my foam tape was too thick and would have raised the strip up above Merry). I glued the other sentiment strips flat to the card.

To finish my card, I glued on several Max Red flat backed gems and I added some shimmer and shine to the word Merry with an Aqua Shimmer pen and Diamond Glaze. Cute, right? Are you still singing the song? Want to see more cards using these images? Check out my Let’s Par-Tea card. And make sure to link up to the blog party and share your projects for a chance to win digi-stamps from Heartcraft Paper!
You are invited to the Inlinkz link party!
This site uses affiliate links whenever possible, but only for products I use and love.

I LOVE your card! Awesome coloring 🙂
Great card colors are so bright !!!