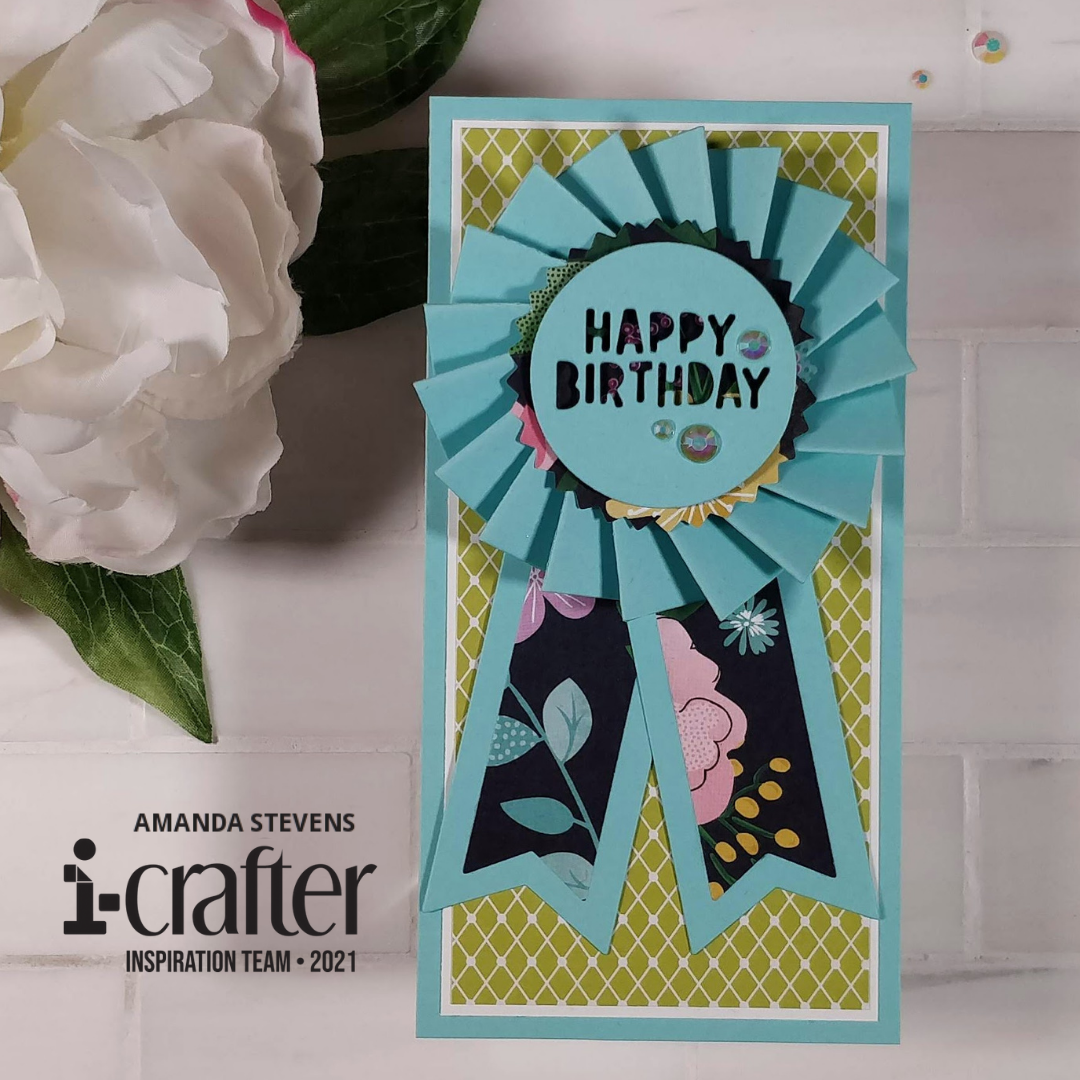
Hello my crafty friend! Today, I’m sharing a neat birthday card with a twist. The ribbon rosette on the front is a pin that can be removed from the card and worn. Isn’t it fun?
It was very easy to create, using i-crafter’s new Ribbon Rosette die set. I’ll walk you through the process step-by-step. First, I cut out three of the curved pieces, two each of the large and small tails, a solid circle, and another circle with the HAPPY BIRTHDAY sentiment dropped in, as well as a zigzag circle. Next, I glued the smaller tails to the larger ones, and popped the birthday circle up on the zigzag one with foam tape. I glued the three curved pieces together into a long strip, and folded back and forth on the score lines. It’s easiest to fold it up before gluing the ends together to complete the circle. I pushed the center of the folded strip in on itself to create the rosette and glued it to the solid little circle.
Hot glue would probably set up faster than the PVA glue I used, but I just put a glass on top for a few minutes, to hold everything in place while it dried. After that, I adhered the sentiment in the center with more foam tape, and glued the tails to the back. A bar pin glued near the top of the ribbon will allow the recipient to wear it (higher up is better for the pin, so it doesn’t lean forward when worn). I punched two holes into a mini-slimline card base, layered with pattern paper, so the ribbon could be attached with its pin back. (Unfortunately, I didn’t punch them far enough apart the first time, and had to punch a second set.)
A few iridescent gems around the sentiment add sparkle and finish off the card. Because I used heavyweight cardstock, my rosette is nice and thick. It’s really cool in person! I’ll hand deliver this card, to keep it from getting smashed. If you want to mail a card like this, I would suggest using a lightweight cardstock so the rosette will flatten out more.
I love the way this card came out. And did you notice, there is no stamping or coloring? The pattern paper and dies do all the hard work. It came together so fast! The Ribbon Rosette die set also comes with two other sentiments – CONGRATS, and BEST FRIEND. Wouldn’t this make a fun baby card? Of course, you can always create your own sentiment in the center with stamps, or alphabet dies – #1 Dad, #1 Teacher, etc… I want to make awards for everyone now! (I wish I’d had this die set the year we had a Halloween party with a costume contest.)
Thanks so much for stopping by today! I hope I’ve inspired you to give this idea a try. I’d love to know who you’d make award ribbons for. Let me know in the comments. I’ll be back soon with another fun card to share. And we have a special guest designer, Candice Fisher, back next week with another awesome light-up card! See you then!
This site uses affiliate links whenever possible (at no additional cost to you), but only for products we actually use and love.


WOW Amanda. This is absolutely adorable. If we weren’t still in lockdown, I’d make a matched set for John and I…Bdays 4 days apart end of the month! 🙂