Good morning! Join me for a cup of joe on the Serengeti, while I share how to create an easy mini scene for larger stamps?

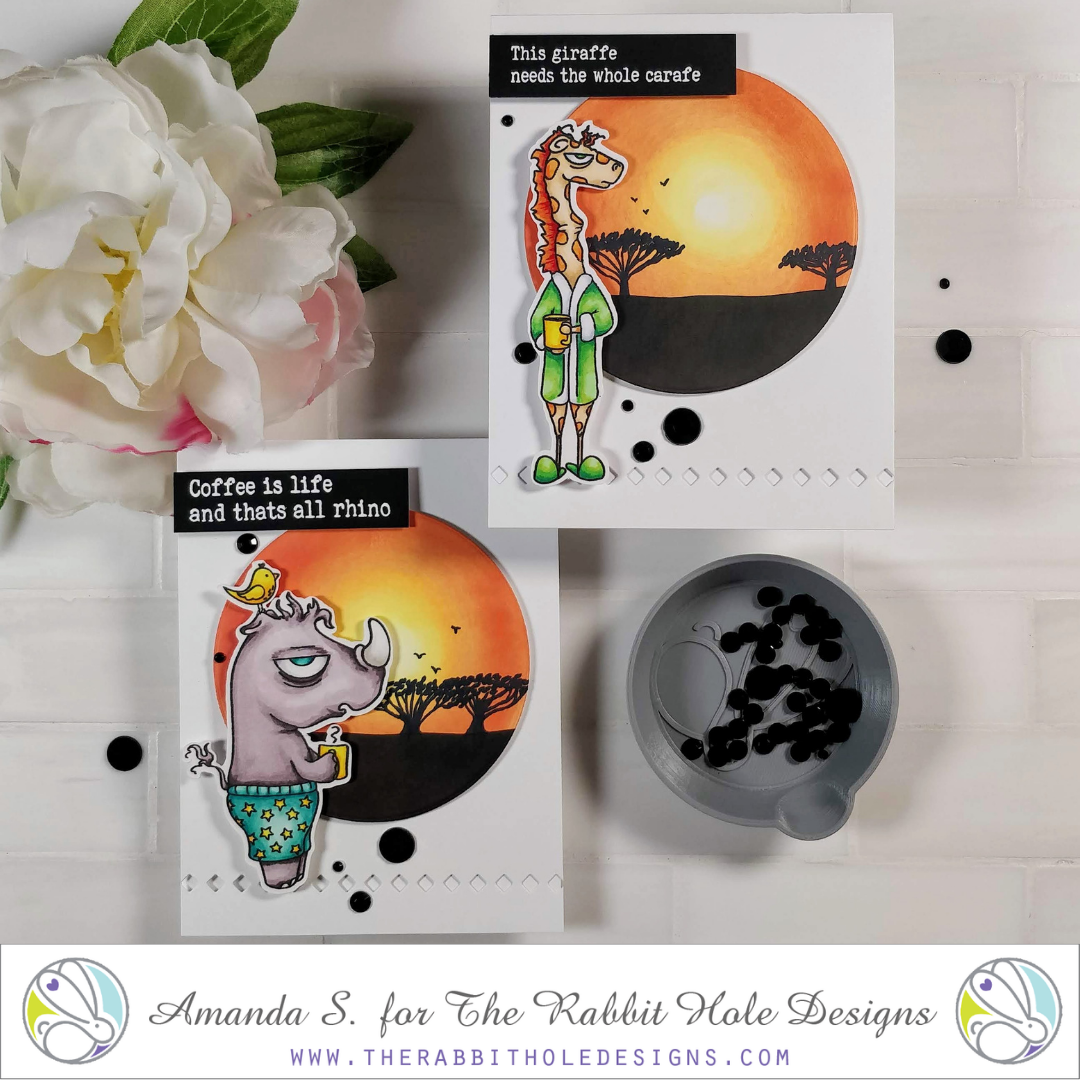
The new release from The Rabbit Hole Designs is available today, and there are three new Caffeinated Critters in the collection! Since the Caffeinated Rhino and the Caffeinated Giraffe are both African animals, I decided to create the same scene as a backdrop for them both. They are both larger stamps, so you might think you’d need to create a full scene, but by layering them on a die cut, or masked shape, you can create strong focal points with a mini scene.
STEP ONE: STAMP & COLOR
For today’s cards, I stamped the Giraffe, Rhino, and bird, and colored them with Copic markers. Then, I cut them out with my Scan N Cut. I prepped my sentiments by embossing them with white powder on Perfect Sentiment Cardstock, and trimmed them into strips.
STEP TWO: MINI SCENE
To create the mini scenes, I die cut a pair of 3½” circles from white cardstock. Using Squeezed Lemonade and Crackling Campfire Distress Oxide inks, I blended in a circular pattern, to create a sun on each panel. I made sure to leave a tiny bit of white space in the center of the yellow area, where the sun would be the brightest. I also tried to slightly offset the sun toward the right, for a more pleasing scene. Small brushes really help control your blend in small spaces. To create the ground, I freehand cut a wavy border from Memo Tape and masked off the horizon. Then, I quickly blended Black Soot Distress Oxide ink underneath.
Acacia trees are often associated with the Serengeti scene I wanted to create, and it turns out, they are very easy to draw in silhouette. (As are most trees.) I used a black Karin marker to draw the trunks and tree limbs, then dotted on the leaves at the top. Acacias are known for their wide, flat canopy, with lots of exposed limbs underneath. Add birds to the sky with a few tiny V shapes. That’s it, easy peasy mini scene! Depending on the stamps you are creating a background for, you might want to draw different trees, or change the colors. (Although, this scene will work great for the new Caffeinated Kangaroo as well, because acacia trees grow in Australia too.)

STEP THREE: ASSEMBLE CARDS
To pull the cards together, I die cut diamond borders from the bottom edges of my card bases, and adhered the pieces with a combination of regular, and double thick foam tape. A few scattered black gems add sparkle. What do you think?


Ready for more inspiration? Hop along with us!
The Rabbit Hole Designs – next stop
Kelly
Terra
Von Marie
Tangii
Amanda – you are here

What great background scenes!! I really love these…
Love these mini scenes.