
Hello everyone! It’s Samantha Pfrimmer here with you on the Pear Blossom Press Blog today. I am so excited to share a cute interactive card I made using adorable new products from the newest Trinity Stamps release out today paired with the Pear Blossom Press Twinkle-Lights.
SUPPLIES
- Twinkle Lights
- World’s Best Foam Tape
- Trinity Stamps Tiny Alien Die
- Trinity Stamps Space Saucer Die
- Trinity Stamps Crater Layers Stencil and Die
- Trinity Stamps Another Orbit Clear Stamp Set
CARD INSTRUCTIONS
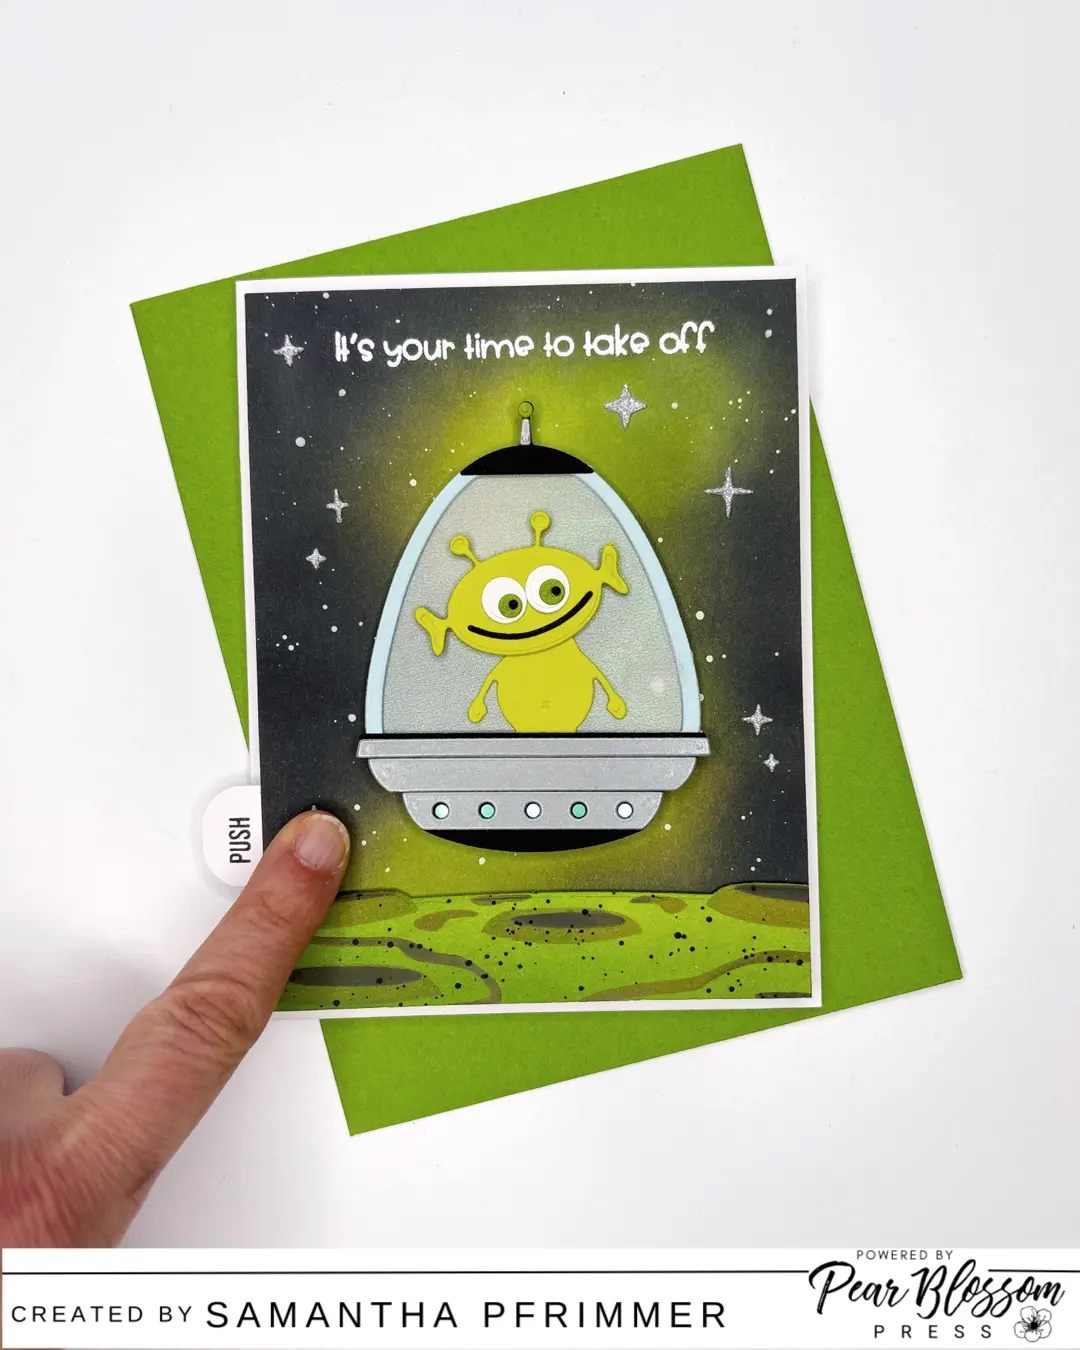
To begin this card, I first created a “spacy” A2 background panel using Distressed Oxides, Twisted Citron, Mowed Lawn, and Black Soot. I ink-blended most of my greens in the center of the panel where my Space Saucer would eventually be placed. Next, using white acrylic paint and a little water, I splattered some star details and set the panel aside while I worked on the planet stencil.
Using the Craters Layers Stencil, I stenciled a planet using the same Distressed Oxides listed above with the addition of Distressed Oxide Peeled Paint. Then using the accompanying die set, I die cut out my planet, splattered some more Black Soot, and set it aside while I worked on die-cutting my Tiny Alien and my Space Saucer. I used both colored and metallic card stocks for all of my die cuts and a shimmery vellum for the glass window of my saucer. I assembled all of my die cuts, inserting the alien into his saucer, and moved onto the lights.
The base of the saucer is the perfect place for Twinkle Lights. After trimming down my spacy background panel and white heat-embossing my sentiment from the Another Orbit Stamp Set, I traced the space where I wanted to place my sauce using the little holes in the saucer base, and used a sentiment strip die to cut out the section of the panel as shown below for my lights.

Next, I traced where my cut-out shape onto an A2 white base and attached my Twinkle Lights and the World’s Best Foam Tape. I also cut a small paper strip to hang off the side of my card where the battery pack was located and stamped the word “Push.” I would later add a star-shaped die cut using another die from the Crater Layers Stencil and Dies set out of glitter card stock to be placed over the press button.
Once my two panels were attached, I glued a little blue vellum over the small light holes in my saucer and then glued all of the elements from my top panel into place. I then added a few more glitter die cut stars around the panel and my scene was complete.
I just think this Tiny Alien in his light-up saucer is the cutest!

