Hello my crafty friend. It’s a great day here in my new craft room! We’re almost finished with the remodel, and I’ve already started moving everything back in. As I’ve been unpacking and going through things looking for their new homes, I’ve found a bunch of stuff I forgot I had. It’s like Christmas! So of course, I’ve had to stop and play a little. I’ll show you what I made.
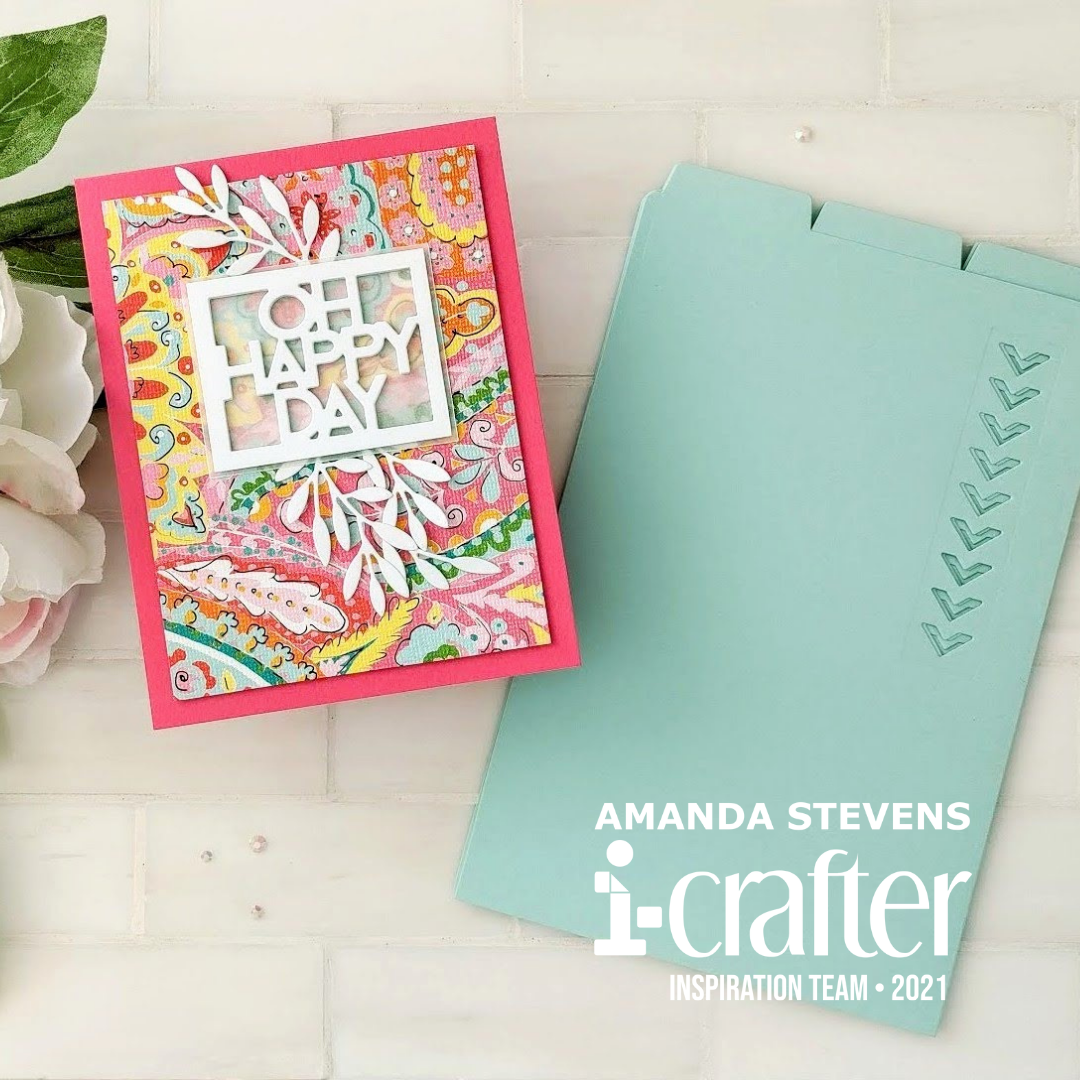
With all of these pretty new cabinets, I really wanted to upgrade my organization a bit. I’ve had mismatched and odd sized containers for years. So I decided to splurge and buy the clear refrigerator bins like Jennifer McGuire uses in her gorgeous craft room. In order to keep my stamps and dies organized by category, I’ve been making my own dividers using the new Mini Album Dividers from i-crafter. The dies are designed to mimic small file folders, and the tabs are perfect for stamp/die dividers. I simply cut sheets of cardstock in half (8½” x 5½”), then line up the Divider Dies and cut the tab tops, using partial die cutting. It’s fast, easy, and they look fantastic! In fact, they are so simple, I decided to dress them up a little with a decorative chevron die from the Divider 1 set.

So far, I’ve been cutting all of the dividers from blue cardstock, but I might change it up for different categories. How do you organize? By company, or by subject matter? I tend to keep my stamps organized by company, but my dies are sorted into categories (words, alphabets, nesting shapes, interactive, scene building, etc). I’m considering changes, so I haven’t labeled them yet. That way, I can change my mind. I’ll let you know what I decide.
While I had the Divider dies out, I couldn’t resist playing with some of the other decorative dies in the set, so I made a quick card. (No guilt, it was a quick and easy card.) I die cut the sentiment and floral sprig three times each from a scrap of white cardstock. I stacked the sentiment layers and trimmed the outer edges to match (this die can be used as an inset, so it doesn’t cut the outer rectangle). I had run across this bright pattern paper scrap, but it is really busy, so to help the sentiment stand out, I added a piece of vellum underneath. After gluing the leaves and sentiment to the pattern paper, I popped the panel up with foam tape onto a bright pink card base. No gems or glitter; I promised a quick and easy card. It’s really pretty though, don’t you think?
[one_half] [/one_half]
[one_half last] [/one_half]
Alright, it’s back to unpacking for me. The floor and countertops go in tomorrow. Then, the plumber can come back and install my sink and water heater. After that, it’s trim and paint touchups to finish. (And I can finally move my desk back in!) The tour is coming friend, don’t worry. I’m so excited and I can’t wait to share.
Thanks so much for stopping by today. Be sure to swing by tomorrow; we’ve got an awesome hop with Catherine Pooler and special guest, Mona Toth, sharing a gorgeous new light-up card! See you then!
This site uses affiliate links whenever possible (at no additional cost to you), but only for products I actually use and love.
