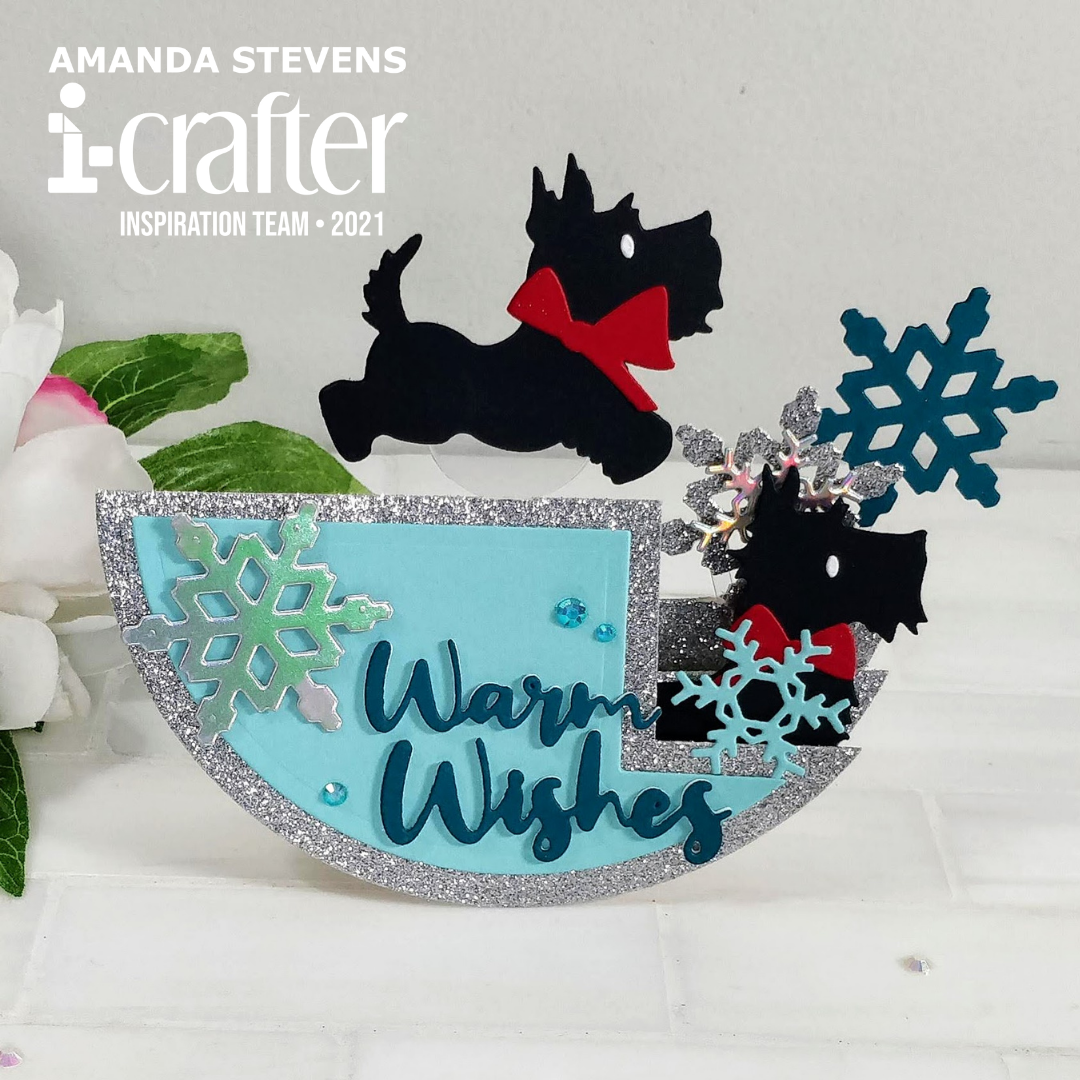
Hello, hello my crafty friend! I’m so excited to share today’s card with you. You know how I love interactive cards, and this one has double the fun; it’s a rocker card, with a pendulum! So as the card base rocks back and forth, the cute little scottie dog on top rocks in the opposite direction. Take a look…
[row]
[column size=”2/3″ stack=”sm”]
[/column]
[column size=”1/3″ stack=”sm”][/column]
[/row]
Isn’t that fun? This card is on my desk, and I keep playing with it. Let me show you how I put it together. Don’t worry, I used dies to help make things easy.
First, let’s talk about the rocker base, and how I prepped the pendulum. The base itself was really easy to make. I simply cut it from glitter cardstock, using i-crafter’s new Rocker Step Card die set. The die does all the work, so I only had to pinch the folds where the die scored them. Then, I cut a little slit for the pendulum in the center of the card, along the score line. (See photo below.)
For the pendulum mechanism, I cut acetate into a half circle with a leg hanging down. Think of a wine glass shape without a foot. (I cranked up the contrast so you could see it in the photo below.) Then, I tucked the leg in through the slit I cut in the card, and adhered a penny to the bottom of the leg for weight, and a pair of white circles to make it look pretty. The half circle above the card will allow my dog to rock smoothly, and the weight of the penny will give it more momentum.
[row]
[column size=”1/2″ stack=”sm”] [/column]
[column size=”1/2″ stack=”sm”] [/column]
[/row]
[row]
[column size=”1/2″ stack=”sm”] [/column]
[column size=”1/2″ stack=”sm”] [/column]
[/row]
Now, we can add the scottie dog to the pendulum, and decorate the rest of the card. For 3D cards like this, I don’t like the look of an unfinished back, so I cut a pair of the jumping dog, gluing the bow and eye on to the back side of one for a mirror image. Then, I sandwiched the pendulum between the dogs.
[row]
[column size=”1/2″ stack=”sm”] [/column]
[column size=”1/2″ stack=”sm”] [/column]
[/row]
To decorate the card, I glued on a variety of snowflakes, cut from teal, glitter, and holographic paper. Some were attached to the card with acetate strips to extend them up from the top of the card. (Snowflakes on acetate strips were backed with a second snowflake to hide the acetate.) I nestled a sitting dog into the steps, and stacked my sentiment four layers high, for a nice chipboard look. A few gems finish the card and add more glitz.
[row]
[column size=”1/2″ stack=”sm”] [/column]
[column size=”1/2″ stack=”sm”] [/column]
[/row]
[row]
[column size=”1/2″ stack=”sm”] [/column]
[column size=”1/2″ stack=”sm”]
[/column]
[/row]
I just love the way this card turned out. Don’t you? Since I added so much height and width to the rocker card’s dimensions, it needs an A7 envelope (normally, the rocker card fits into an A2 envelope). If you’d like to recreate a card like this, I’ve got a supply list below. I mixed and match sets, but the rocker card comes with a beautiful bird and florals that you could decorate with. It even has the sentiment! I wanted to use the Scottie dogs, since this card will be for my dad (he’s a dog guy).
Supply List
Rocker Step Card Die Set
Scotty Holiday Die Set
Holiday Words Die Set (snowflakes)
Classic Circles Die Set (pendulum parts)
I hope I’ve inspired you to give this card a try. If you have any questions, just holler. Or better yet, join me on Zoom for Crafternoon, and show me. A small group of us login on Sunday afternoons to chit chat while we craft. I hope you’ll join us sometime!
Thanks for stopping by today. I’ll be back soon with more fun cards to share. And for those of you attending the Sweet Sentiment Retreat next weekend, I’ll see you there! We’ll be making a fun light-up card together.
This site uses affiliate links whenever possible (at no additional cost to you), but only for products I actually use and love.


You created a beautiful card and I love how creative it is with not only the rocker base, but the pendulum from acetate. My sister owns a similar dog and you have inspired me to try making this card. Thank you.