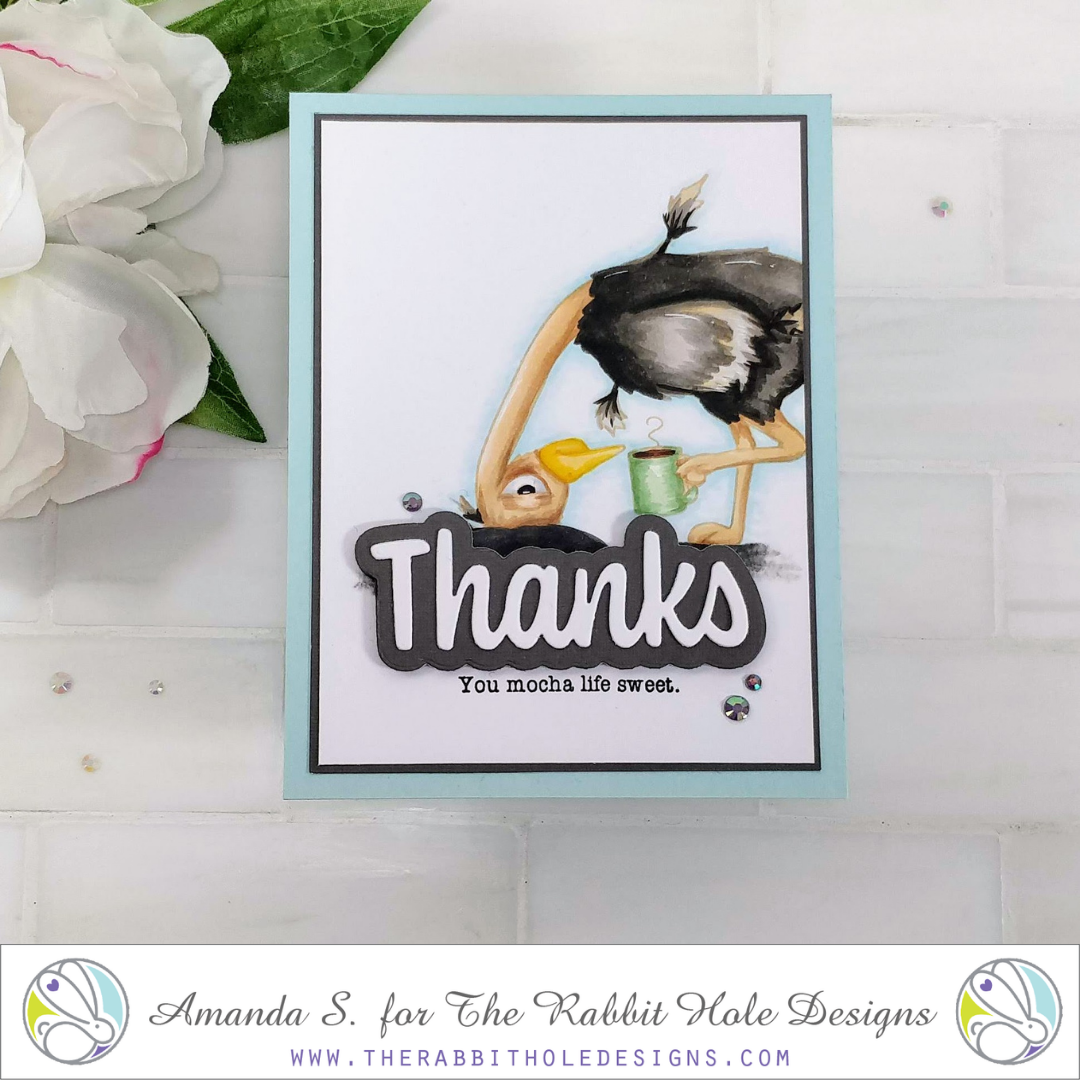
As the weather cools down, I’m reaching for more coffee to keep me warm. Today’s card is a silly thank you, inspired by my increased coffee consumption. It features the new Caffeinated Ostrich (you may remember him from my flamingo card the other day). I used a traditional color palette for him in this no-line coloring card. Take a look…

Funny, right? That ostrich cracks me up. Let me walk you through the coloring process. First, I stamped him with Warm Glow ink onto x-Press It cardstock, slightly offset to the right side of my panel. Then, I colored him with Copic markers. (I just got the last set of 72 colors to complete my collection! Lol, now to refill the dry ones.) You can see the colors I used in the chart below; apologies for the blurry photo, I didn’t have my glasses on when I took it.
[row]
[column size=”1/2″ stack=”sm”] [/column]
[column size=”1/2″ stack=”sm”] [/column]
[/row]
Color Chart
Head and Legs – E34, E53, E00
Beak – Y19, Y23
Eye – 100, N2, N0
Feathers – W10, W8, W6, W4, W2, Y23
Coffee Mug – G24, G40, E27
Ground – T6
Glow – B000, B0000
Highlights – White Gel Pen
Originally, I planned to have the ostrich’s head tucked right into the Thanks shadow and die cut word, but when I lined up the sub-sentiment from the Perfectly Blended stamp set (retired), I used the shadow die itself to figure out spacing, not the die cut. I didn’t account for the extra metal around the cutting edge, so the sub-sentiment was too low on the panel. To fix this, I simply used a dark grey marker to color the ground below the bird. After that, I popped the die cut word onto the panel with foam tape. It’s hard to tell from the photo, but the white word layer is stacked two high, for extra dimension.
To assemble the card, I layered the colored panel onto a slightly larger grey panel, then onto a coordinating blue A2 card base. A few gems add interest and sparkle. Here’s a closer look (can you see the white gel pen accents? And can you tell I had to go back and add more ground to the left side of the die cut to balance the card?)…
 Coloring this Caffeinated Ostrich is fun. He’s big enough that you have plenty of room in each section, and you don’t feel crowded when blending. The nooks and crannies are large enough that you can add more shadows with your markers (you don’t need to do it with colored pencils), so it’s a great practice image. I still struggle with darker colors in my no-line coloring, but I like the way this guy turned out. What do you think?
Thanks so much for stopping by today. I hope I’ve inspired you to pull out your markers and practice no-line coloring with me. I’ll be back soon with more fun cards to share. And this weekend, I’ll be at the Sweet Sentiment Retreat in Boise!!! I’m so excited! Jammie is going to teach us lots of coloring techniques and then, we’ll make a light-up card together! Will I see you there? I hope so.
This site uses affiliate links whenever possible (at no additional cost to you), but only for products I actually use and love.
