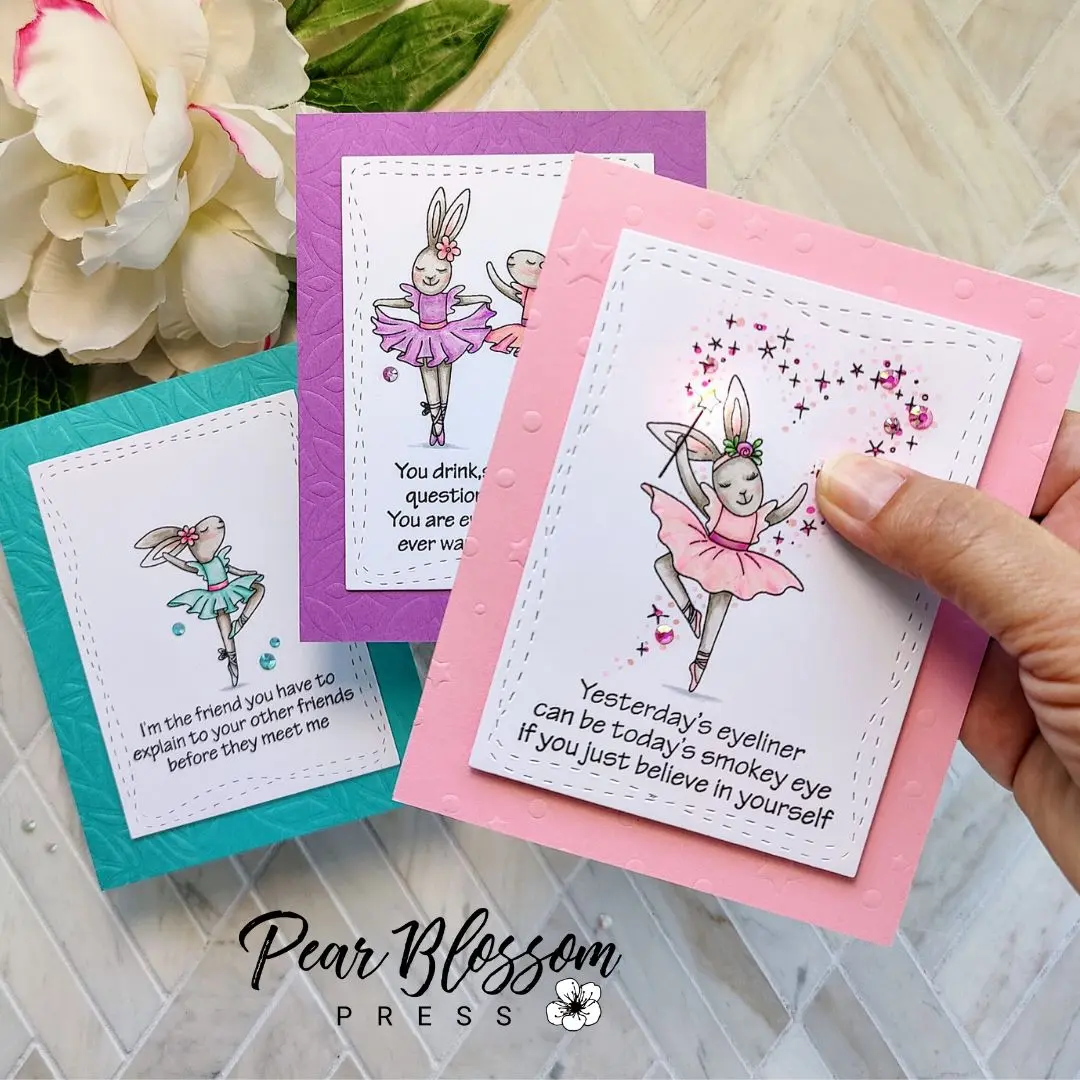
Just like in real life, when you first see cute little bunnies, you can’t imagine they’d be anything but sweet and adorable. As a rabbit mom, I’m here to tell you they can be sassy too. For animals that don’t make much noise, they sure are expressive. They tell me “no” all the time. And they often surprise us with their fancy footwork. We love watching them play outside. They go from nibbling grass, to leaping into the air and crisscrossing their feet so fast they’d make any ballerina jealous of their entrechat skills. So when I saw the new release from The Rabbit Hole Designs, not only did I think the Bunny Ballerinas were perfect, but I knew I wanted to pair them with the hilarious new Sassy Sentiments. Take a look at my trio of sweet bunny ballerina cards with a sassy twist, and just like real bunnies, one has an extra surprise for you…
These cards are clean and simple, making them quick and easy to recreate. I wanted them to look sweet and innocent, so the Sassy Sentiments would be even more unexpected. Of course, you could use the sentiments included in the Bunny Ballet set for purely sweet cards, but I like a little spice. If you’d like to make cards like these, grab your supplies and meet me in the craft room…
SUPPLY LIST
Bunny Ballet Stamps
Sassy Sentiments 2 Stamps
Amanda Stencil
Wonky Stitched Rectangle Dies
One Light
Interactive Labels Stamps
Double Thick Foam Tape
To start, stamp your bunnies and sentiments onto white panels. For the image with three rabbits, I masked off the left one on one panel, and then the other two for another panel. That gave me three stamped panels, so I can give these away as a set. I colored the images with Copic markers, making sure to add tiny grey shadows under their feet to ground them. Then I trimmed the panels down with a wonky stitched die. (You could just cut them down with your trimmer.)
[row]
[column size=”1/2″ stack=”sm”] [/column]
[column size=”1/2″ stack=”sm”] [/column]
[/row]
To add color and interest, I dry embossed three colored cardstock panels with different stencils, by sandwiching them with a squishy silicone pad in my die cutting machine (check your machine’s manual for the correct sandwich). I adhered the panels to A2 card bases, then popped up two of the ballerina panels with thin foam tape.
[row]
[column size=”1/2″ stack=”sm”] [/column]
[column size=”1/2″ stack=”sm”] [/column]
[/row]
For the third panel, I decided to light up the bunny’s wand. (Don’t worry, it’s super easy.) I lined up a One Light on top of the bunny panel and card base in my Misti, with the yellow dot right over the star of the wand. That way, I could place my “PUSH” stamp on the button and pick it up with the lid of my Misti so it would be perfectly lined up. To keep it really subtle, I embossed it with white powder, then lightly blended pink ink around the word. With the stamp still in place, I stamped “PUSH” again on my embossed card to mark where the button should go. I lined the bunny panel back up and hovered a pencil over the star. I slid my panel out of the way, and marked a dot where the light should go. The marks allowed me to easily line up the One Light, and adhere it to the card. After that, I simply attached the bunny panel to the card with Double Thick Foam Tape.
[row]
[column size=”1/2″ stack=”sm”] [/column]
[column size=”1/2″ stack=”sm”] [/column]
[/row][row]
[column size=”1/2″ stack=”sm”] [/column]
[column size=”1/2″ stack=”sm”] [/column]
[/row]
To finish all three cards, I brushed the tutus with a shimmer pen and glued on a few gems for sparkle. An iridescent star gem on top of the wand glows when you push the button!
Here’s a look at the finished cards…
[row]
[column size=”1/2″ stack=”sm”] [/column]
[column size=”1/2″ stack=”sm”] [/column]
[/row]
[row]
[column size=”1/2″ stack=”sm”] [/column]
[column size=”1/2″ stack=”sm”] [/column]
[/row]
I love the way these turned out! I’m planning to give them as a set to an adult friend, but I think I’ll make a few more with the sweeter sentiments to have on hand for my nieces. I’d love to know what you think. Do you have friends who appreciate sassy sentiments, or do you keep all of your cards G-rated?
For those of you who are curious, here are a few photos of our real buns…
[row]
[column size=”1/2″ stack=”sm”] [/column]
[column size=”1/2″ stack=”sm”] [/column]
[/row]
Thanks so much for stopping by today! Whether you prefer a sweet or sassy version, I hope I’ve inspired you to give these cards a try. Be sure to check out the entire new release from The Rabbit Hole Designs for more inspiration. I’ll be back soon with another fun card to share.
This site uses affiliate links whenever possible (at no additional cost to you), but only for products I actually use and love.
