Hello crafty friends! Thanks for joining me today! I’m so excited to share this fun card with you as part of the December 2018 release and blog hop celebration for Heartcraft Paper! Be sure to check out all of the lovely cards created by the design team and then enter a card of your own in the challenge! Three lucky winners will receive digi-stamps from the new release!!! (Links below.)
As a designer, I’ve really been trying to up my game and make more videos to better walk you through the process. I’ve got one for you here!
[row]
[column size=”1/5″ stack=”sm”][/column]
[column size=”3/5″ stack=”sm”]
[/column]
[column size=”1/5″ stack=”sm”][/column]
[/row]
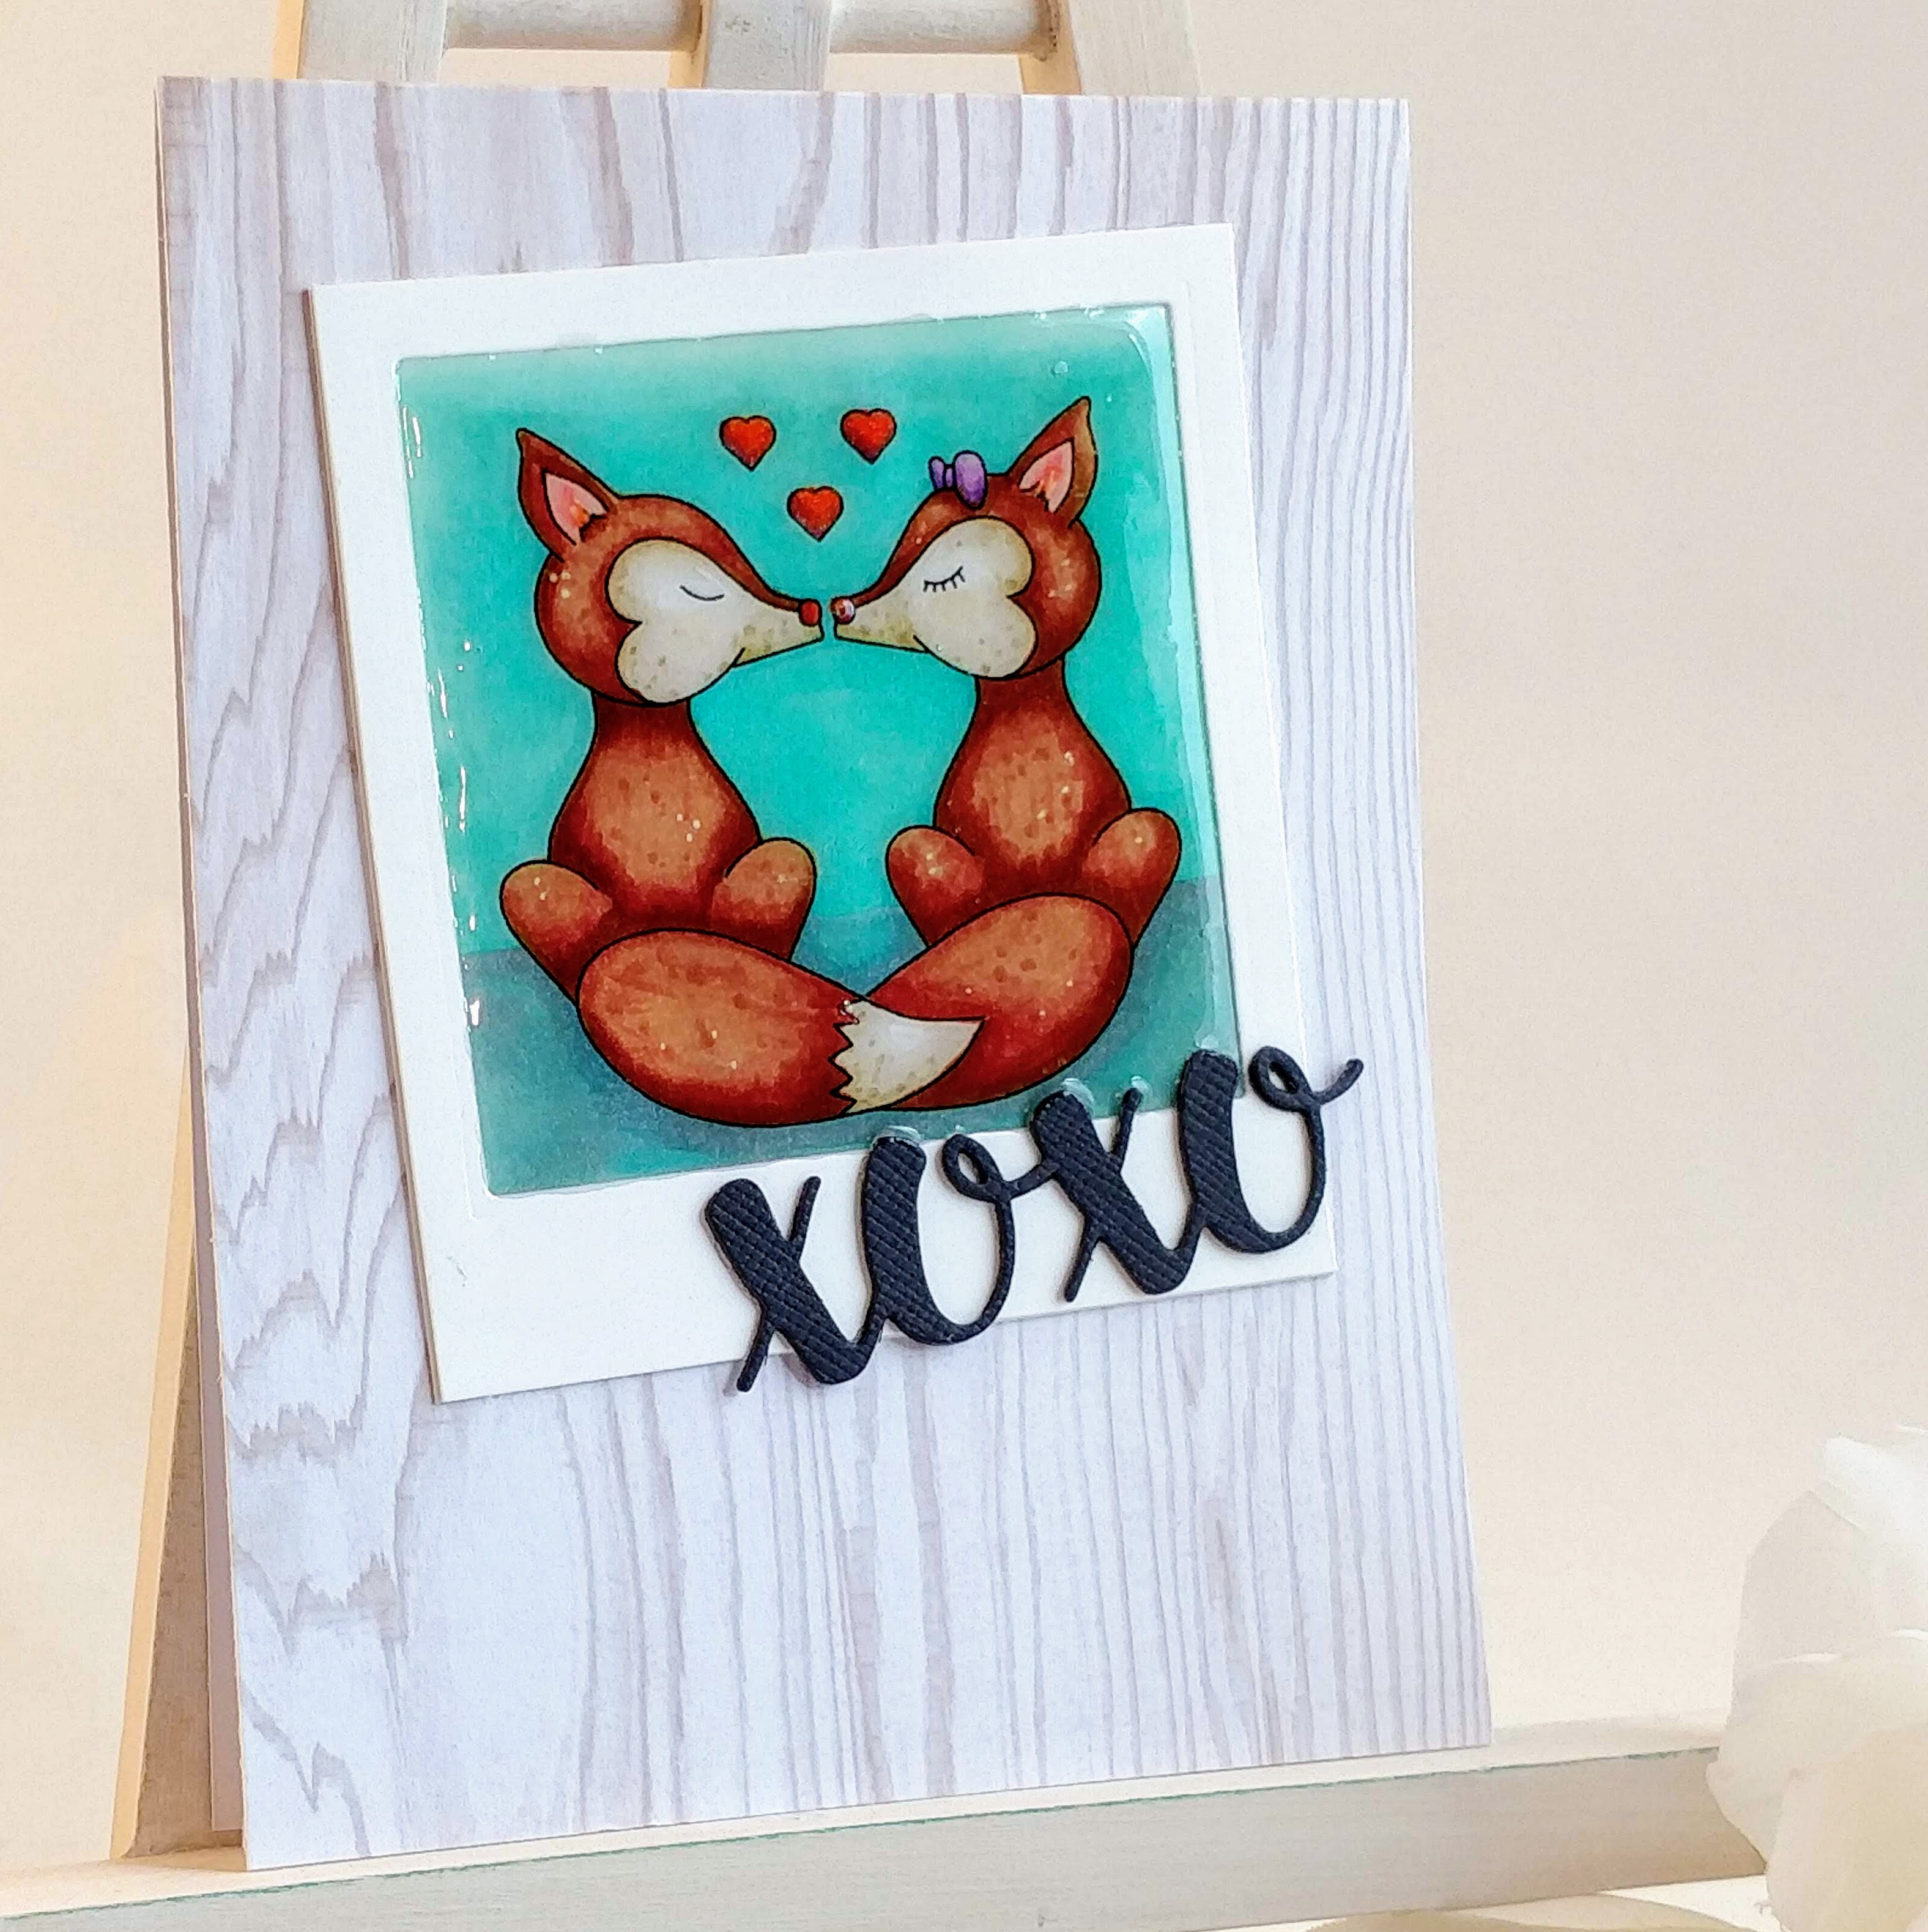
For my card, I started with a square die that looked to be about the right size for the window of a Polaroid picture. I used the measurements to size my Foxy Kind of Love digi-stamp to fit inside the square. I printed the image out on lightweight cardstock and colored it with my Copic Markers, adding details with a white gel pen and Wink of Stella.
From heavy white cardstock, I cut three rectangles measuring 1/2″ wider and 7/8″ taller than my square die. I lined up the die 1/4″ in from the top and sides of one rectangle (leaving 5/8″ at the bottom) and cut it out with my Big Shot. This will be the top layer of my Polaroid. I cut my foxy image down to the size of my rectangle, making sure my image lined up through the window. I also cut my sentiment out three times from black cardstock.
[row]
[column size=”1/5″ stack=”sm”][/column]
[column size=”3/5″ stack=”sm”] [/column]
[column size=”1/5″ stack=”sm”][/column]
[/row]
After I had all of my pieces cut and my image colored, I glued the layers together to form a thick Polaroid and a thick sentiment. I cut and scored woodgrain cardstock to form a top folding A2 card base. Then I glued on my Polaroid and sentiment. To finish my card, I added a thick coat of Glossy Accents to the image. I used acrylic blocks to hold the edges of the Polaroid down as it dried overnight. I was careful not to let the blocks touch the Glossy Accents, just the outer edges of the frame. This helps avoid any curling of the paper as it dries. That’s it! I think it came out really cute!
Now be sure to hop along to each stop on the blog hop and don’t forget to enter the challenge for your chance to win!
Amanda Stevens <<<You Are Here
Tina Bickers Turner<<< Next Hop
