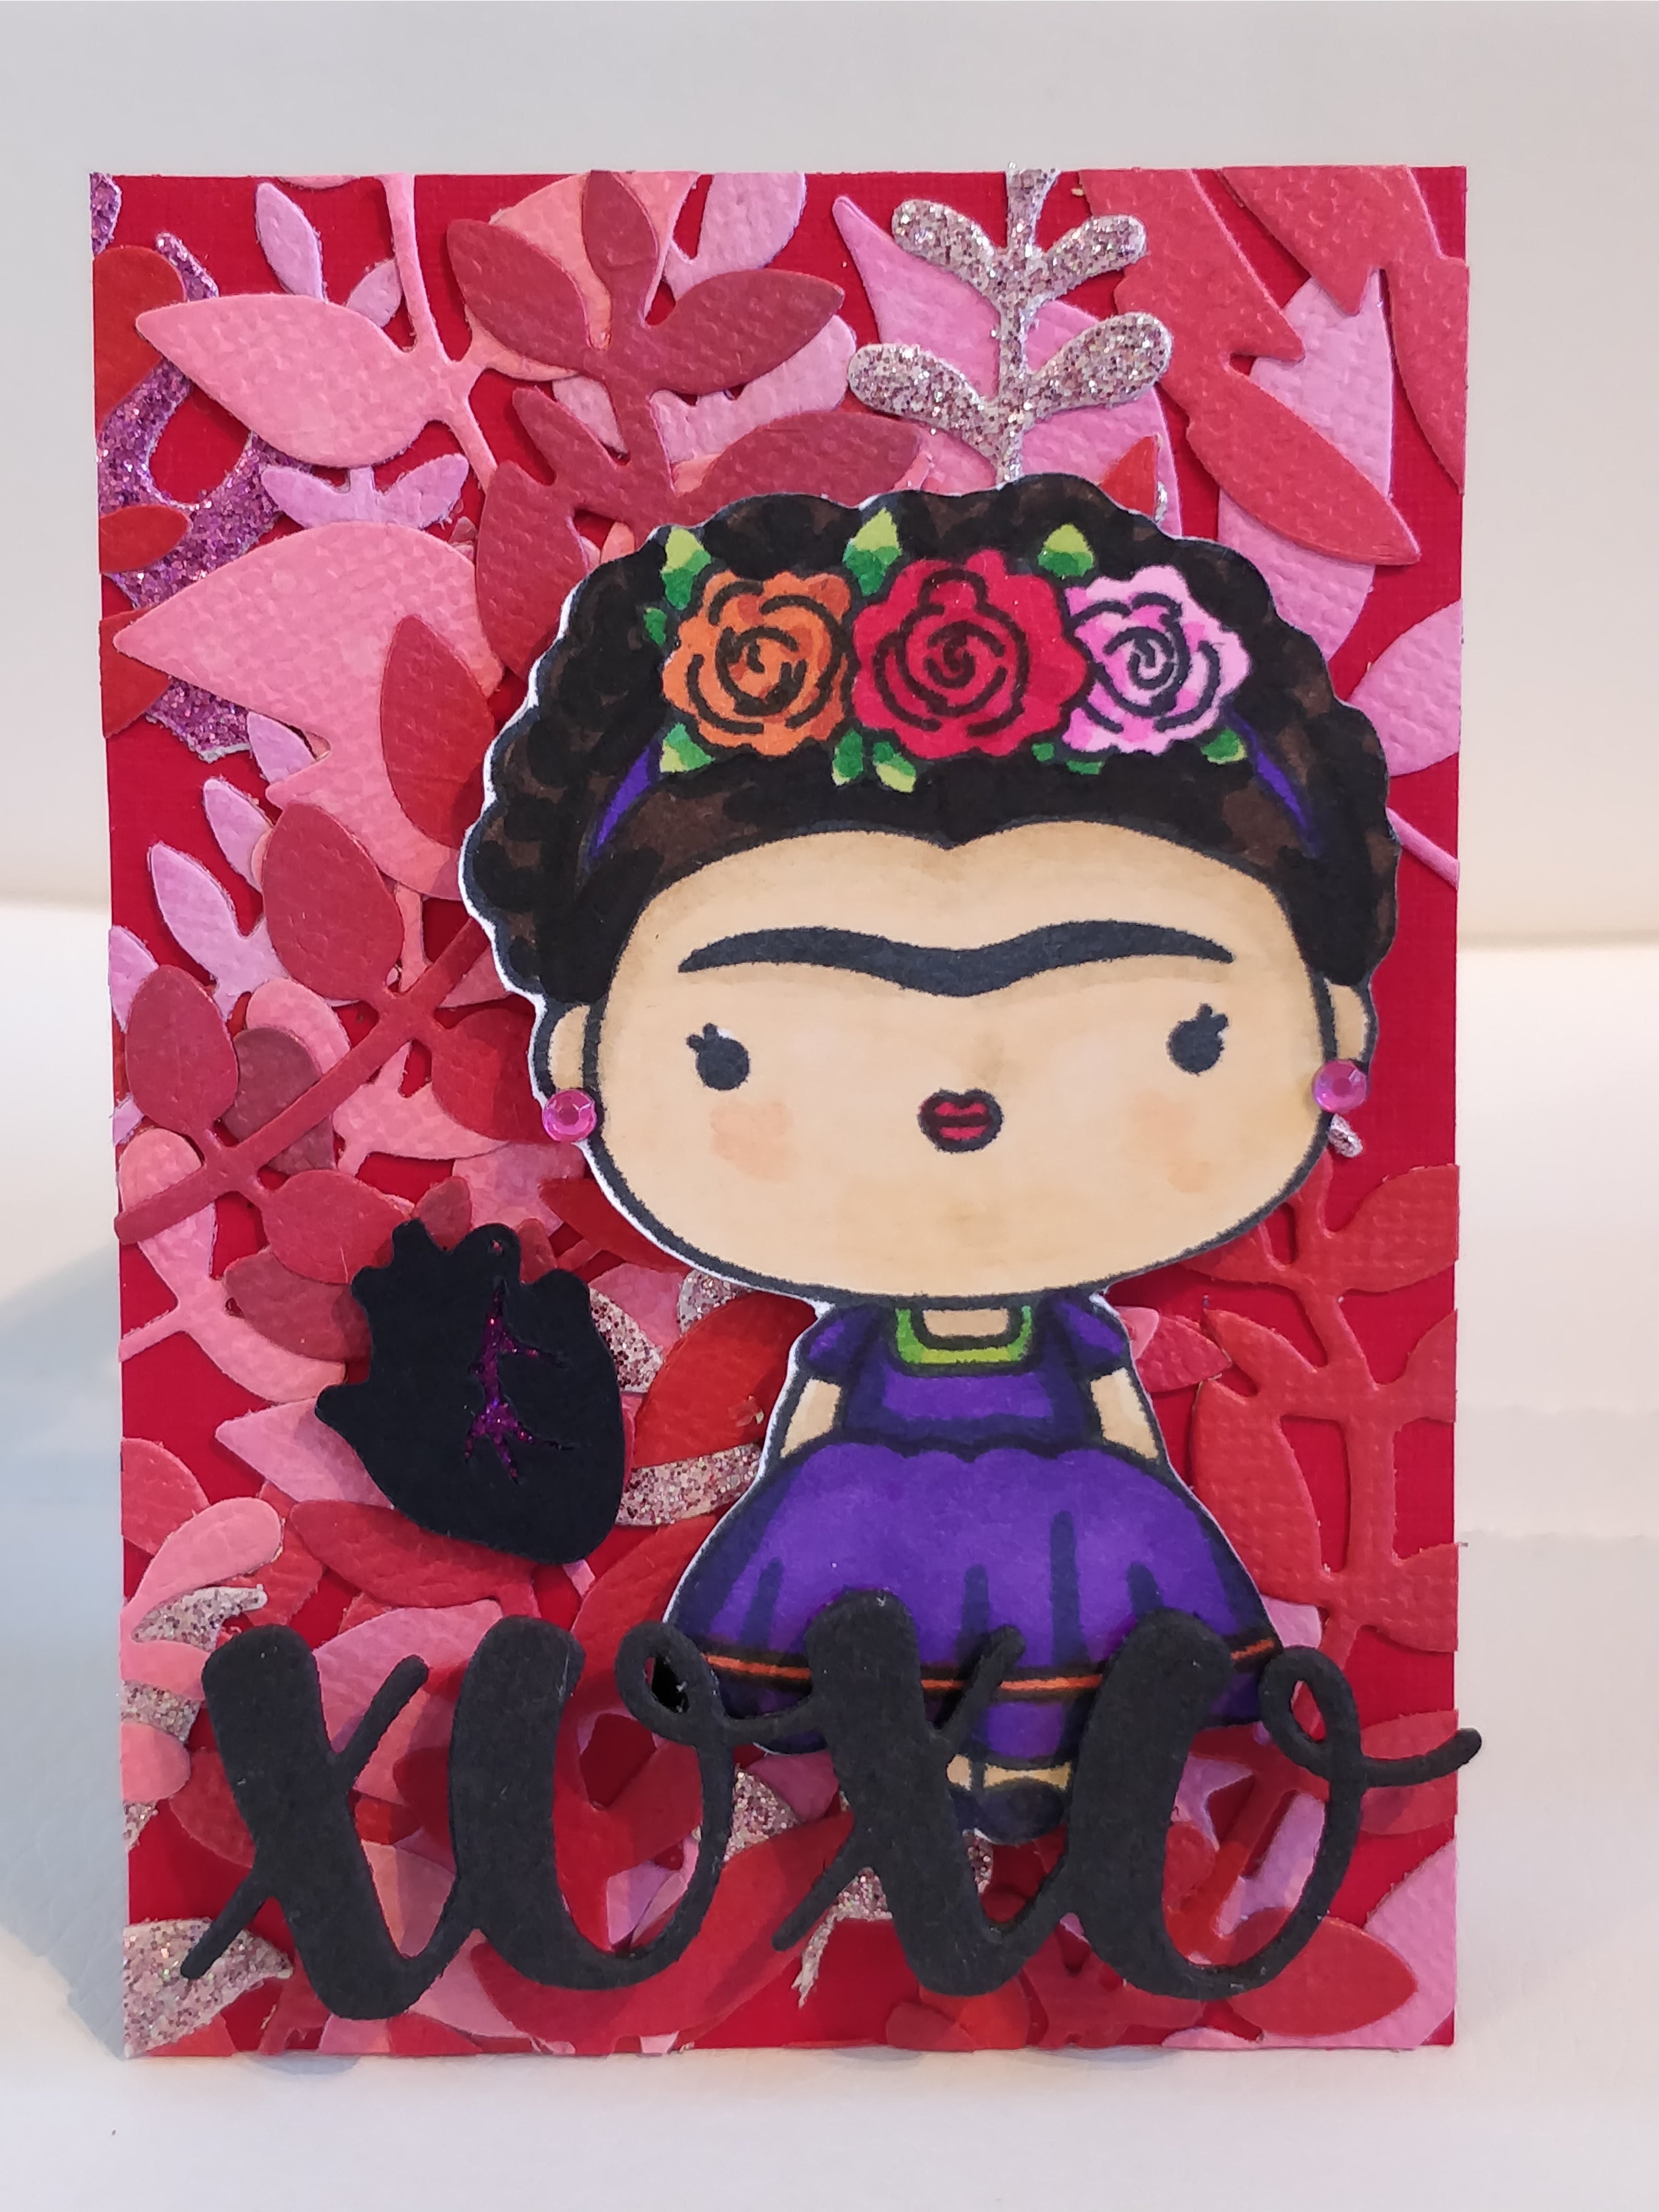
Ever since I first saw the Frida Kahlo stamp set from Kindred Stamps, I just had to have her. Unfortunately, so did everyone else and she was always sold out. Luckily, she came back in stock and I snapped her up! For my first project, I decided to make some Valentine themed ATCs for the swap on the Kindred Stamps Fan Club page. I stamped a whole sheet of Fridas and began coloring them in. I used alcohol markers to get the bright, bold colors that would compliment Frida’s style. I also added a touch of glitter to the flowers in her hair with my Wink of Stella pen. My Scan ‘N Cut helped me fussy cut them all out in just a few minutes. (Love that machine!)
For the background, I knew I wanted to use red and pink leaves to mimic several of Frida’s paintings. I pulled various shades of cardstock from my scrap containers and a bunch of smaller leaf dies from my collection. You might recognize some from Sizzix designers Tim Holtz and Lynda Kanase as well as the Fab Foliage set from MFT.
My plan was to apply Stick-It adhesive sheets to the back of my cardstock scraps and then die cut them. As luck would have it, I couldn’t find my Stick-It. Since it was late at night and I wanted to keep going, I decided to die cut the leaves and purchase/apply Stick-It the next day. Turns out my local Michael’s doesn’t carry Stick-It but, they had Silhouette’s Double Sided Adhesive Sheets. I hadn’t worked with these sheets before but, I assumed they were basically the same – WRONG! Friends, don’t make the same mistake. They are awesome but, they do not work the same way. Stick-It works a lot like your Xyron sticker makers. You peel back one side of release paper, apply it to your cardstock, and now you have a thin layer of adhesive coating the paper, making it basically a sticker. Silhouette’s double sided adhesive sheets are more like full sheets of double sided tape. There is a carrier sheet that you have to cut through. And it’s nice and thick. Which meant re-die cutting every leaf. Needless to say, this took me more than twice as long but, when I was done, I had a ton of lovely leaf stickers. You’ll be happy to hear, now that I don’t need it, my Stick-It has magically reappeared.
The next step was fast and fun. I applied all of my leaf stickers to an 8.5″ x 11″ sheet of red cardstock. Since the glitter leaves could easily steal too much attention if I applied them on top, I made sure to layer them under lots of other leaves. I also paid attention to the direction I wanted my leaves to lay as I was placing them. I knew that to maximize the number of cards I could cut from this sheet, the orientation for the top portion would be opposite of the bottom (think portrait and landscape).


Once all of the leaves were in place, I cut a 3.5″ x 11″ strip from the top. The bottom portion now measured 5″ x 11.” I ran both pieces through my Big Shot, without any dies, to evenly burnish the leaves and makes sure they were good and stuck in place. I then trimmed off any overhanging leaf parts from the edges and cut the 3.5″ x 11″ strip at 2.5″ intervals. I cut the 5″ x 11″ strip in half, lengthwise, giving me two 2.5″ x 11″ strips. I cut those at 3.5″ intervals. In total, I was able to cut the sheet into 10 standard ATC cards that measure 2.5″ x 3.5.”

For the sentiment, I used my new XOXO die from Reverse Confetti. I cut it out of black cardstock and black fun foam, then glued the layers together with a tacky glue pen. Now I was ready to start putting it all together. I used thin foam tape to adhere Frida to the background. I popped the XOXO up with thin strips of clear Kool Tak and tacky glue where it was flat on her dress. I added tiny rhinestone earrings and she was looking good but I wanted something more. I thought about adding a black heart in the traditional shape but, it just wasn’t right.

I really wanted an anatomical heart. That seemed much more Frida’s style. Luckily, my husband is crafty too and excited to help give Frida a little more edge. He drew up an anatomical heart for me and converted it to an .fcm file so I could cut them out real quick on my Scan ‘N Cut! I cut them out of black cardstock and backed them with a small piece of very thin foam tape. I made sure the foam covered the vein from behind so I could apply purple glitter to the exposed adhesive. I titled my ATCs “Be Still My Beating Heart” and signed and numbered them. Since they have a lot of layers and are a little bulky, I decided to make little envelopes for them too so they’d survive mailing. If you’d like to give this a try, you can use these heart and envelope files for use with your Scan ‘N Cut. What do you think? Would Frida approve of these little Valentines?

