Hello again my crafty friend. Today, I’m sharing a neat interactive card, sure to help anyone under the weather feel better soon. Take a look…
Isn’t it sweet? Using the new Mini Double Slider Dies, and a few other goodies from Heffy Doodle, this card was easy to create.
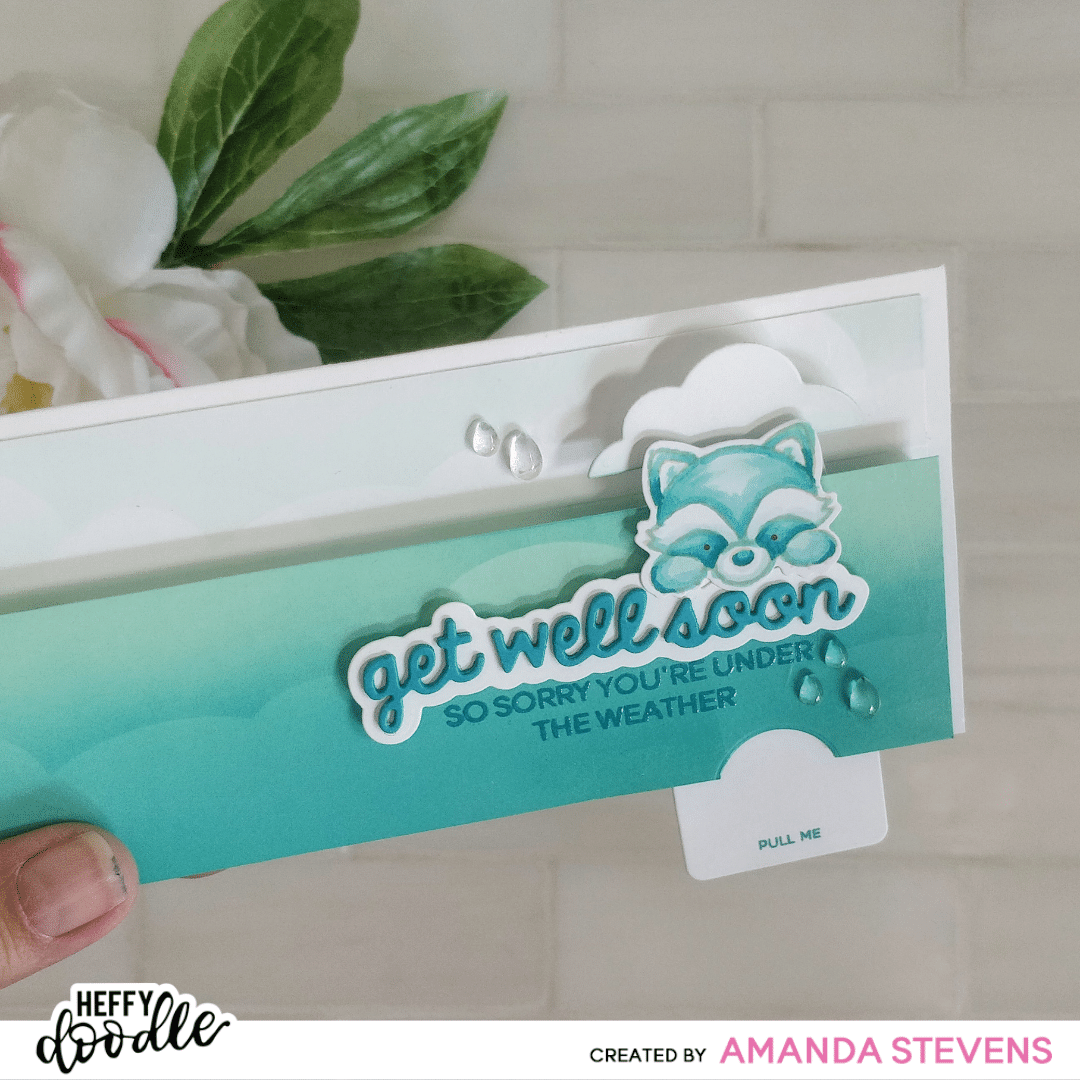
First, I stamped the raccoon image in Bed Heads with Warm Glow ink, colored him with Copic markers, and cut him out with the coordinating die.
[row]
[column size=”1/2″ stack=”sm”] [/column]
[column size=”1/2″ stack=”sm”] [/column]
[/row]
Next, I die cut the GET WELL SOON sentiment three times from teal cardstock, and the shadow once from white stock. I glued the layers together, and adhered the raccoon to the top right.
For the background layers of the card, I cut and folded a mini-slimline card base, measuring 3¼” x 6¼,” and a white mat measuring 3″ x 6.” I also trimmed down a mint panel to 2″ x 6.” After stenciling on clouds in soft shades of teal on both layering panels, I lined them up on top of the card base and cut out the finger notch from the Mini Double Slider Dies. Since I was cutting through four layers, I had to run them through my machine several times, removing the cut out pieces from the top layers as I went. (The die isn’t deep enough to cut through all four layers.)
 Next, I glued the white cloud layer to the card base, and stamped the sub-sentiment from Get Well Greetings on the mint panel. Then I assembled the double slider mechanism. It is simple to do. Cut the H shaped piece (it looks like an embroidery floss card), a pair of the rectangular tabs, a strip of acetate, and your pop-up element (for this card it’s a cloud). You’ll need to wrap the acetate strip around the H shaped piece, and secure it with strong double-stick tape. You only stick the acetate to itself, forming a ring. It needs to be able to roll around the H shape. Make sure the acetate isn’t too tight, or it won’t slide easily. Use more double-stick tape to attach one pull tab to the front of the acetate, only at the top. Attach the other tab to the back side, only at the bottom. (The flaps will seem floppy at this point, that’s normal.) Stamp PULL ME at the bottom of the front tab, and trim the back tab to be narrower than the raccoon’s head; glue the cloud to it as shown below. Apply strips of foam tape to the front and back of the narrow sides of the slider. Making sure the mechanism is closed, center the pull tab in the notch of the card base and stick it down. Use double thick foam tape around the borders of the mint panel, except where the mechanism lines up, and stick it in place. Test to make sure the cloud easily pops up when you pull the tab.
[row]
[column size=”1/2″ stack=”sm”] [/column]
[column size=”1/2″ stack=”sm”] [/column]
[/row]
To finish the card, pop the raccoon and sentiment up with foam tape, and glue on a few clear raindrops. Even though this card is a little thicker than usual, it still fits nicely into a #7 coin envelope. What do you think?
[row]
[column size=”1/2″ stack=”sm”] [/column]
[column size=”1/2″ stack=”sm”] [/column]
[/row]
[row]
[column size=”1/2″ stack=”sm”] [/column]
[column size=”1/2″ stack=”sm”] [/column]
[/row]
I hope I’ve inspired you to give a card like this a try! This card is the inspiration for the Heffy Doodlers October Challenge. The theme is actually Out of the Blue, so you don’t have to create an interactive card, or even a get well soon card; just one that incorporates some blue. You’ll find all of the details over on the Heffy Doodle blog, and in the Heffy Doodlers Facebook group. I hope you’ll play along with us!
 Thanks so much for stopping by today! I’ll be back soon with another fun card to share soon.
This site uses affiliate links whenever possible (at no additional cost to you), but only for products I actually use and love.
