Have you wondered what trick-or-treating is going to be like this year? My youngest child is now 13. That’s the cutoff age for trick-or-treating around here. (I know, I’m a mean mom.) When we talked about what she’d do on Halloween starting this year, the plan was find a party to go to, or throw one ourselves. I’m not gonna lie, I know how to throw a Halloween party, so I was secretly hoping for that option. But who knew Covid was going to come knocking? Now what? I’m not sure. I guess we’ll wait another month and see where we are, but I’m pretty sure it’s just going to be us, eating GORP and watching scary movies (in costume, of course). So for Kelly, and all of the kids who are going to miss out on traditional Halloween adventures this year, I decided to design an extra special treat.
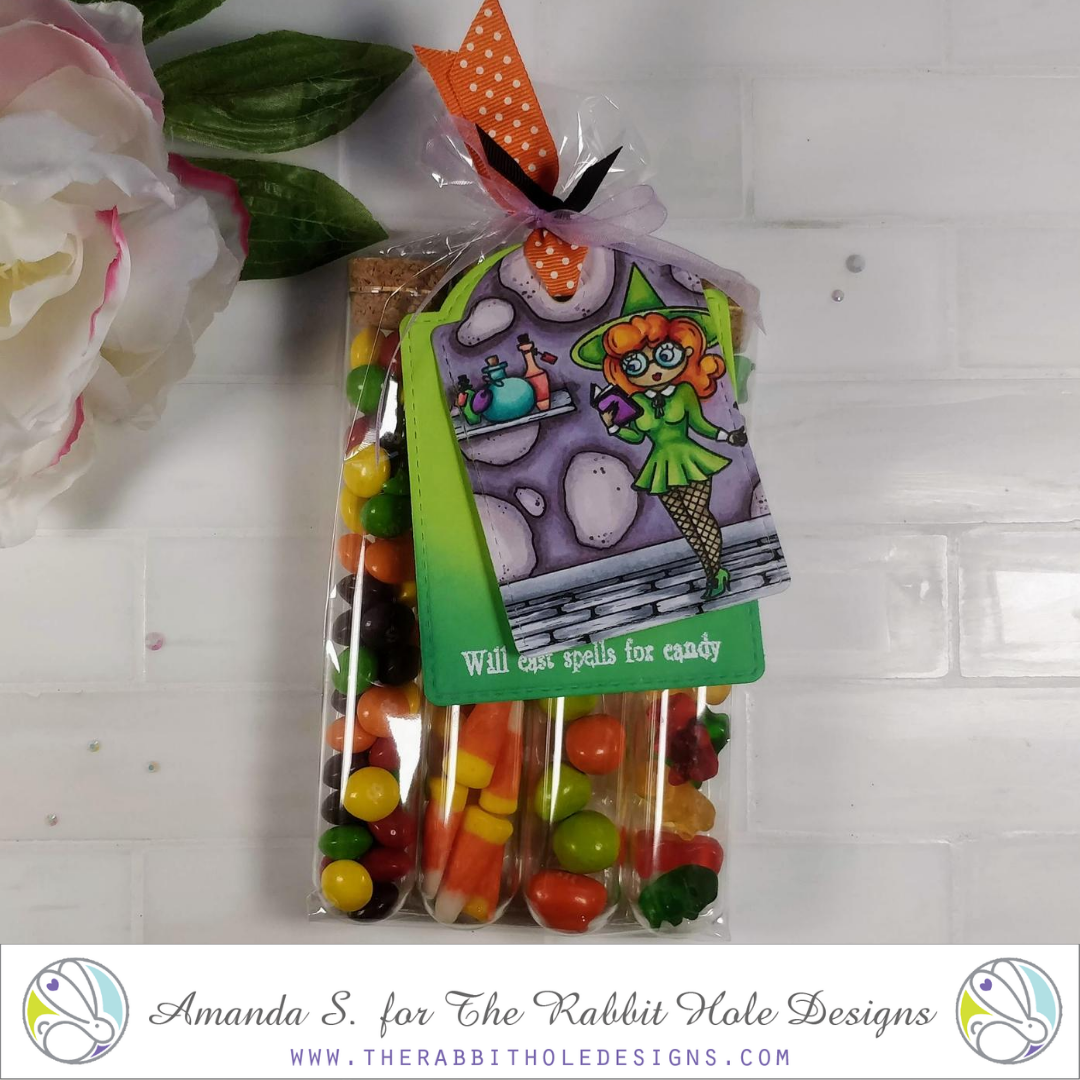
I found some inexpensive plastic test tubes and filled them with candy. After tucking them into a cellophane bag, I tied on this fun tag…

To most kids, the candy and the cool test tubes would be their favorite part, but for me, it’s all about the tag. I want to show you how easy it is to draw in the scene behind the cute little Spellcaster Witch.
The first thing I did was stamp the witch and bottles onto a panel, cut slightly larger than my tag die. I used a ruler and a black Copic multiliner to draw in two lines at the horizon, forming the baseboard. (I wish I had only drawn one line here, but it was too late by the time I came to regret it.) Then I drew in two shorter lines under the bottles, and a third one slightly above them. I connected them on the right side to form the shelf. Notice the smudge? It’s no big deal, I’ll hide it in the shadows.

To create a wood floor, use the ruler to draw in more horizontal lines, spacing them closer together at the top (near the baseboard), and spreading them out more as you move to the bottom. No need to measure, just move the ruler down a little more each time. Then draw in some vertical lines to separate the boards. You want the vertical lines on the left side to slightly skew to the left (like a forward slash / ). As you move toward the center, the lines should become more vertical, and as you get to the right side, you want them to switch direction (backslash \ ). You can see that I forgot and made them all straight at first. No problem, I just roughed in the slant, and fixed them in the next stage.

With the boards divided, it was time to add the woodgrain. I drew tiny curves in each corner where the boards met up (basically forming forward, and backward C shapes). I drew in small V shapes to create divots, and using a very light touch, drew in tiny lines and swirls to add grain and knots. You can always add more, so I suggest starting with just a few, and then taking a look at it. If you go too crazy, your floor will look really rough. Don’t forget to add the same texture to the shelf.

It makes a big difference, right? In order to add some texture to the walls, and make it feel like a stone cottage, I added some boulders to the wall. That just means terrible, barely round, circle shapes. Easy peasy. At this point, I regretted the top baseboard line. I’m pretty sure with walls like this, you wouldn’t have baseboard. So when you try this, I suggest you just draw one line to separate the floor from the wall.

She looks like she’s in a cottage now, right? So it’s time to get coloring! I used my Copic markers in colors that matched the candy.

To turn the panel into a tag, I die cut it with my nesting tag dies. I cut the next larger tag from lime green cardstock, and blended on some darker ink along the bottom. I embossed the sentiment in white on the dark green area, so you can see it when the tags are stacked. Coordinating ribbon holds the tags together and tied to the bag. Isn’t it cute? There is plenty of room to write a message on the back of the green tag, and it hides the messy side of the copic colored panel.

This is a fun way to deliver candy, right? What kid wouldn’t love this? And with the plastic tubes, they are safe for mailing. I think I’m going to make a few more to send to my nieces and nephews this year.

I’d love to know if you have any neat Halloween ideas in mind. Share them in the comments, or tag me on social media (@pearblossompress). Just because we’ll be celebrating on a much smaller scale, doesn’t mean that the holidays can’t still be special and meaningful, right?
Thanks for stopping by today. I’ll be back soon with more fun cards to share.
This site uses affiliate links whenever possible (at no additional cost to you), but only for products I actually use and love.

You did a great job the tags are beautiful. Love how you showed steps for floor and wall. TFS
OMG adorable or WHAAAAT?? I have several little (unrelated) grandies I always give/send to Halloween. GOTTA try this one! (John says I won’t have time ’cause I’m too busy printing off Amanda’s instructions from all Ah-Mazing cards!) Pointed out it keeps me from cleaning out TRHD. 🙂
Great image! I had the feeling that you were making a brick / paver floor when I was reading and following along w/ your progress down the blog page. Then the coloring you chose sort of reinforced that – looks more grey than brown. Whichever it is, it looks terrific. I LOVE the way you had one tag w/ another larger one behind it in a shade of green that coordinated w/ the witch’s dress. Smashing!
Oh my goodness Amanda 😊 This is sooooo stinkin’ cute!!! May use this one for trunk or treat when they start again! Thanks!