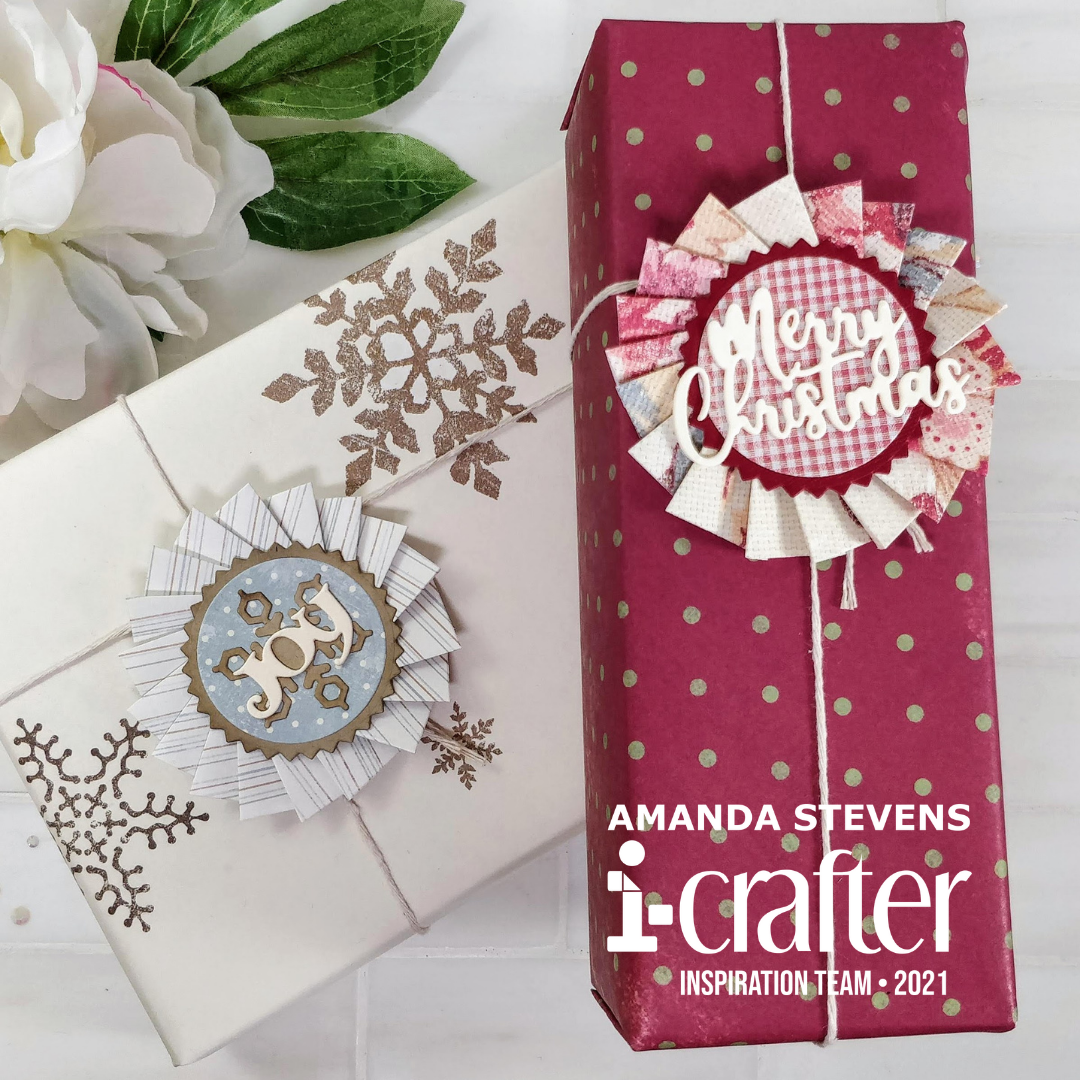
Hello again my crafty friend! If you ever wrap gifts to mail to loved ones, you are going to be so happy you stopped by! I’m sharing a pair of mail-proof Ribbon Rosettes from i-crafter, decorated with the Christmas Add-on set, that are perfect to dress up any package, and won’t get smashed in transit. Take a look…
 Don’t let the look of them fool you; these are very easy to create! Let me walk you through the process, step by step. First, die cut your pieces from i-crafter’s Ribbon Rosette die set, and the coordinating Christmas Add-on die set. Be sure to cut three of the curved ruffle pieces for each one, and a circle to adhere everything to on the back. Any other decorative elements are your choice…
 To help the kraft snowflake and decorative circle stand out from the pattern paper, I ink blended the edges to darken them up. (This step is optional, but only takes a minute when you use small i-Brush Blender Brushes.)
 Next, you’ll want to glue the three ruffle strips together, to make one long strip…
 The die conveniently scores lines, to help you accordian fold perfect pleats…
 After your pleats are folded, glue the ends together to form a ring…
 Now you can pinch and push the center of the ring in, to form a pleated donut shape. Don’t worry, it folds right in on itself…
 Tuck in a length of twine, and glue the pleats to the back circle. A hot glue gun is really handy for this step…
 Turn it over, and decorate the front…
 Now you’re ready to wrap!
 These rosettes are perfect to tie onto packages, in place of bows, and look so much better. They lay flat, and will mail without worry of getting smashed en route. As an added bonus, the circle on the back serves as a to/from tag, and the rosettes are so cute, they can work as ornaments too.
I suggest cutting the ruffle pieces from wrapping paper, so they match your packages. Or choose pattern paper scraps to coordinate with your gift wrap.
 Here’s a closer look…
 I think these are just darling. What do you think?
Now if you prefer to wrap with gift bags, a) I like your style, and b) these tie on nicely. Especially, when you need to replace the tag on bags you are recycling. (Wink, wink.)
Thanks so much for stopping by. I hope you are inspired to give these a try. I’d love to see; just tag me on Instagram!
Be sure to check out the masculine birthday card I’m also sharing on the blog today, it’s really fun. And be sure to swing back this Saturday, for a special light-up holiday card hop! You’ll be amazed to see who’s joining us…
This site uses affiliate links whenever possible (at no additional cost to you), but only for products I actually use and love.

2 thoughts on “How to Wrap Gifts to Mail”