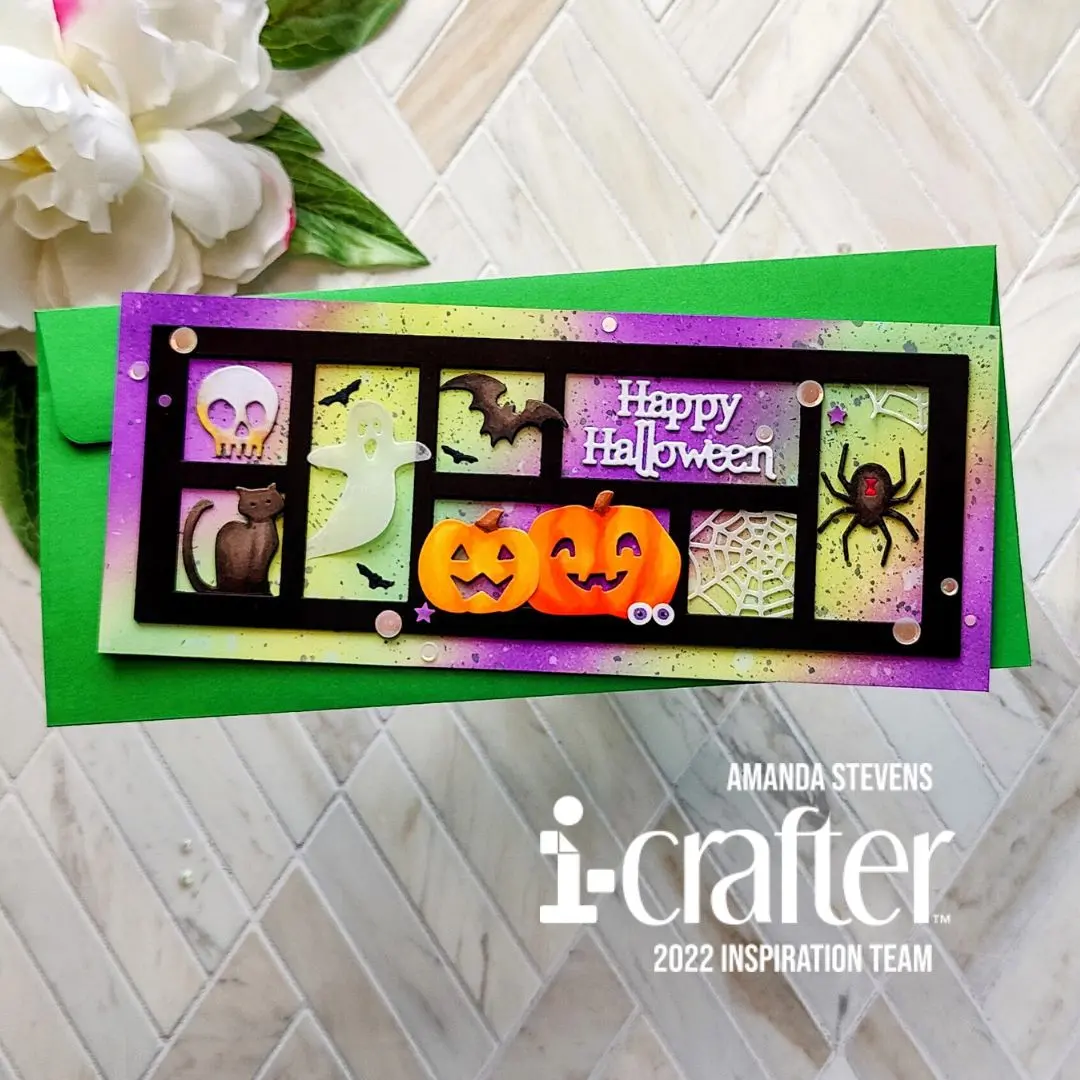
Just joking. My card was framed, not me. All kidding aside though, using a frame is a great way to showcase images, without having to build a scene. Think of frame dies as curio cabinets, waiting to be filled with whatever die cuts, or stamped images you’d like! For today’s card, I used a slimline frame and spooky dies from i-crafter for a fun Halloween card. And there’s a creepy surprise you may not notice at first…
I’d love to show you how I made this card. Grab your supplies and meet me in the craft room…
SUPPLY LIST
Slimline Window Dies
Ribbon Rosette Halloween Add-on Dies
Mini Halloween Hauntings Dies
Halloween Treat Lantern Dies
Tunnel Card Halloween Add-on Dies
PRO Deck
i-Brush Blender Brushes
To start, let’s cut out the pieces. In addition to the Slimline Frame, I went through my stash and pulled out lots of Halloween dies for this card. I cut four black frames, one ghost and one spider web from vellum. Then, I cut the rest of the elements from white cardstock. You can substitute colorful cardstock, but I love to color my own with Copic markers. (You can see the colors I used below.) For the spider, I cut two layers and colored the front of one and the back side of the other so I could sandwich a piece of clear thread between them. After coloring the other pieces, I stacked up extra die cut layers behind the cat, skull, large bat and sentiment.
[row]
[column size=”1/2″ stack=”sm”] [/column]
[column size=”1/2″ stack=”sm”] [/column]
[/row]
Before we can assemble the card, we need to create a background. I cut a slimline panel from white cardstock, then blended on several colors of green and purple ink. Be careful not to overlap green and purple too much, or they will turn brown. After splattering the panel with water, I added black splatter on top. Then, I adhered the panel to a slimline card base.
[row]
[column size=”1/2″ stack=”sm”] [/column]
[column size=”1/2″ stack=”sm”] [/column]
[/row]
To assemble the card, I glued three of the black frames together. Before gluing the last layer on top, I sandwiched in the spiderweb in one box, cutting the overlap off and gluing it to the back corner of the upper right opening. I also glued the clear thread from the spider to the frame, allowing it to dangle. (I saw Jeannie Lieu use this trick on one of her cards and I had to try it! It’s so fun!) With the last black frame on top, the spider and webs are locked into place. I glued the frame to the card, tucking the ghost in at the bottom, and letting him float up. I glued the other die cuts in place, then finished the card with some sequins and clay bits from a fun Halloween mix. By pairing the card up with a bright green envelope, it adds a colorful pop. What do you think?

[row]
[column size=”1/2″ stack=”sm”] [/column]
[column size=”1/2″ stack=”sm”] [/column]
[/row]
Of course, you can change the colors and shapes for any occasion, but I hope I’ve inspired you to pull out some of your frame dies and get creative! Remember, you don’t need to create a scene, let the dies do the work!
Thanks so much for stopping by today. I’ll be back soon with another fun die cut card to share. And don’t forget, this Saturday, October 1st, is World Cardmaking Day! We’re celebrating with another YouTube Livestream Hop and Zoom Party like we did for International Scrapbooking Day. I hope you’ll join us! The fun starts at 8:00am Pacific…

See you soon…
This site uses affiliate links whenever possible (at no additional cost to you), but only for products I actually use and love.

This is just so wonderful! I love every little detail! Nicely done!