Do you ever make a card and it turns out even sweeter than you thought it would? That’s what happened with my little deer on this card…
Isn’t it adorable? And what do you think of the little surprise you get when you push the button?
I read somewhere that by Christmas, male reindeer have all shed their antlers. So I decided to turn this cute little deer from Gina K Designs into Rudolph. I planned to add a red gem on top of his nose, but when I tested the light behind him, it glowed red on its own. That was a happy accident, so I went with it.
If you’d like to make a card like this, grab your supplies and meet me in the craft room…
SUPPLY LIST
Woodland Friends Stamp Set
Woodland Friends Coordinating Dies
Winter Whimsy Stamp Set
Star Flower Stamp Set
EZ-Lights
Interactive Labels Stamp Set
Double Thick Foam Tape
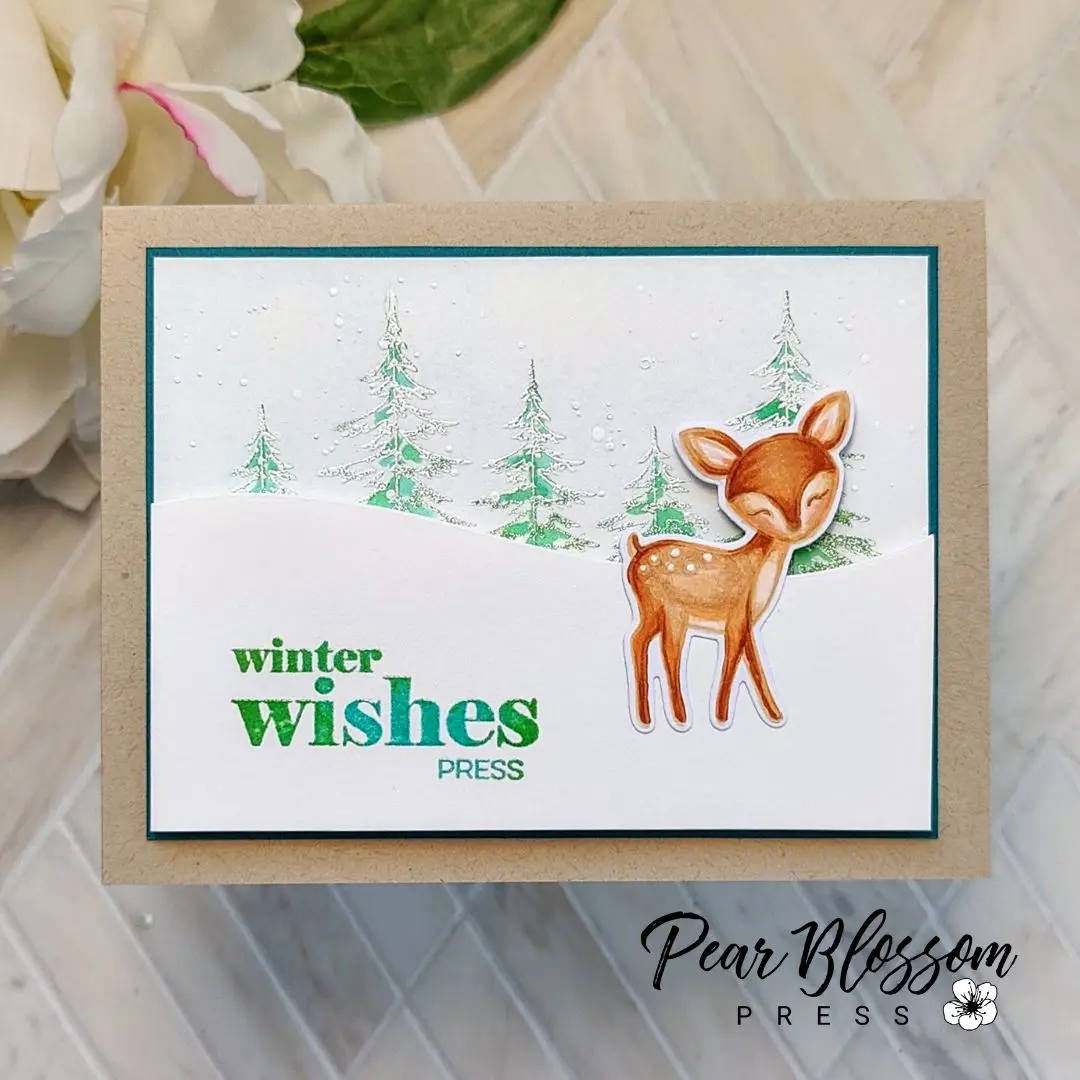
This time, let’s start with the background first, so the snow can dry while we color the deer. You’ll want to stamp your trees onto a white panel with Lucky Clover green ink. To add more dimension, I partially stamped it again with a Sea Glass teal ink. They are both soft colors. Leave your stamp in place in your Misti while you add a little bit of loose coloring to the trees with green and teal markers. Then, softly blend some of the teal ink onto the sky. Place your panel back into the Misti and stamp again with embossing ink. Sprinkle white embossing powder on the tops of the trees and tap off a lot of it before heating. To add falling snow to the background, thin Copic Opaque White (or white paint) and splatter it all over. Set the panel aside to dry completely. For the snowdrift layer, die cut a hillside border (I used the side without the stitches), or cut your own with scissors. Stamp WINTER WISHES and PRESS onto the panel with the same green and teal inks used on the trees. Add embossing ink on top and, emboss it with clear powder for an icy finish.
[row]
[column size=”1/2″ stack=”sm”] [/column]
[column size=”1/2″ stack=”sm”] [/column]
[/row]
While the panel is drying, you can color your deer. It’s been a while since I played with no-line coloring and this image is just so darling, I knew it would look great with soft lines. I stamped it with Gina’s Warm Glow ink and colored it with Copic markers. (Warm Glow is a great way to get into no-line coloring. Especially, if you have tired eyes.) You can see the colors I used below, including the green and teal markers used on the background. To darken up the eyes, I used a Sepia colored Copic Multiliner. And for the white spots on his rear end, I used an Essential White Gel Pen.
[row]
[column size=”1/2″ stack=”sm”] [/column]
[column size=”1/2″ stack=”sm”] [/column]
[/row]
Notice that there is no red marker in the mix. I used a little pink for his cheeks, but no red anywhere near his nose. When I tested the lights of my EZ-Light behind his nose, it glowed red! (It doesn’t show up great on camera, but in person, his nose is bright red.) There must be enough red in the brown inks that it looks red when light shines through. Originally, I planned to punch a hole for the lights and glue a red gem on top, but since his nose turns red, I decided not to. This way, it’s more of a surprise when you push the button.
If you’ve never played with EZ-Lights, they are basically flat little flashlights with three LEDs at the ends of wires. You can spread the lights out, or bundle them up like I did for this card. After trimming my background and snowdrift layers down, I glued the deer onto the snowdrift. I flipped the snowdrift over and marked with a pencil where I wanted the lights and button of my EZ-Light to end up. Using double stick tape on the silver battery clip, I adhered the battery in place, lining the button up over the dot. Then, I used regular tape to adhere the lights under his nose. I curled up the excess wire and taped it down. Double thick foam tape surrounds the panel. For extra support under his head, I added a little bit of clear double thick foam tape behind his ears (you can see the red release paper on the clear foam in the photo below). To help hold the EZ-Light battery in place, I added more double stick tape to it as well.
[row]
[column size=”1/2″ stack=”sm”] [/column]
[column size=”1/2″ stack=”sm”] [/column]
[/row]
[row]
[column size=”1/2″ stack=”sm”] [/column]
[column size=”1/2″ stack=”sm”] [/column]
[/row]
To finish the card, just remove the release paper and stick the snowdrift to the background. I matted the scene onto a slightly larger dark teal panel, then a craft card base. It was so soft and pretty, that I didn’t want to add any other embellishments. If you wanted to dress it up more, a few clear sequins would be nice, but I don’t think it needs them. What do you think?
[row]
[column size=”1/2″ stack=”sm”] [/column]
[column size=”1/2″ stack=”sm”] [/column]
[/row]
I just love this one. It turned out so much better than I thought it would. Don’t you love it when that happens?
Thanks so much for stopping by today! I’ll be back soon with another fun card to share. And don’t forget, this Saturday, October 1st, is World Cardmaking Day! We’re celebrating with another YouTube Livestream Hop and Zoom Party like we did for International Scrapbooking Day. I hope you’ll join us! The fun starts at 8:00am Pacific…

See you then!
This site uses affiliate links whenever possible (at no additional cost to you), but only for products I actually use and love.
