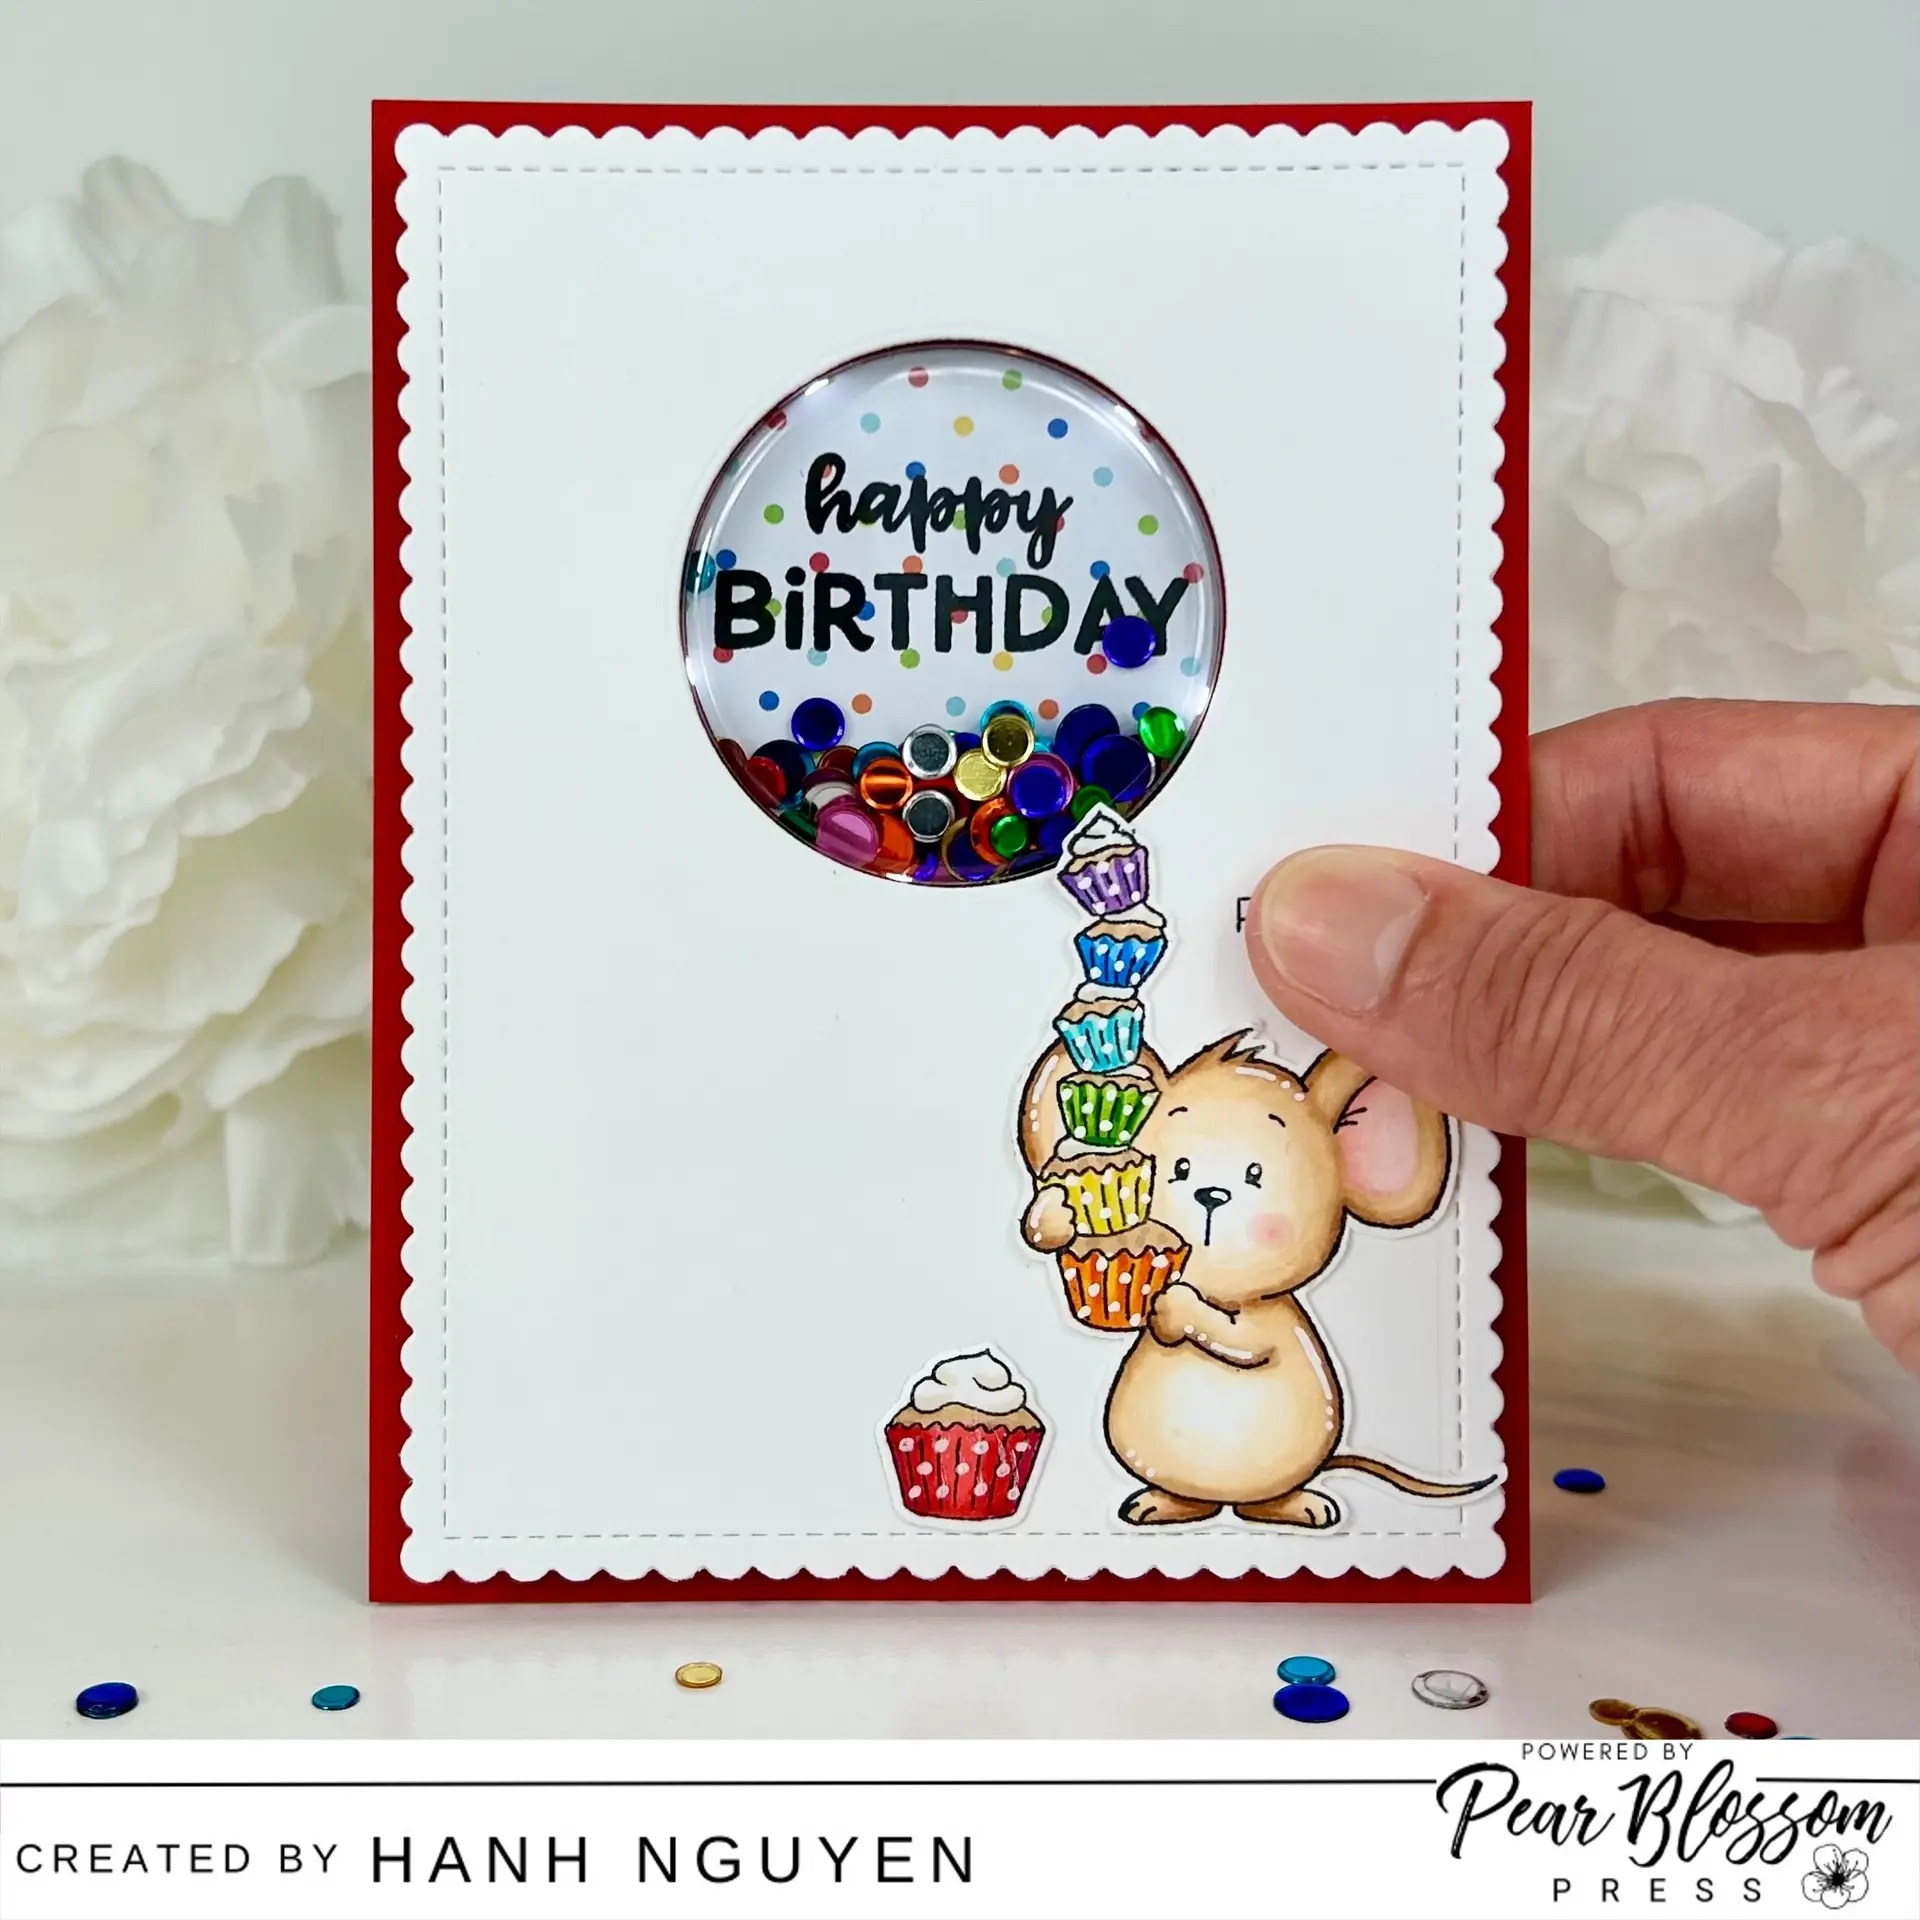
Hello Crafty Friends! It’s Hanh Nguyen with you on the Pear Blossom Press Blog today. I am so excited to share a fun light-up shaker birthday card with you featuring the Pear Blossom Press Halo Light and Gerda Steiner Designs Cupcake Mice. The Halo Light is unique in that it is a ring of five lights that can illuminate the center and it fits perfectly around the Pear Blossom 2″ Shaker Pouch. The combination of shaker and lights doubles the fun of this card.

SUPPLIES:
Halo Light Combo Pack- Pear Blossom Press
Shaker Pouches – Pear Blossom Press
PB Press Stamps and Die Bundle – Pear Blossom Press
World’s Best Foam Tape – Pear Blossom Press
Cupcake Mice Stamp – Gerda Steiner Designs
Cupcake Mice Dies – Gerda Steiner Designs
CARD INSTRUCTIONS: I stamped the images from the Cupcake Mice Stamp set onto a piece of Neenah Solar White 110 lb cardstock with Memento Tuxedo Black ink and used the Cupcake Mice Dies to diecut them out. I colored them with Copic markers and accented with a white gel pen.
COPIC COLORS:
Mouse: E50/51/53/33, R00/20, R000/00/20, C7
Cupcake: E53/55, E41
Red: R22/24/29
Orange: Y17/38 YR04/09
Yellow: Y11/13/08/19
Green: YG01/03/17
Teal: BG10/11/15
Blue: B12/16
Purple: V12/15/17

I diecut a white cardstock panel using the scallop die from MFT Blueprints 27 Die-namics. I used a 2″ circle die to diecut a window into the panel. I used the same circle die to diecut a circle out of a piece of patterned paper. I stamped the Happy Birthday sentiment from the Cupcake Mice Stamp set onto the patterned paper circle. I used the white panel as a guide to adhere the patterned paper circle onto a piece of red cardstock (4.25″ x 5.5″).
For the shaker, I placed some sequins from my stash onto the circle. I removed the release paper and adhered one of the Pear Blossom Shaker Pouches over the circle to enclose the shaker pouch.

I prepared my Pear Blossom Press Halo Light by placing the coin battery into the battery unit. Then I placed the unit on top of the shaker pouch and adhered it with tape.
I used this red panel as a guide in order to align the word “PRESS” correctly onto the white panel. I placed the red panel into a stamping tool and placed the word “PRESS” from the Pear Blossom Stamps Press and Die combo on top of the button on the Halo Light unit. I lightly closed the door to my stamping tool to pick up the stamp. I switched out the red panel for the white scalloped panel. I stamped the word PRESS onto the white panel with the same Memento Tuxedo Black ink. I tested the light out to make sure everything worked and was aligned properly.
In order to create room for the battery unit, I adhered some Pear Blossom Press World’s Best Foam Tape to the red panel. This foam tape is absolutely AMAZING! It allows you 30 minute working time during which you can adhere, remove and re-adhere the foam tape as many times as you want and it does not tear up the cardstock! It slowly becomes permanent in 24 hours. It’s magic! Pure magic!
I removed all of the release paper from the foam tape and adhered the white scalloped panel. I decorated the front with the colored images. Finally, I adhered the panel to a white card base (4.25″ x 5.5″).

As always, I appreciate you taking the time to stop by and visit today. I hope you liked my card. Please also visit my INSTAGRAM feed for more inspirations.
Have a wonderful and crafty day!
Hanh
**Affilitate Links are used when available at NO EXTRA COST to you! I make a small commission if you click my links to shop. Thank you so much for your support!**
