Hello, hello my crafty friend! Today, I’m sharing a fun pair of cards that I created with i-crafter’s new Classic Circle Dies. If you already have nesting circle dies, you can create these cards too, but it might take a little more work to line things up perfectly. Why? Because i-crafter’s new dies have special registration marks etched in, making them very easy to center. Other dies don’t have these, so it’s harder to line them up. I’ll show you what I mean below.
To create the targets for my cards, I used the sticky grid of my ScanNCut mat to line up, and hold my nesting circle dies in place, so I could tape them together. Look closely, and you’ll see four registration marks on each die, that allow you to line them up with horizontal and vertical lines. This way, you will be able to cut out perfectly spaced concentric circles. I lined up the smallest two circles in the set, then skipped a size for the next three. With the registration marks lined up, I used low-tack highligher tape to connect the dies, so I could move them without having them shift. I cut a piece of hot pink, and a piece of white cardstock for my targets. Since I was alternating the colors, I ended up with two targets. (A good 2-for-1 project is the best! Don’t you agree?)
[row]
[column size=”1/2″ stack=”sm”] [/column]
[column size=”1/2″ stack=”sm”] [/column]
[/row]
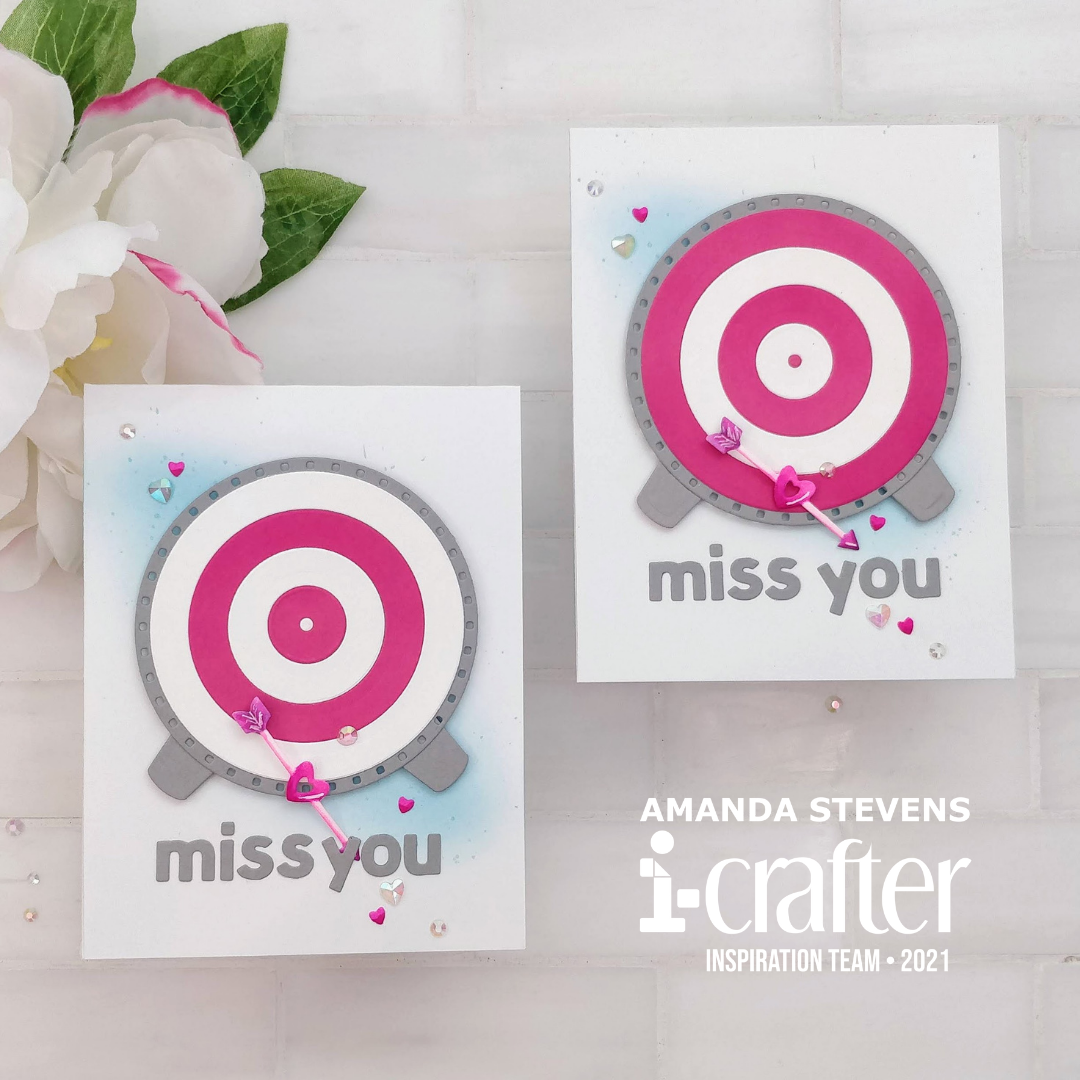
After the concentric circles were cut, I cut and prepped the other pieces for my cards. To make the targets more substantial, and help ground them, I decided to cut Dashed Circle frames and legs from grey cardstock. The legs are actually coffee cups from the same Mini Album Divider set that the arrow die is from. I cut a pair of arrows, and then a few more hearts from the center of the arrow, and colored them with Copic markers. I also cut out the letters to spell MISS YOU from the Carly Alphabet. To add interest to my top folding A2 card bases, I blended a hint of blue ink where the targets would sit, and splattered concentrated ink on as well. You can see all of the parts here…

To assemble the cards, I simply glued each target to a dashed circle, then added the coffee cups from behind. Foam tape adheres the targets to the card bases. The arrows use a combination of glue and foam tape to attach them at an angle. Then, I used a ruler to make sure I lined the sentiments up straight as I glued them down. Scattered heart and round gems mix with the tiny pink hearts to finish the cards.
Here’s a closer look at each one…
[row]
[column size=”1/2″ stack=”sm”] [/column]
[column size=”1/2″ stack=”sm”] [/column]
[/row]
Aren’t they fun? Besides the hint of ink blending, the only coloring was on the arrows and tiny hearts, so these cards came together really fast. (You could skip coloring all together if you cut the arrows from a solid color, but I like the extra detail.) Corny and punny cards are my favorite. By using an alphabet set to spell out your sentiment, you have the freedom to change things up to suit. These cards would be cute if they said THANKS FOR KEEPING ME ON TARGET, or HOPE YOUR DAY IS SPOT ON.
If you don’t have i-crafter’s new Classic Circle dies with the registration marks, it will take you a little longer to line up other circle dies. You might want to substitute nesting stars or hearts, as they are easier to get evenly spaced. Don’t worry, the arrows will sell the “target” theme.
Thanks so much for stopping by today. I hope I’ve inspired you to give this a try! I’d love to know who you’d make cards like these for. Let me know in the comments below, or tag me on Instagram. I’ll be back soon with more fun cards and tags to share. (I’ve been practicing my coloring on tags for Kathy’s new #thedailymarker30day coloring challenge.)
This site uses affiliate links whenever possible (at no additional cost to you), but only for products I actually use and love.

One thought on “New Twist on Circle Dies”