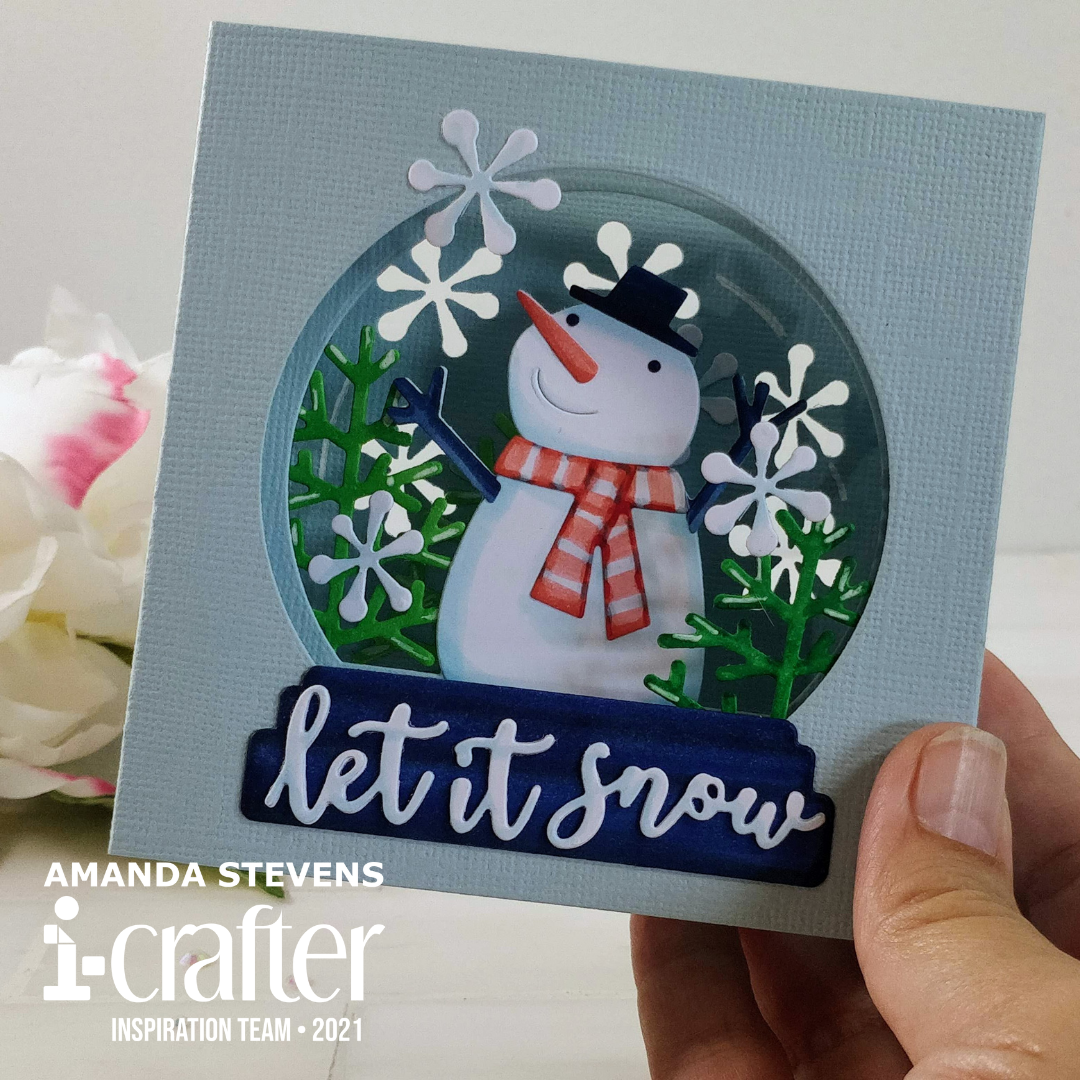
Hello my crafty friend! I’m back with another awesome holiday card, to keep the Christmas in July theme going. This one is a 3D tunnel card, featuring the new Snow Globe add-on set from i-crafter. And just like so many of i-crafter’s pop-up cards, this one is easy to assemble. Here’s a look at the completed card…
[one_fifth][/one_fifth]
[three_fifth]
[/three_fifth]
[one_fifth last][/one_fifth]
Let’s walk through the steps to create the card. First, I die cut the three layers of the Tunnel Base from light blue cardstock, dropping in the front, center, and back window dies from the Snow Globe add-on. Next, I die cut the decorative elements from Copic friendly white cardstock (four trees, the snowman and his accessories, the snow globe stand and sentiment, and a set of snowflakes). For extra dimension, I cut the snow globe stand twice, and the sentiment three times, then stacked them together. Before I started assembly, I colored the white decorative pieces with Copic markers. It would have been faster to cut the pieces from colored scraps, but I like the extra dimension you can create when you color the pieces yourself. To make the trees a little more wintry, but still keep the bright green color, I added a few white gel pen highlights to the branches. I also drew a white curve around the back layer.

After I was happy with the coloring (it really didn’t take long at all), I trimmed the tabs off the center layer (leaving me with a 4″ square), and glued the decorative pieces to their respective layers, as shown in the photos below. Notice that I decorated both sides of the back layer of the card, as both will be visible.
[one_half]

[/one_half]
[one_half last]

[/one_half]
[one_half]

[/one_half]
[one_half last]

[/one_half]
With the decorative elements glued in place, I folded the tabs on the front and back layers to form C shapes. You’ll want to fold the tabs away from you on the top layer, and toward you on the back layer, as shown in the photos. Glue the center layer to the tabs of the back layer. Then glue the tabs of the front layer to the center. That’s it, you’re done! The card folds flat and fits into a standard A2 envelope.
[one_half]

[/one_half]
[one_half last]

[/one_half]
[one_half]

[/one_half]
[one_half last]

[/one_half]
I hope my description doesn’t make the card sound complicated. It’s really just folding a few score lines and gluing the tabs together. Maybe we should make this one in a LIVE too! What do you think? I’ll be going live tonight at 5pm PDT, playing with new goodies from Scrappy Tails. So maybe we can have an i-crafter night next week? We can make a tunnel card, and an oval box card; that would be fun! And they’re simple enough that we can assemble both in an hour. Sound good?
Here’s a look at the finished card from a few angles…
[one_half] [/one_half]
[one_half last] [/one_half]
[one_half] [/one_half]
[one_half last] [/one_half]
[one_half] [/one_half]
[one_half last]
[/one_half]
I almost forgot to mention, i-crafter is having a 4th of July sale this weekend, and they’ve got lots of stuff on sale, including the Tunnel Card Base that I used today. Head on over to their site and check it out! While you’re there, take a look at the new Christmas in July release. I love all of the new sets!
Reminder, since Sunday is a holiday, we are cancelling Crafternoon. But we’ll be back next Sunday. See you there!
Thanks so much for stopping by. If you didn’t get a chance to see yet, we have a very special guest designer, Su-Queen Teo, joining us for a fun collab hop with Scrappy Tails today! Hop along for some light-up card fun!
This site uses affiliate links whenever possible (at no additional cost to you), but only for products that I actually use and love.

Great card (for those who don’t have 70+ to send. 🙂 ) AND…great instructions very much appreciated!