Hello, hello again! It’s high time I shared a real Halo Light tutorial with step-by-step photos, don’t you think? And what better way to show Halo Lights off, then with a super sweet birthday card…
[one_fifth][/one_fifth]
[three_fifth]
[/three_fifth]
[one_fifth last][/one_fifth]
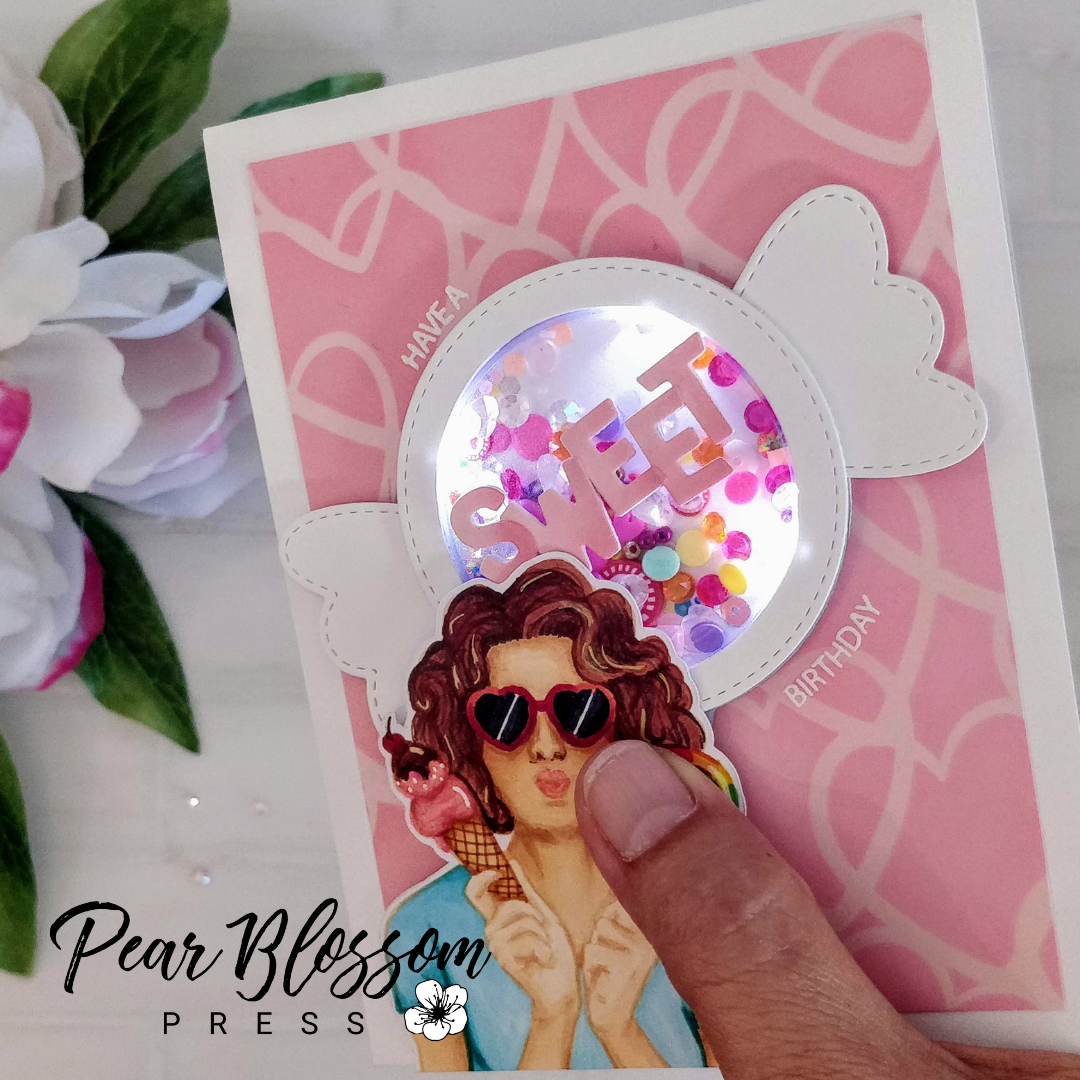
Isn’t that fun? Not only is it a light-up card, but a shaker too! If you haven’t seen our Halo Lights yet, they are rings with four LEDs that point in toward the center, with a 2″ opening. (If you’d like to use them to light up a shaker like I did, MFT’s Circle Shaker Pouches fit inside perfectly! You can also create your own shaker with acetate and foam tape.)

So now that you know what a Halo Light is, let me show you how to use one…
Let’s start with the parts we’ll need for this super sweet card. Here is an overview. Starting with our fussy cut Sassy Girl, and working clockwise, we have a white A2 card base, a pink stenciled layer on top, three die cut circle frames, one solid circle, a shaker pouch with assorted gems, a Halo Light, the die cut letters that spell out SWEET, and a pair of die cut pine trees. I’ll go into a little more detail below.

The sassy girl is from the Sassy Girls – Sweet stamp set. I stamped her with Warm Glow ink and colored her with Copic Markers for a no-line look. (I’m definitely getting better at no-line coloring, but faces are still tricky. An image with sunglasses really helps!) After I colored her, I added gold gel pen highlights to her hair, and white highlights to the ice cream, glasses, and sucker. Then, I fussy cut her with my Scan N Cut. Later in the process, I will stamp the word PUSH onto the sucker, and emboss it with white powder. (I wasn’t sure of the button placement at this stage though.)

To prep the stenciled layer, and the SWEET die cut sentiment, I trimmed a light pink panel to 3¾” x 5″ and blended pink ink through the Hearts Stencil. (Later in the process, I will white heat emboss HAVE A and BIRTHDAY onto the panel when I know where they should go.) I die cut the letters to spell SWEET from the Carly Alphabet set, cutting three layers from white cardstock, and another layer from the same light pink paper that I cut the larger panel from. Using a soft hand, I lightly blended more pink ink onto the lower right of each pink letter. This way the edges stand out where they overlap. I glued the sentiment together, spelling out the word one layer at a time, so the letters overlap like shuffled cards.

To cut the circle frames, I pulled a 2″ circle from my nesting circle dies, and a 2½” stitched circle from this set. To hold them together while I cut the frames, I used low-tack masking tape. This ensures that my frames will match up when I stack them. For the solid circle that will be the back side of my shaker pouch (shown above), I used the same 2½” stitched circle die alone.

For the shaker pouch, I love MFT’s Circle Shaker Pouches. They are deep enough to hold thicker bits, and very easy to work with. Halo Lights are the perfect size to slide right on top of these pouches, and the lights point to what’s inside. I pulled various gems, clay pieces, and sequins from my stash to fill the pouch. (If your stash is running low, check out our shop. We carry a nice selection, and have more on the way!)

Don’t forget the Halo Light! They come two in a pack; I popped one out for this card. (That’s it, there’s no other prep work. They are ready to use.)

The last thing to prep was the candy wrapper sides. I was trying to mimic a cellophane wrapped hard candy, so I hunted through my dies to find a shape that would work. I used part of a whimsical tree die from this set. You’d be surprised what dies can do double duty if you look at them with an open mind. (Note: I picked the stitched circle die above to coordinate with the stitching on the tree. If you find a die in your stash without stitching, you might want to use plain circles.)

Alright, with all of the parts ready to go, let’s put this card together. First, fill the shaker pouch and glue the solid white circle to the back to seal it up. Next, glue the halo light over the pouch. I recommend a strong glue like Nuvo Deluxe Adhesive that works on plastic.
[one_half] [/one_half]
[one_half last] [/one_half]
Next, glue the three circle frames together, then trim the tree parts, and glue them to the back of the circle frames. Lay out the pieces of the card to determine where the Halo Light/shaker will sit, then heat emboss the small sub-sentiment, and glue the light in place. Add a thin layer of foam tape around the ring, without covering the lights. (This is just to hold the candy shaped frame on top, you do not need an entire ring of foam.) While I had everything out, I embossed PUSH on the sucker too.
[one_half] [/one_half]
[one_half last] [/one_half]
After adhering the candy frame in place, you can see the battery is still exposed. I covered it with the sassy girl. The battery is the same thickness as double thick foam tape, so I added some to the back side of the girl, to support her at the bottom. A little Nuvo adhesive on the back of her head helps her stick to the shaker pouch where she overlaps.
[one_half] [/one_half]
[one_half last] [/one_half]
I double checked to make sure the button was lined up under the word PUSH. Then, I trimmed the bottom of her flush with the bottom of the card. After that, I glued the SWEET sentiment to the top of the pouch, tucked slightly under her head. And it’s done!
[one_half] [/one_half]
[one_half last] [/one_half]
[one_half] [/one_half]
[one_half last] [/one_half]
What do you think? I hope I’ve inspired you to give this a try. I’d love to see what you create! Tag me on social media so I can cheer you on!
Want to see this card in person? I’m bringing it to the Scrapbook Expo in Duluth, Georgia next week! (We’ll be there July 15th – 17th.) If you are going to be in the area, come see me!
This site uses affiliate links whenever possible (at no additional cost to you), but only for products I actually use and love.
