Welcome to day 2 of the new release celebration for The Rabbit Hole Designs! Today, I’m sharing a neat technique called triple time stenciling with the new Amanda stencil (named after me – so exciting)! This is a technique I learned from my friend Linda, at Valley Stamp and Scrap.
If you haven’t seen it before, you’re going to love this technique! It’s quick, easy, and works with stamps or stencils. The basic idea is that you cut three panels, each slightly smaller than the next, stack them up, and stencil on all three layers at the same time. Then, you mat them and layer them up to create your card.
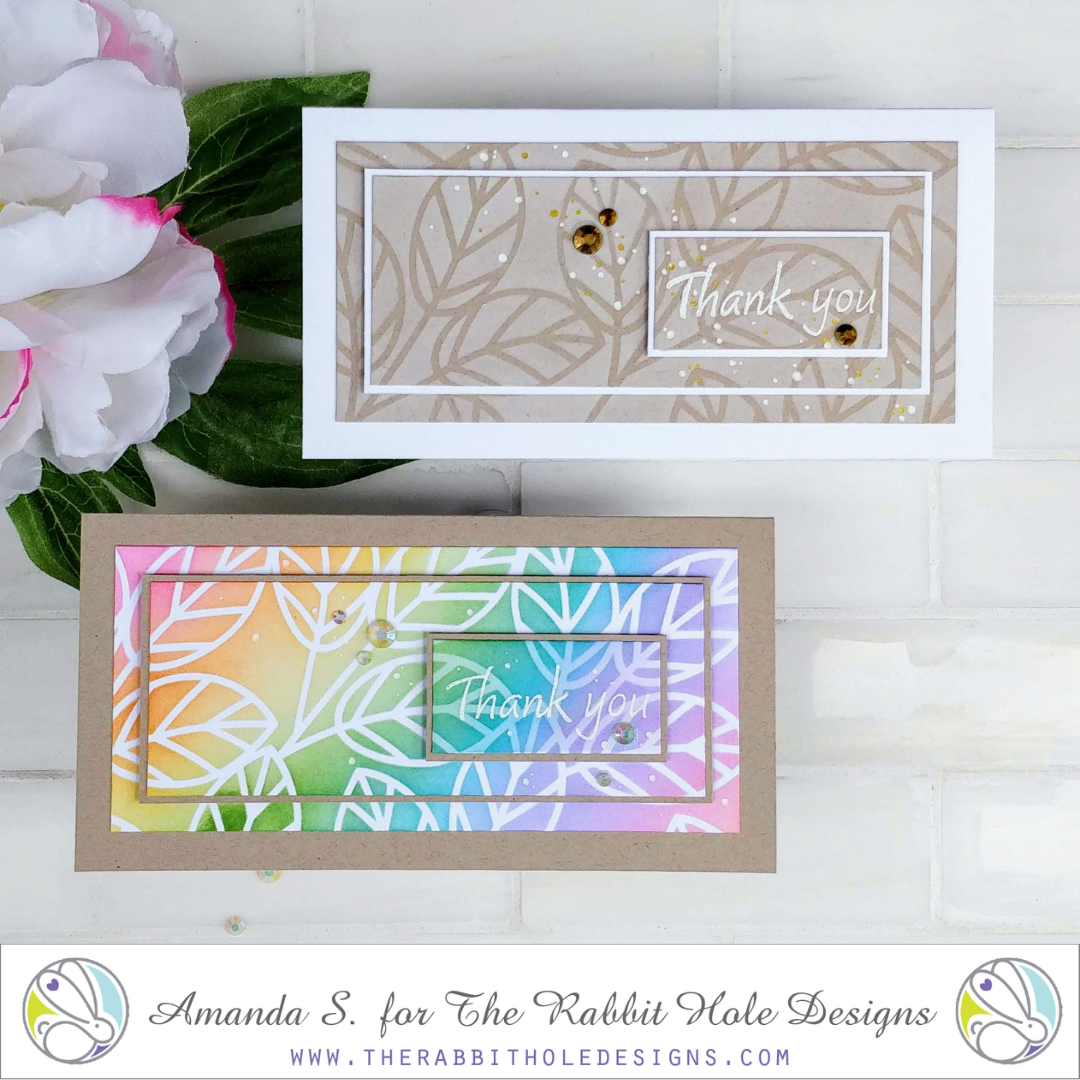
Let’s take a look at how I did that for my mini-slimline cards. First, I cut my panels to 5 1/2″ x 2 1/2,” 4 7/8″ x 1 7/8,” and 2″ x 1.” (Make sure your smallest panel is big enough for your sentiment.) Next, I used temporary adhesive to stick the layers together. Then, I used more adhesive to stick the stack to my craft mat, and masking tape to adhere the Amanda stencil on top. (You don’t want anything to shift around while inking.) Using blending brushes and a handful of inks, I blended a rainbow of color onto the panels.
[row]
[column size=”1/2″ stack=”sm”] [/column]
[column size=”1/2″ stack=”sm”] [/column]
[/row]
[row]
[column size=”1/2″ stack=”sm”] [/column]
[column size=”1/2″ stack=”sm”] [/column]
[/row]
Using white powder, I embossed my sentiment from the new 1 Line Flower stamp set on the smallest panel. It wasn’t standing out enough, so I blended more ink on top, and that really helped it pop.
[row]
[column size=”1/2″ stack=”sm”] [/column]
[column size=”1/2″ stack=”sm”] [/column]
[/row]
To assemble the card, I glued each panel onto a slightly larger cardstock mat, popping up the layers with thin foam tape. A few scattered gems and white gel pen dots finish the card.
[row]
[column size=”1/2″ stack=”sm”] [/column]
[column size=”1/2″ stack=”sm”] [/column]
[/row]
[row]
[column size=”1/2″ stack=”sm”] [/column]
[column size=”1/2″ stack=”sm”] [/column]
[/row]
I loved the card so much, I made a second one! This time, I blended my favorite white ink onto kraft cardstock and used gold and white accents.
What do you think? I’m so glad I saw Linda sharing this technique in one of her Facebook live videos. If don’t already follow her, here is a link to her page. She’s live almost every afternoon.
Ready for more inspiration? Hop along with us!
The Rabbit Hole Designs
Amanda – you are here
Jenn – next stop
Joy
Lauren
Kelly
Kim
Tangii
Terra
Von Marie
Heather
Thanks so much for stopping by today! I’ll be back on Thursday with another really cool, interactive card. You won’t want to miss it; I’ll see you then!
GIVEAWAYS:
To celebrate the new release, The Rabbit Hole Designs is giving away two savings vouchers; one to a lucky Instagram Follower and one to a lucky Fan Page follower. Winners will be chosen at random from the comments left on the INSTAGRAM post, and from comments on the Fan Page post. So make sure to head on over to INSTAGRAM and look for the giveaway post @therabbitholedesignsllc and look for the post at The Rabbit Hole Designs Fan Page by 11:59 p.m. PST 04-27-2021. Winner will be announced on The Rabbit Hole Designs blog 04-28-2021.
This site uses affiliate links whenever possible (at no additional cost to you), but only for products I actually use and love.

GORGEOUS cards. Can’t wait to find some specific stencils where this technique would shine!! Thanks much for sharing!
These are stunning!! Love how colorful the first one is and how different the second one looks!!