Hello my crafty friend! Can you believe it’s almost July? And you know what that means for cardmakers…Christmas in July! That’s right; we crank the air conditioner and start dreaming of snow. Haha, I’ve even been known to turn on my favorite carols to help set the mood, as I get a head start on my holiday cards and crafts. Are you ready?

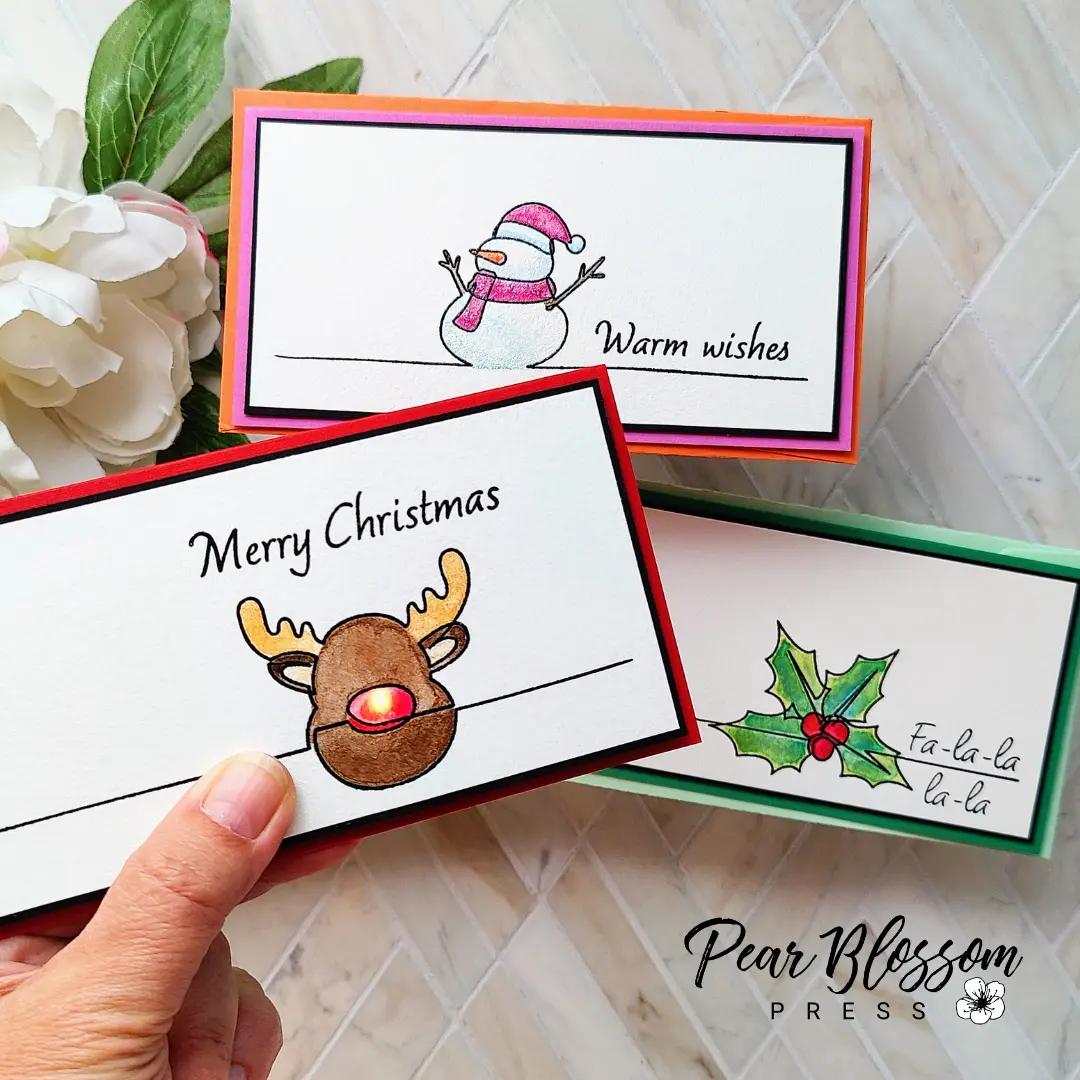
I’m excited to help The Rabbit Hole Designs kick off their holiday release with these three quick and easy cards. If you’re a fan of clean and simple, you are going to love these new 1 Line stamp sets! A line along the bottom instantly grounds the classic Christmas images, and only minimal coloring is needed to pull your cards together. You could easily create dozens in a day! Wouldn’t it be wonderful to have such a nice head start in July? Of course, you can step these cards up a bit for some of the special people on your list like I did with the Reindeer; you know I couldn’t resist lighting up his nose with a One Light!
Grab your supplies and meet me in the craft room…
SUPPLY LIST
1 Line Reindeer Stamp Set
1 Line Snowperson Stamp Set
1 Line Holly Stamp Set
Shimmery Watercolors
One Light
Double Thick Foam Tape
Push Here Stamp Set
I’m a big fan of mini-slimline cards, so I decided to make a trio of them with these images. (They lend themselves to any size card though.) Since such minimal coloring is required, I decided to make the coloring more special with shimmery watercolor paints. To start, I trimmed heavy watercolor paper down to 2 ⅞” x 5 ⅞” panels and prepped them with my Embossing Powder Tool, before stamping the 1 Line images with black ink and embossing them with clear powder. I painted the images with clear water first, then dropped in color and let it bloom into the wet areas. Often, I added a second color to solid areas to create more interest. In the red areas where I needed more intense color, I used Karin markers to draw in shadows.
[row]
[column size=”1/3″ stack=”sm”] [/column]
[column size=”1/3″ stack=”sm”] [/column]
[column size=”1/3″ stack=”sm”] [/column]
[/row]
I like to let watercolor panels air dry whenever possible; they tend to warp less. Luckily, by the time I finished the third panel, the first was dry. I lined up the sentiments and stamped and embossed them. (I’m not sure why I didn’t do that at the same time I stamped the images. I should have.) To finish up the holly and snowman cards, I simply matted the panels onto 3″ x 6″ black panels and popped them up onto bright colored mini-slimline card bases, measuring 3 ¼” x 6 ¼.” The shimmer from the paint provided enough sparkle, so I didn’t add gems, but I did match them up with colorful #7 coin envelopes. Here’s a look…
[row]
[column size=”1/2″ stack=”sm”] [/column]
[column size=”1/2″ stack=”sm”] [/column]
[/row]
[row]
[column size=”1/2″ stack=”sm”] [/column]
[column size=”1/2″ stack=”sm”] [/column]
[/row]
Adorable, right? And so fast! Now, remember I said you could step them up a bit? Let’s talk about lighting up the Reindeer’s nose. It only takes a few minutes more, and the wow factor is huge! We’ll back up to the part where I stamped the sentiment. At the same time, I lined up a One Light on top of the reindeer’s nose to see where the button would be. Then, I placed my PRESS ME stamp on top of the button, picked up the stamp with the lid of my Misti, then removed the light and stamped the words. (This gives me perfect stamp placement.)
[row]
[column size=”1/3″ stack=”sm”] [/column]
[column size=”1/3″ stack=”sm”] [/column]
[column size=”1/3″ stack=”sm”] [/column]
[/row]
I wanted this card to have a black mat under the watercolor panel too, but I knew my One Light wouldn’t shine through both black cardstock and heavy watercolor paper. (It’s bright, but not that bright.) So I needed to cut a nose hole in the black panel. The easiest way to do that was to line the watercolor panel up on the black panel in my Misti, then line the image back up. After removing the watercolor panel, I stamped the reindeer on the black panel with white ink. (I didn’t even try to stamp the whole image, just inked up near his nose.) That way, I knew exactly where to cut the hole. Easy peasy!
[row]
[column size=”1/3″ stack=”sm”] [/column]
[column size=”1/3″ stack=”sm”] [/column]
[column size=”1/3″ stack=”sm”] [/column]
[/row]
After gluing the watercolor panel to the black panel, making sure the noses lined up, I flipped the panel over. Using double-stick tape, I attached my One Light to the panel, with the light centered over the nose (and the button lined up where I stamped PRESS ME). Then, I added Double Thick Foam Tape around the panel and adhered it to a red card base. That’s it!
[row]
[column size=”1/3″ stack=”sm”] [/column]
[column size=”1/3″ stack=”sm”] [/column]
[column size=”1/3″ stack=”sm”] [/column]
[/row]
Here’s a look at the finished card, paired up with a bright green envelope. If you are concerned about the battery draining before Christmas, don’t worry. They have a 3 year minimum shelf life. If you are wondering how to mail light-up cards without the button getting pushed, just stick a thin tab of paper between the battery and the unit, that can be pulled out by the recipient. (You can see me demonstrate that in this video.)
[row]
[column size=”1/2″ stack=”sm”] [/column]
[column size=”1/2″ stack=”sm”] [/column]
[/row]
It’s hard to tell from the photo since I was trying to capture the shimmery paint too, but the light from the nose glows brightly through the watercolor paper. It’s such a fun card, and really only took a few minutes more than the other two. I plan to make a bunch more of all three and have them ready for the holidays. I hope I’ve inspired you to give them a try too!
Ready for more inspiration? Hop along with us!
HOP LIST
The Rabbit Hole Designs
Jenn
Dalis
Judy
Lauren
Amanda S – you are here
Lydia – next stop
Deana
GIVEAWAYS
To celebrate the new release, The Rabbit Hole Designs is giving away two savings vouchers; one to a lucky Instagram follower and one to a lucky Facebook Fan Page follower. Visit The Rabbit Hole Designs for contest details. Good luck my friend!
Thanks so much for stopping by today! I’ll be back soon with more fun cards to share. See you then!
This site uses affiliate links whenever possible (at no additional cost to you), but only for products I actually use and love.
