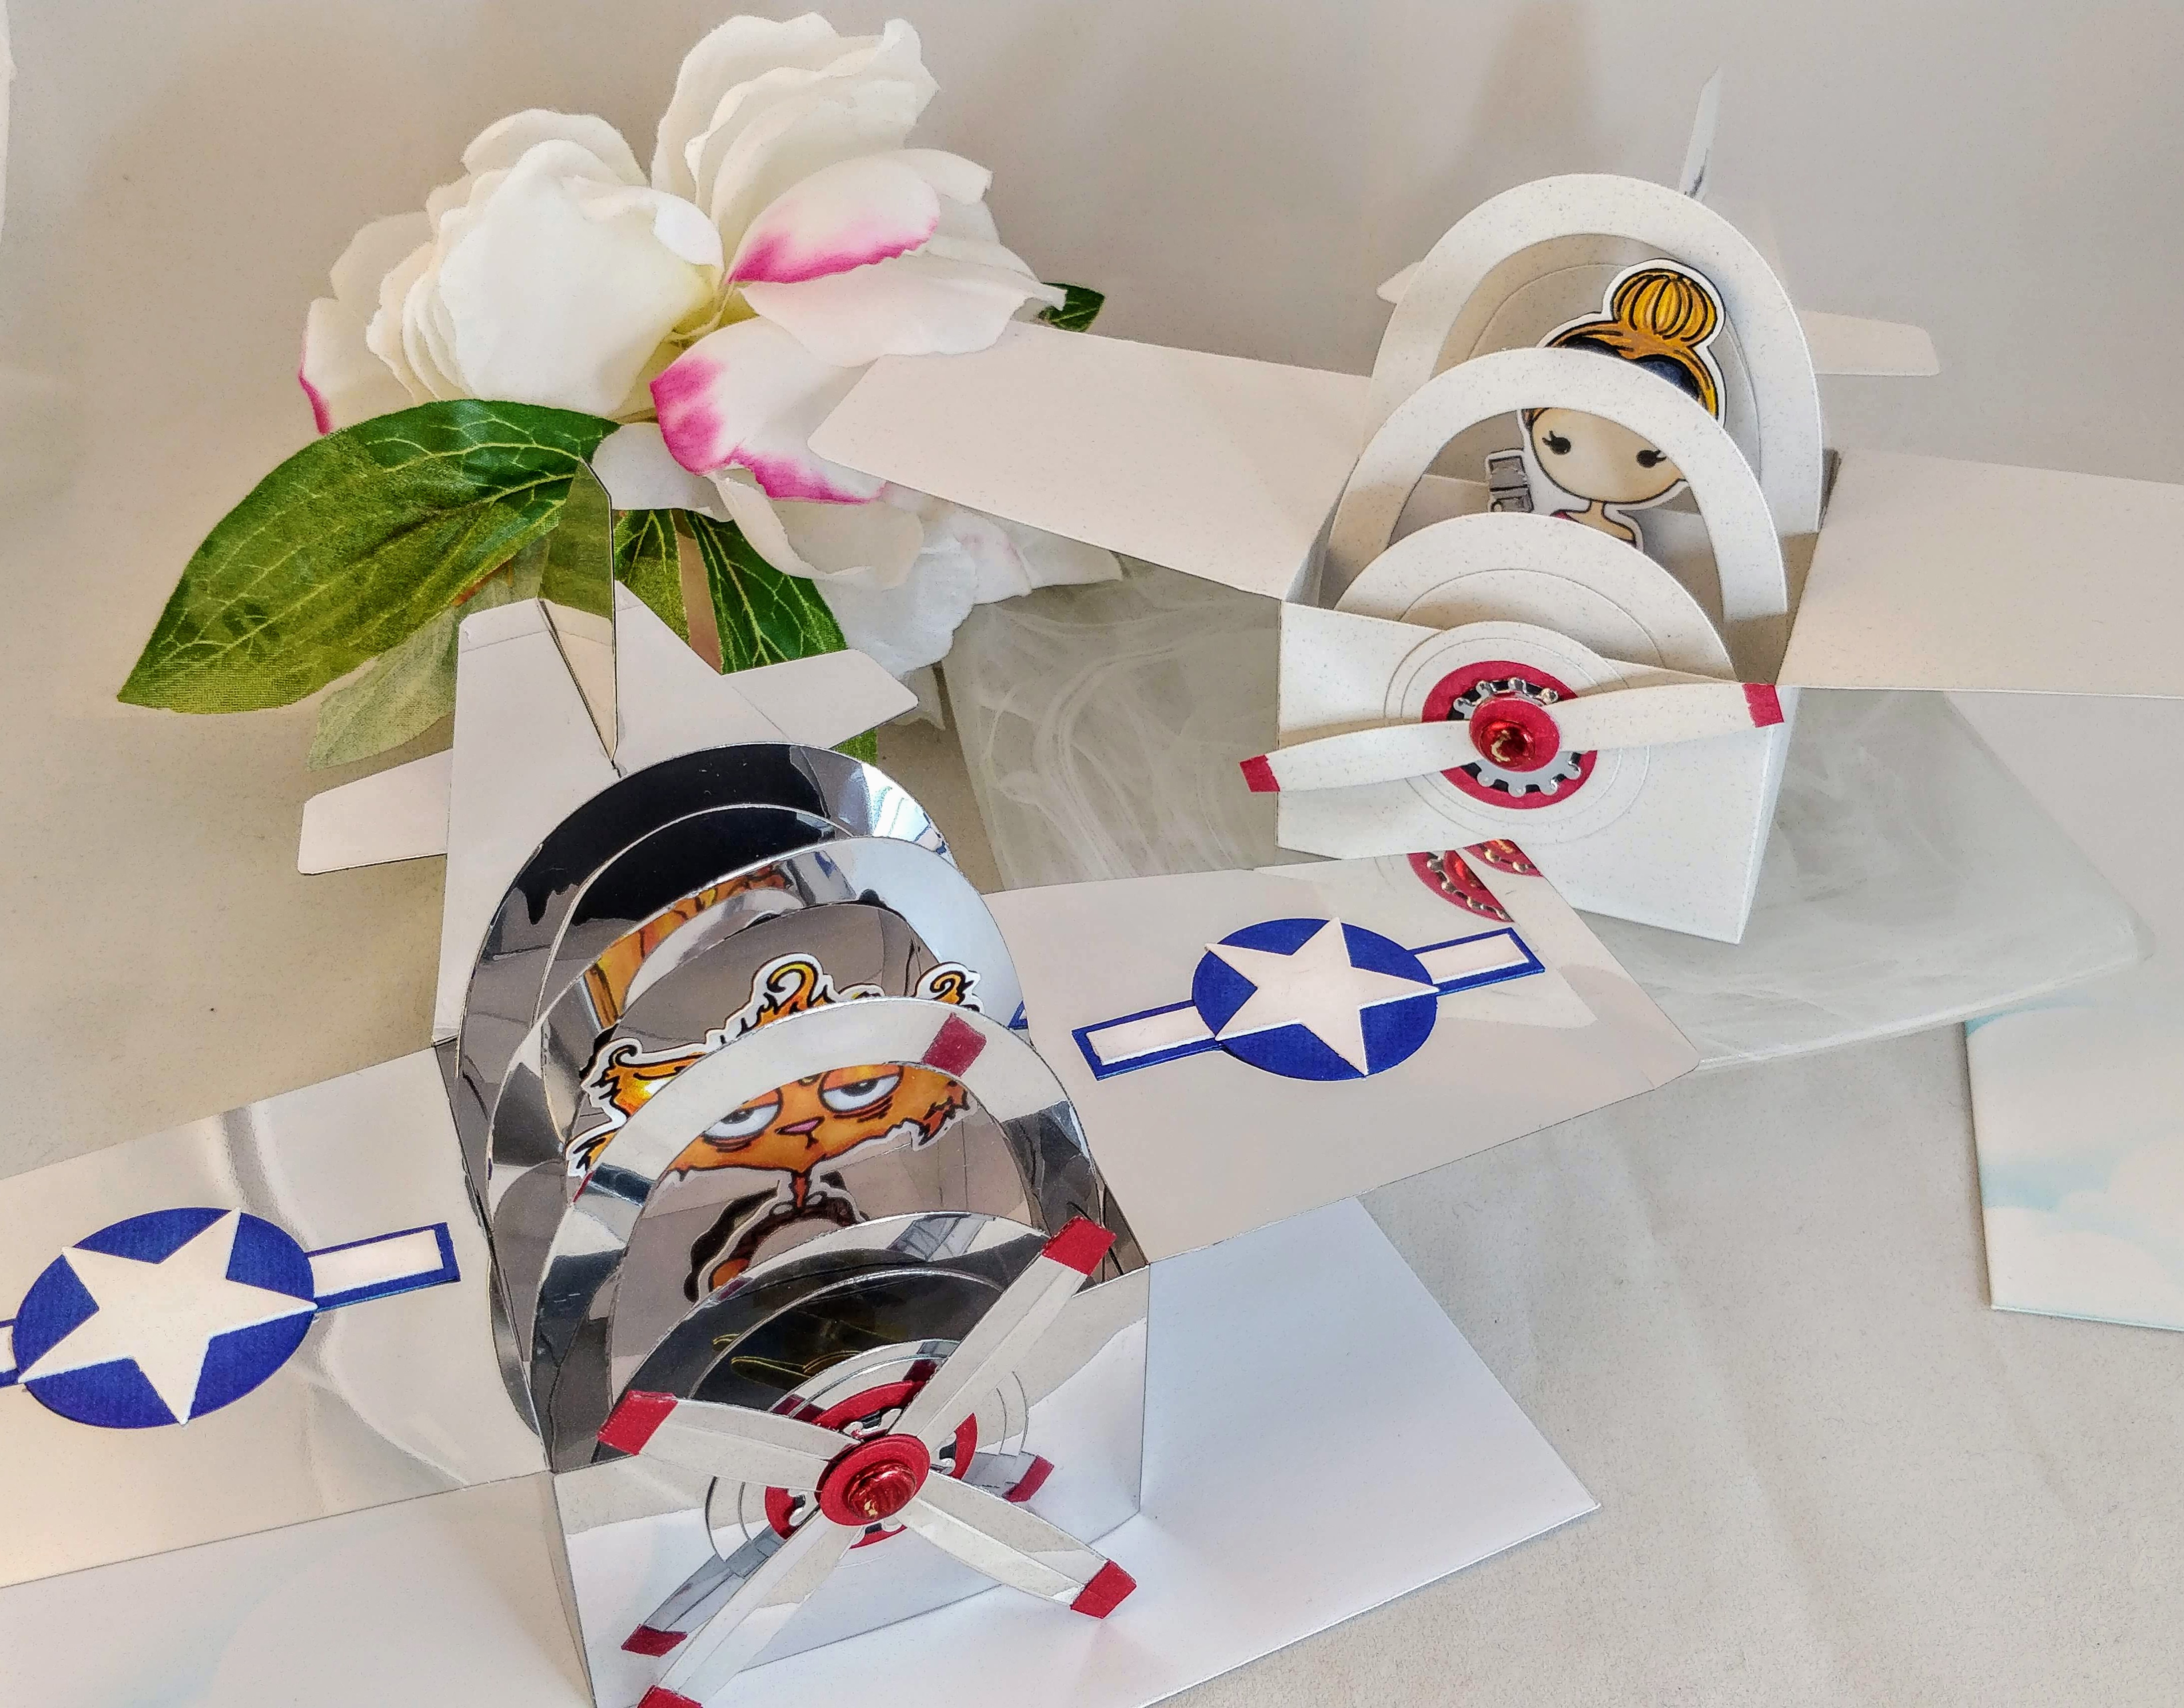
Hello again my crafty friend. Today, as part of the Lynda Kanase design team, I get to share a set of cards that might be my favorite ever! I made a pair of airplane box cards!!! Why is that so exciting? Well, several reasons really… First, I always wanted to be a pilot when I was a little girl; I even majored in aviation in college. Second, I used Lynda’s Card-in-a-Box Flower Basket die set in a totally different way. (Finding new ways to stretch my supplies gives me a secret thrill 😉 ) And third, I finally got to ink up the Amanda Inked Girl set from Ink Road Stamps; the set was actually named after me! How cool is that?! So you can see why I love these cards so much.
Do you ever have an idea, and when you bring it to life, it turns out better than you expected? That’s what happened here. A few months ago, I turned a box card into a pirate ship. To be honest, I’m not thrilled with it. I plan to revisit the design, but it got me thinking of out-of-the-box ways to make box cards. It didn’t take long for the idea of an airplane to come to mind. Lynda’s box card die set is different from other box card sets on the market. I love that the base is a square, rather than a rectangle, and the inner struts are full length. The handle offers some interesting options too. Once the wheels started turning, I started playing with the shapes until I came up with a model that I liked. In the end, I also used several of my nesting circle dies and a diamond shaped die from my stash to round out my list of airplane parts.
This is one of those times where a picture is worth a thousand words, so I made a video tutorial that walks you through the process…
In the video, you saw that these cards aren’t hard to make. You just need to cut out your pieces and make a few simple modifications. Here is a list of pieces to cut out for each plane:
- (5) basket handles to become the cabin or cockpit frame
- (1) acetate window to fit inside a pair of the basket handles
- (4) struts to become the wings and tail
- (2) box frame pieces to become the fuselage
- (2-4) long leaves to become propeller blades
- (1) flower center to be the engine block
- (2) diamond shapes*
- (1) 1½” circle
- (1) 1¼” circle
- (1) 1″ circle
- (2) ¾” circles
- (2) ½” circles
With your pieces die cut, you’ll need to make the few simple modifications shown in these diagrams:


With those pieces modified, you can start to decorate by adding color and/or stamping. Before assembling, you’ll want to stack the cirlces/nose pieces and punch a hole in the center of each. Assemble as shown in the video. Then be sure to add a pilot! I used Amanda for the white plane, and the Caffeinated Cat for my warbird. Because I colored my images with Copic markers, I cut silhouettes from black cardstock to hide where the ink bled through the paper. My ScanNCut made short work of the fussy cutting. When choosing a pilot from your stamps, look for a character who is looking straight ahead. To finish your plane, add any additional die cut pieces you’d like for decoration. I added Naval insignia to my warbird’s wings. I thought about adding nose art, but I didn’t want to go overboard. I did however, stencil some light blue clouds onto my envelopes to hint at the theme.
These cards were a ton of fun to make! I think the warbird is going to make a perfect Father’s Day card. (Incidentally, I cut all of the silver pieces for that plane from one 12″ x 12″ sheet of Bazzill silver mylar.) Who would you make an airplane box card for? Are you ready to see several other ways to use Lynda’s die set? Check out the fantastic ideas the rest of the design team came up with; each one is so unique!
Lynda Kanase |
Mitsyana Wright |
Pam Bray |
Amanda Stevens – you are here |
Karen Aicken |
Daniela Costa – next stop |
Thanks for stopping by today. I’ll be back again soon with another fun interactive card. Make sure you are subscribed to my newsletter so you don’t miss out…
*If you don’t have a diamond die that will work, you can cut a 2″ square in half diagonally, and clip the edges to form a diamond shape.

This site uses affiliate links whenever possible, but only for products I actually use and love.

Amanda, you are amazingly clever. How Awesome.
Very clever design!
Incredible Flower Basket Die; love all those fabulous details and how you transformed the die into something so unexpected!!!! Love all it!!!
Love it! Thanks for the detailed tutorial!
HOW stinkin cute is THIS?!?!
ok. all i had to do was see the picture and and and . . . i LOLed at just how adorable those are. amazing as usual!!!
Love, love, love the airplane idea. So creative!