Hey crafty friend, I’m back with another birthday card, and I wanted to share the transformation process as I colored. I think you’ll agree, the difference between just the markers, and markers, plus colored pencil on top, is significant. Especially, with a softer color palette. Let’s take a look…
Working on x-Press It cardstock, I started by stamping and gold heat embossing a sub-sentiment from the Scripty Birthday stamp set on the lower right side of the panel, leaving room for the foiled sentiment above. Then, I stamped a flower and leaves from the Pretty In Peony stamp set in Warm Glow ink on the left, masking as necessary to set the leaves behind the flower. Using Copic markers BG49, BG13, and G00, I colored the flower, leaving lots of white space. The leaves were colored with G02, and G12, again leaving white spaces. I really wanted to end up with soft colors, so I didn’t go crazy with the shadows. (You can see all of the colors I used in my Collapsible Marker Bag down below.)
To add depth to the floral scene, I outlined the images with W3, then blended out with W1, and W00. I feathered the color out as I moved away from the images. Then, I added a second coat of color to the flower and leaves with the same markers I used above. I was careful not to give up too much of the white space.
[row]
[column size=”1/2″ stack=”sm”]

[/column]
[column size=”1/2″ stack=”sm”] [/column]
[/row]
I could have stopped here, but I wanted to sharpen up some of the lines, and add more contrast, without darkening up the whole scene. So I pulled out a few colored pencils. They allowed me to add finer details. Using sharp points, and light pressure, like Kathy Racoosin taught me, I deepened the shadows. I also added a bit of green pencil to the flower, just for a little variation.
 At this point, I was happy with the coloring, but I wanted to add white dots, for a magical, dewy look. I could have splattered on a bit of white paint, but my white gel pen is less messy, and only takes a minute. Plus, I could control where the dots ended up (not on my sentiment). Notice the white dot on my finger in the photo below? I always start gel pens by drawing on my finger like that. It gets the ball rolling, and removes any crust that may have dried on the tip from the previous use. (Another handy trick Kathy taught me!)
Here’s one more tip for using gel pens; go slow. If you move your pen too fast, the thicker ink cannot flow out fast enough, and you’ll end up with a groove in the middle of your lines. If your lines dry back too faint, trace over them with a second coat (make sure the first coat is dry). And always give your gel pens a good shake first, to wake them up.
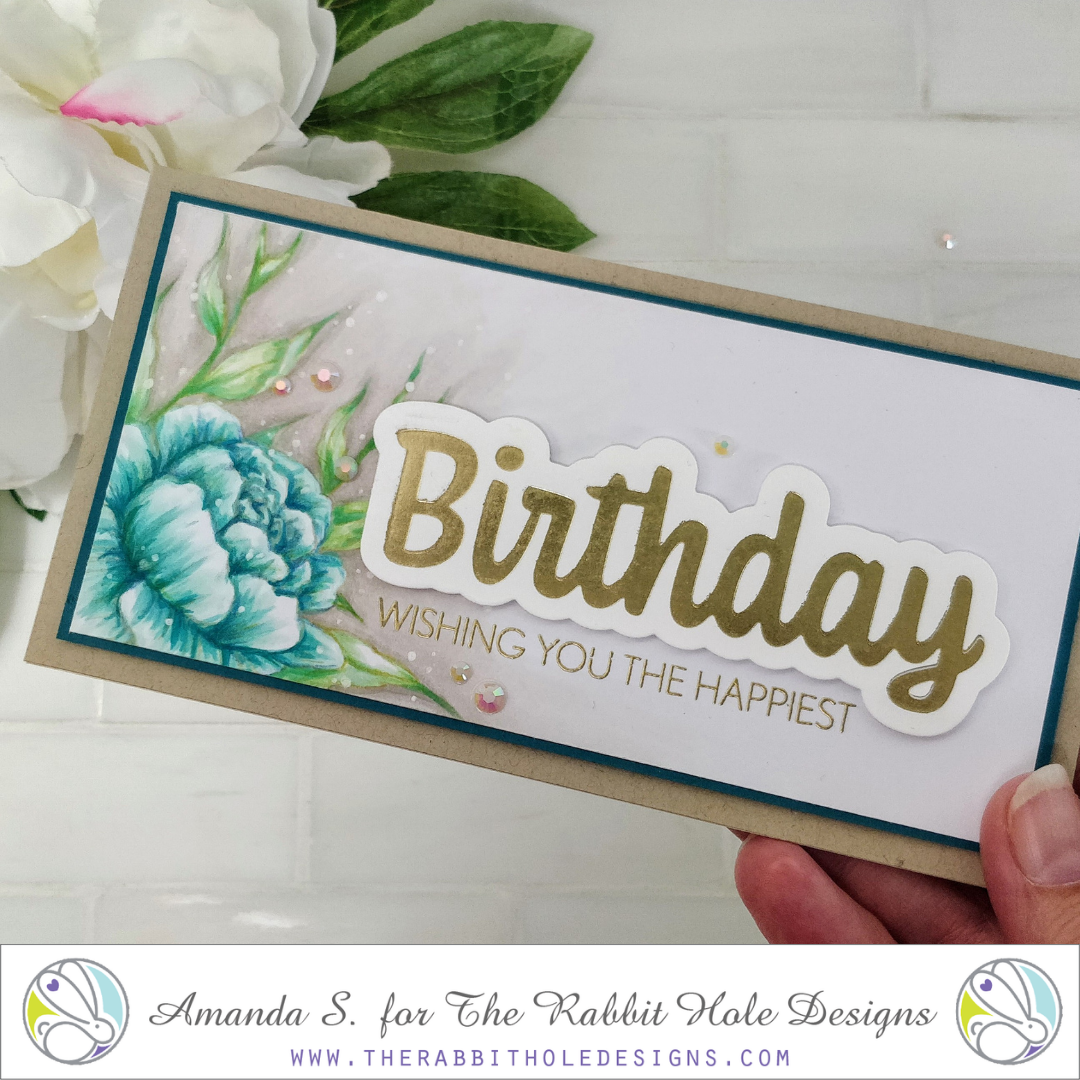
 Finishing the card was simple from there. I mounted the stamped panel onto a slightly larger teal panel, then popped it up onto a kraft mini-slimline base with foam tape. I used more foam tape to pop up the foiled and die cut BIRTHDAY sentiment. A few white gems add shimmer and mimic the white gel pen dots. What do you think?

Isn’t it pretty? The Pretty In Peony stamp set is one of my favorites. And the new hot foil plates help take sentiments to the next level.

Thanks so much for stopping by today! It’s a busy day here on the blog; I have another post sharing four ways to use a die set (you’re not going to believe how different each one is). Be sure to check that out! And if you missed Cassie Trask’s post yesterday, be sure to take a look! She created an awesome double interactive card!!! I’ll be back later this week with another floral card, in a similar color scheme to today’s card. I hope you’ll stop back by and let me know which one you like better. (Lol, I love these colors so much, you might see a few more this fall.) See you then!
This site uses affiliate links whenever possible (at no additional cost to you), but only for products I actually use and love.

This is so beautiful Amanda. Thank you for sharing how you created it. I love everything about this card 💗