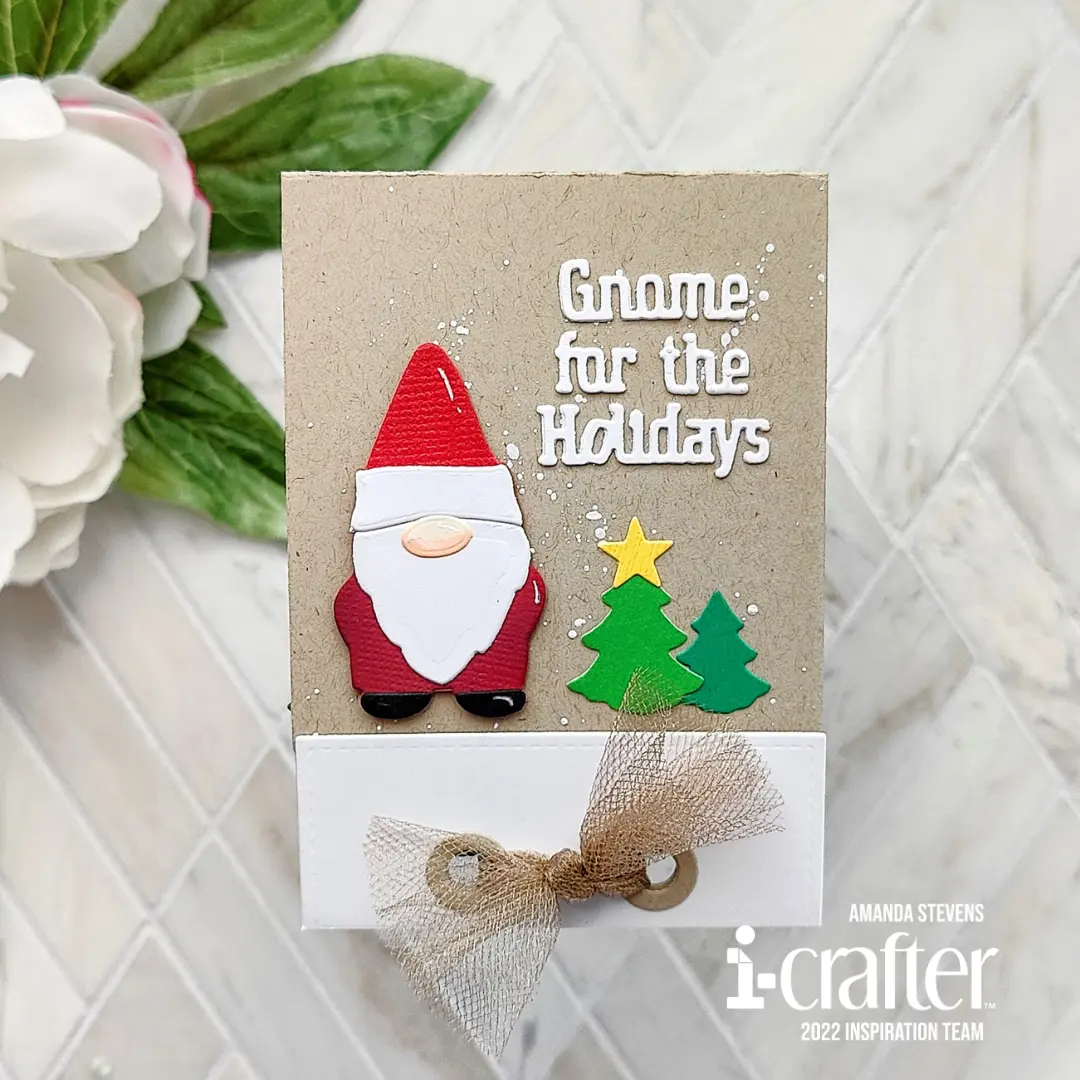
Okay, so I know I jumped the gun a little earlier this week, but we’re officially in July now, so I think it’s safe to dive into Christmas in July! And what better way than with an adorable matchbook card? This one has a cute gnome on front, and an adorable gingerbread house inside. You can lift the flap on the door to reveal a Christmas tree. Then, when you push the button, the house lights up! Plus, there is a gift card holder in there too. This card is just full of surprises! Take a look…
Too cute, right? I just love it! I’m really enjoying matchbook cards too. I’ve made quite a few now. They are very simple with dies from i-crafter; let me show you how. Grab these supplies and meet me in the craft room…
[row]
[column size=”1/2″ stack=”sm”]
SUPPLY LIST
Matchbook Stitches Base Set
Matchbook Gnome Add-on Set
Christmas Ornament Tree Set
Pinwheel Card Set
i-Mend PRO Deck
Locking Tweezers
[/column]
[column size=”1/2″ stack=”sm”]
One Lights
Double Thick Foam Tape
Interactively Yours Stamp Set
Santa’s Treats Sprinkletz
Clay Rainbow Dots
[/column]
[/row]
To assemble this card, the first thing you’ll want to do is to die cut your pieces and start piecing them together. You can see in the photo below, I cut out the Matchbook front and back pieces from kraft cardstock. I partially die cut a white strip to layer along the bottom flap as well. I used a combination of the solid insert, and a card slot die from the Pinwheel set to cut out the blue gift card holder. I cut out a pair of kraft houses, notice that one is only partially cut (I didn’t need it to extend all the way to the bottom). For the partially die cut house, I added tape to the back side, before removing it from the die, to lock all of the cut out pieces in place (I wanted a solid house for the back layer). I cut and assembled the gnome, several trees, and stacked up the sentiment. I also glued on the decorative pieces of the front house. The stars are from the new Christmas Ornament Tree set.
[row]
[column size=”1/2″ stack=”sm”] [/column]
[column size=”1/2″ stack=”sm”] [/column]
[/row]
Here is a closer look at the decorated front house layer. I added vellum behind all of the cutouts and put a star-topped tree inside the door.
[row]
[column size=”1/2″ stack=”sm”] [/column]
[column size=”1/2″ stack=”sm”] [/column]
[/row]
Adding the light is quick and easy. Just adhere a One Light to the solid back layer house, then add Double Thick Foam Tape along the roofline and thin foam tape near the bottom. Stick the pretty house on top and finish decorating with clay candy and trees. Stamp PUSH HERE onto a small circle and adhere it over the button.
[row]
[column size=”1/2″ stack=”sm”] [/column]
[column size=”1/2″ stack=”sm”] [/column]
[/row]
[row]
[column size=”1/2″ stack=”sm”] [/column]
[column size=”1/2″ stack=”sm”] [/column]
[/row]
Next, it’s time to glue the matchbook together. Simply fold along the score lines and add glue to the narrow tab on the top piece. Adhere it to the bottom/back. I glued the white partially die cut piece to the bottom first. I also splattered white paint onto the top piece and let it dry before assembly. To decorate the front, I glued on the gnome, sentiment and more trees. I also decided to add a pair of kraft hole reinforcements at the bottom. Using locking tweezers helped me line everything up without getting my fingers in the way.
[row]
[column size=”1/2″ stack=”sm”] [/column]
[column size=”1/2″ stack=”sm”] [/column]
[/row]
[row]
[column size=”1/2″ stack=”sm”] [/column]
[column size=”1/2″ stack=”sm”] [/column]
[/row]
After that, the only thing left to do was slip the gift card holder and house into the matchbook and tie it closed. I opted for tulle that matched the kraft so the die cut images would be the focal point when the card is open or closed.

That’s it, it’s ready for gift giving! What do you think? Here are a few shots of the finished card…
[row]
[column size=”1/2″ stack=”sm”] [/column]
[column size=”1/2″ stack=”sm”] [/column]
[/row]
[row]
[column size=”1/2″ stack=”sm”] [/column]
[column size=”1/2″ stack=”sm”] [/column]
[/row]
[row]
[column size=”1/2″ stack=”sm”] [/column]
[column size=”1/2″ stack=”sm”]
[/column]
[/row]
I just love how it turned out!
Thanks so much for stopping by today! I hope I’ve inspired you to give this fun card a try, and get a jump on your holiday crafting. Be sure to head over to i-crafter to see the other new dies in their Christmas in July release, and if you hurry, you can take advantage of free shipping this weekend (details below)! I’ll be back soon to share fun projects with the Christmas Ornament Tree set and the Mini Slimline Zip Envelope set. They are so cool! See you soon…

This site uses affiliate links whenever possible (at no additional cost to you), but only for products I actually use and love.

That is just awesome! Where do you buy the light from?
Thanks Ruaha! We carry them here in our shop… https://pearblossompress.com/shop
Oh, I LOVE the gnome home!!! And adding the light was just wonderful. I would love to make the gnome home for many different purposes…