We’re pleased to welcome Meghan Kennihan as a guest designer this month! Today, she’s sharing the first of several gorgeous cards she’s made. Take it away Meghan…
Hi Crafty Friends. I am SO EXCITED to be Guest Designing for Pear Blossom Press. They have the coolest light up products and more that are SO EASY to use! I am showing you how to create a darling light-up birthday card using the EZ- Lights and Yellow Candle Flames so that the candles glow bright.
[row]
[column size=”7/10″ stack=”sm”]
[/column]
[column size=”3/10″ stack=”sm”][/column]
[/row]
Make Crafty Friends Q & A:
Q: Have you ever made a light up card?
A: Me? This is my first one with Pear Blossom Products and it was SO MUCH easier than others I have used.
[row]
[column size=”1/2″ stack=”sm”]

[/column]
[column size=”1/2″ stack=”sm”]

[/column]
[/row]
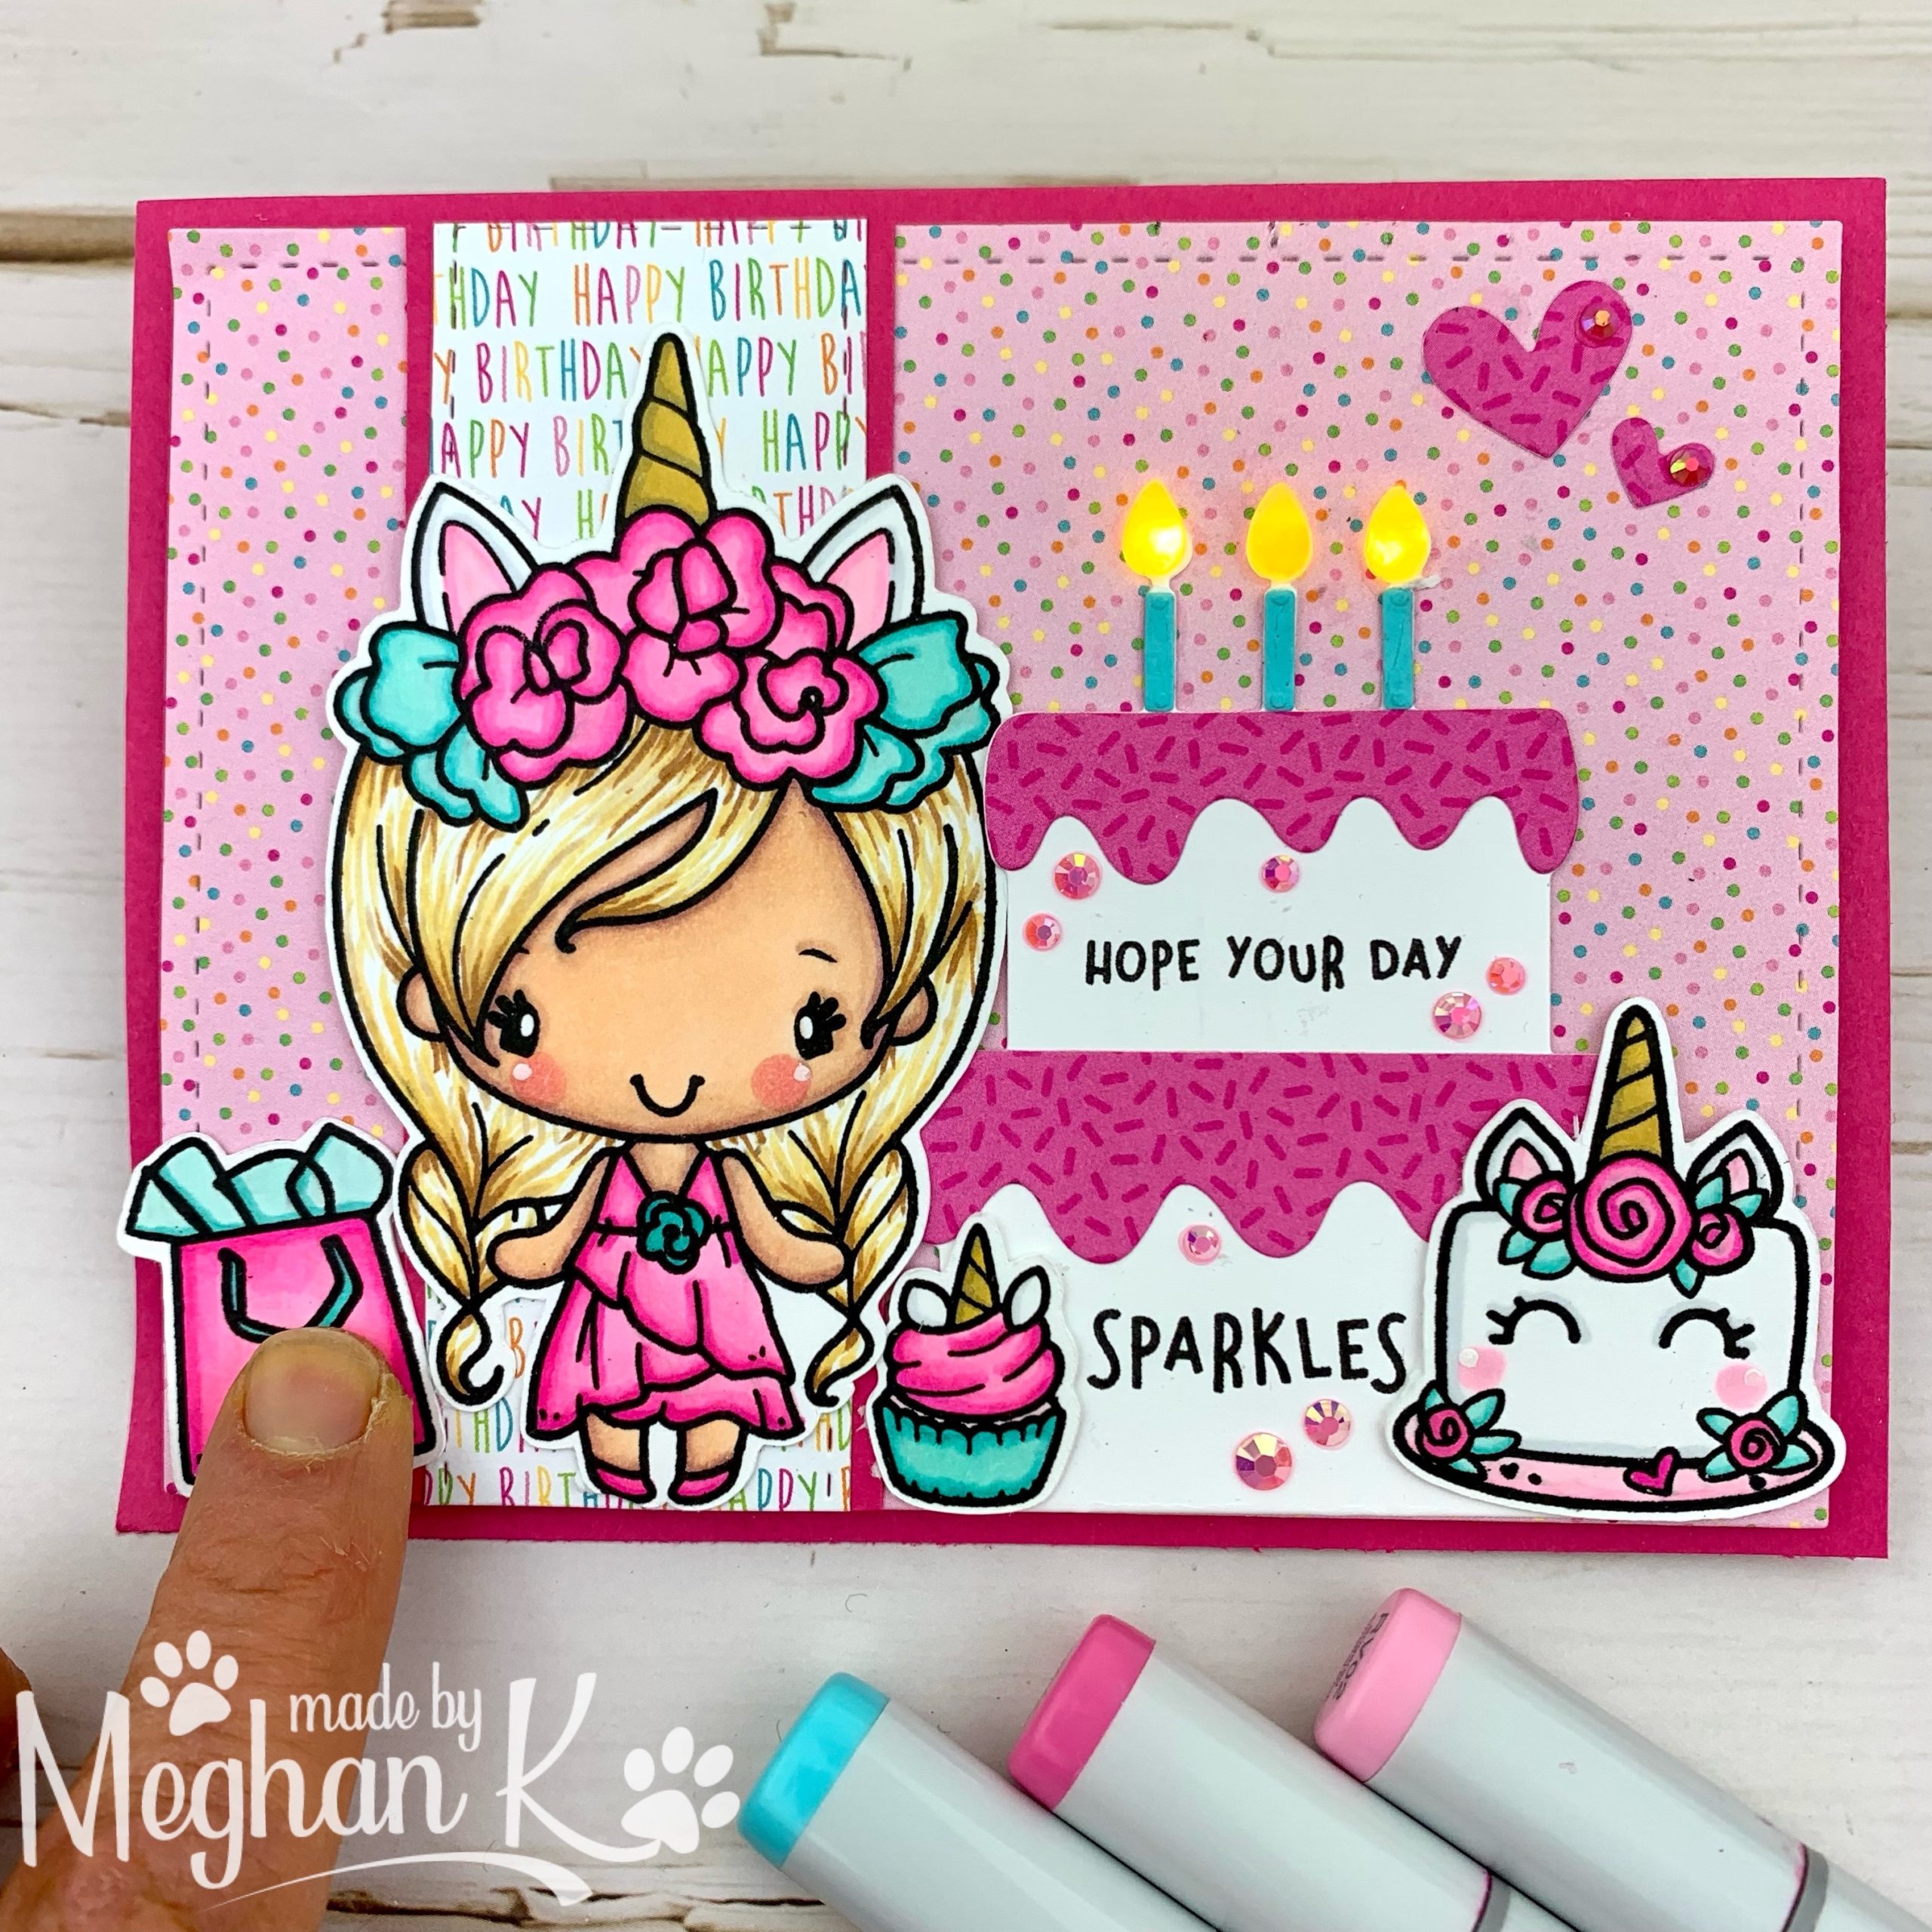
Step One: I colored my Greeting Farm Unicorn Bday Anya in pinks and teals to match my birthday papers. Then I die cut the cake out of Penguin Palace’s I Made You A Cake Die.

Step 2: I assembled the cake and the front of my card, punching small holes in the candles so the three lights can shine through.

Step 3: I took out an EZ- Light, unwrapped the three wires and tested my light, after putting the battery in the center.

Step 4: I picked out 3 of the larger yellow candle gems (they come in all sizes!)

Step 5: I glued everything down so that the front of my card looked exactly how I wanted it, including the gems and the PUSH HERE Button which I decided was going to be the birthday present bag.
[row]
[column size=”1/3″ stack=”sm”]

[/column]
[column size=”1/3″ stack=”sm”]

[/column]
[column size=”1/3″ stack=”sm”]

[/column]
[/row]
Step 6: I flipped the card over and taped down my button, making sure the button lined up with where the “Push Here” was on the front. Next, I taped the wires down and lined up the yellow side of the ends into the holes for the candles. I layered everything with thick foam tape to give space for the button and allow flexibility for the PUSH.
[row]
[column size=”1/2″ stack=”sm”]

[/column]
[column size=”1/2″ stack=”sm”]

[/column]
[/row]
Step 7: I lined it up on my pink cardstock based and TA-DA! Candles GLOW!

Step 8: Since my sentiment says “Hope Your Day Sparkles,” I decided to add some bling with the gems and hearts as a final touch.
[row]
[column size=”1/2″ stack=”sm”]

[/column]
[column size=”1/2″ stack=”sm”]

[/column]
[/row]
PLEASE use the links above or below to get your goodies!
Don’t forget to subscribe, follow, and comment on my blog AND Instagram @MadeByMeghanK for your chance to win my March Prize (see right panel on my blog).
Supplies:
Pear Blossom Press EZ Lights (5) Pack
Pear Blossom Press Yellow Candle Flames
Lawn Fawn Push Here Bundle
Penguin Palace I Made You A Cake Die
The Greeting Farm Unicorn Bday Anya
A great big thanks to Meghan Kennihan for guest designing for us today! She’ll be back soon with more fun light-up cards to share. If you are not already following Meghan on Instagram, you will definitely want to! Please make sure to use her links above, or in her supply list, if you’d like to purchase any of the items used today. Some are affiliate links, and that helps to support her hobby. Don’t worry, there is no additional cost to you; it’s just an awesome way to thank her for the inspiration.

Just darling!!!!!!!!!
I love this so much!