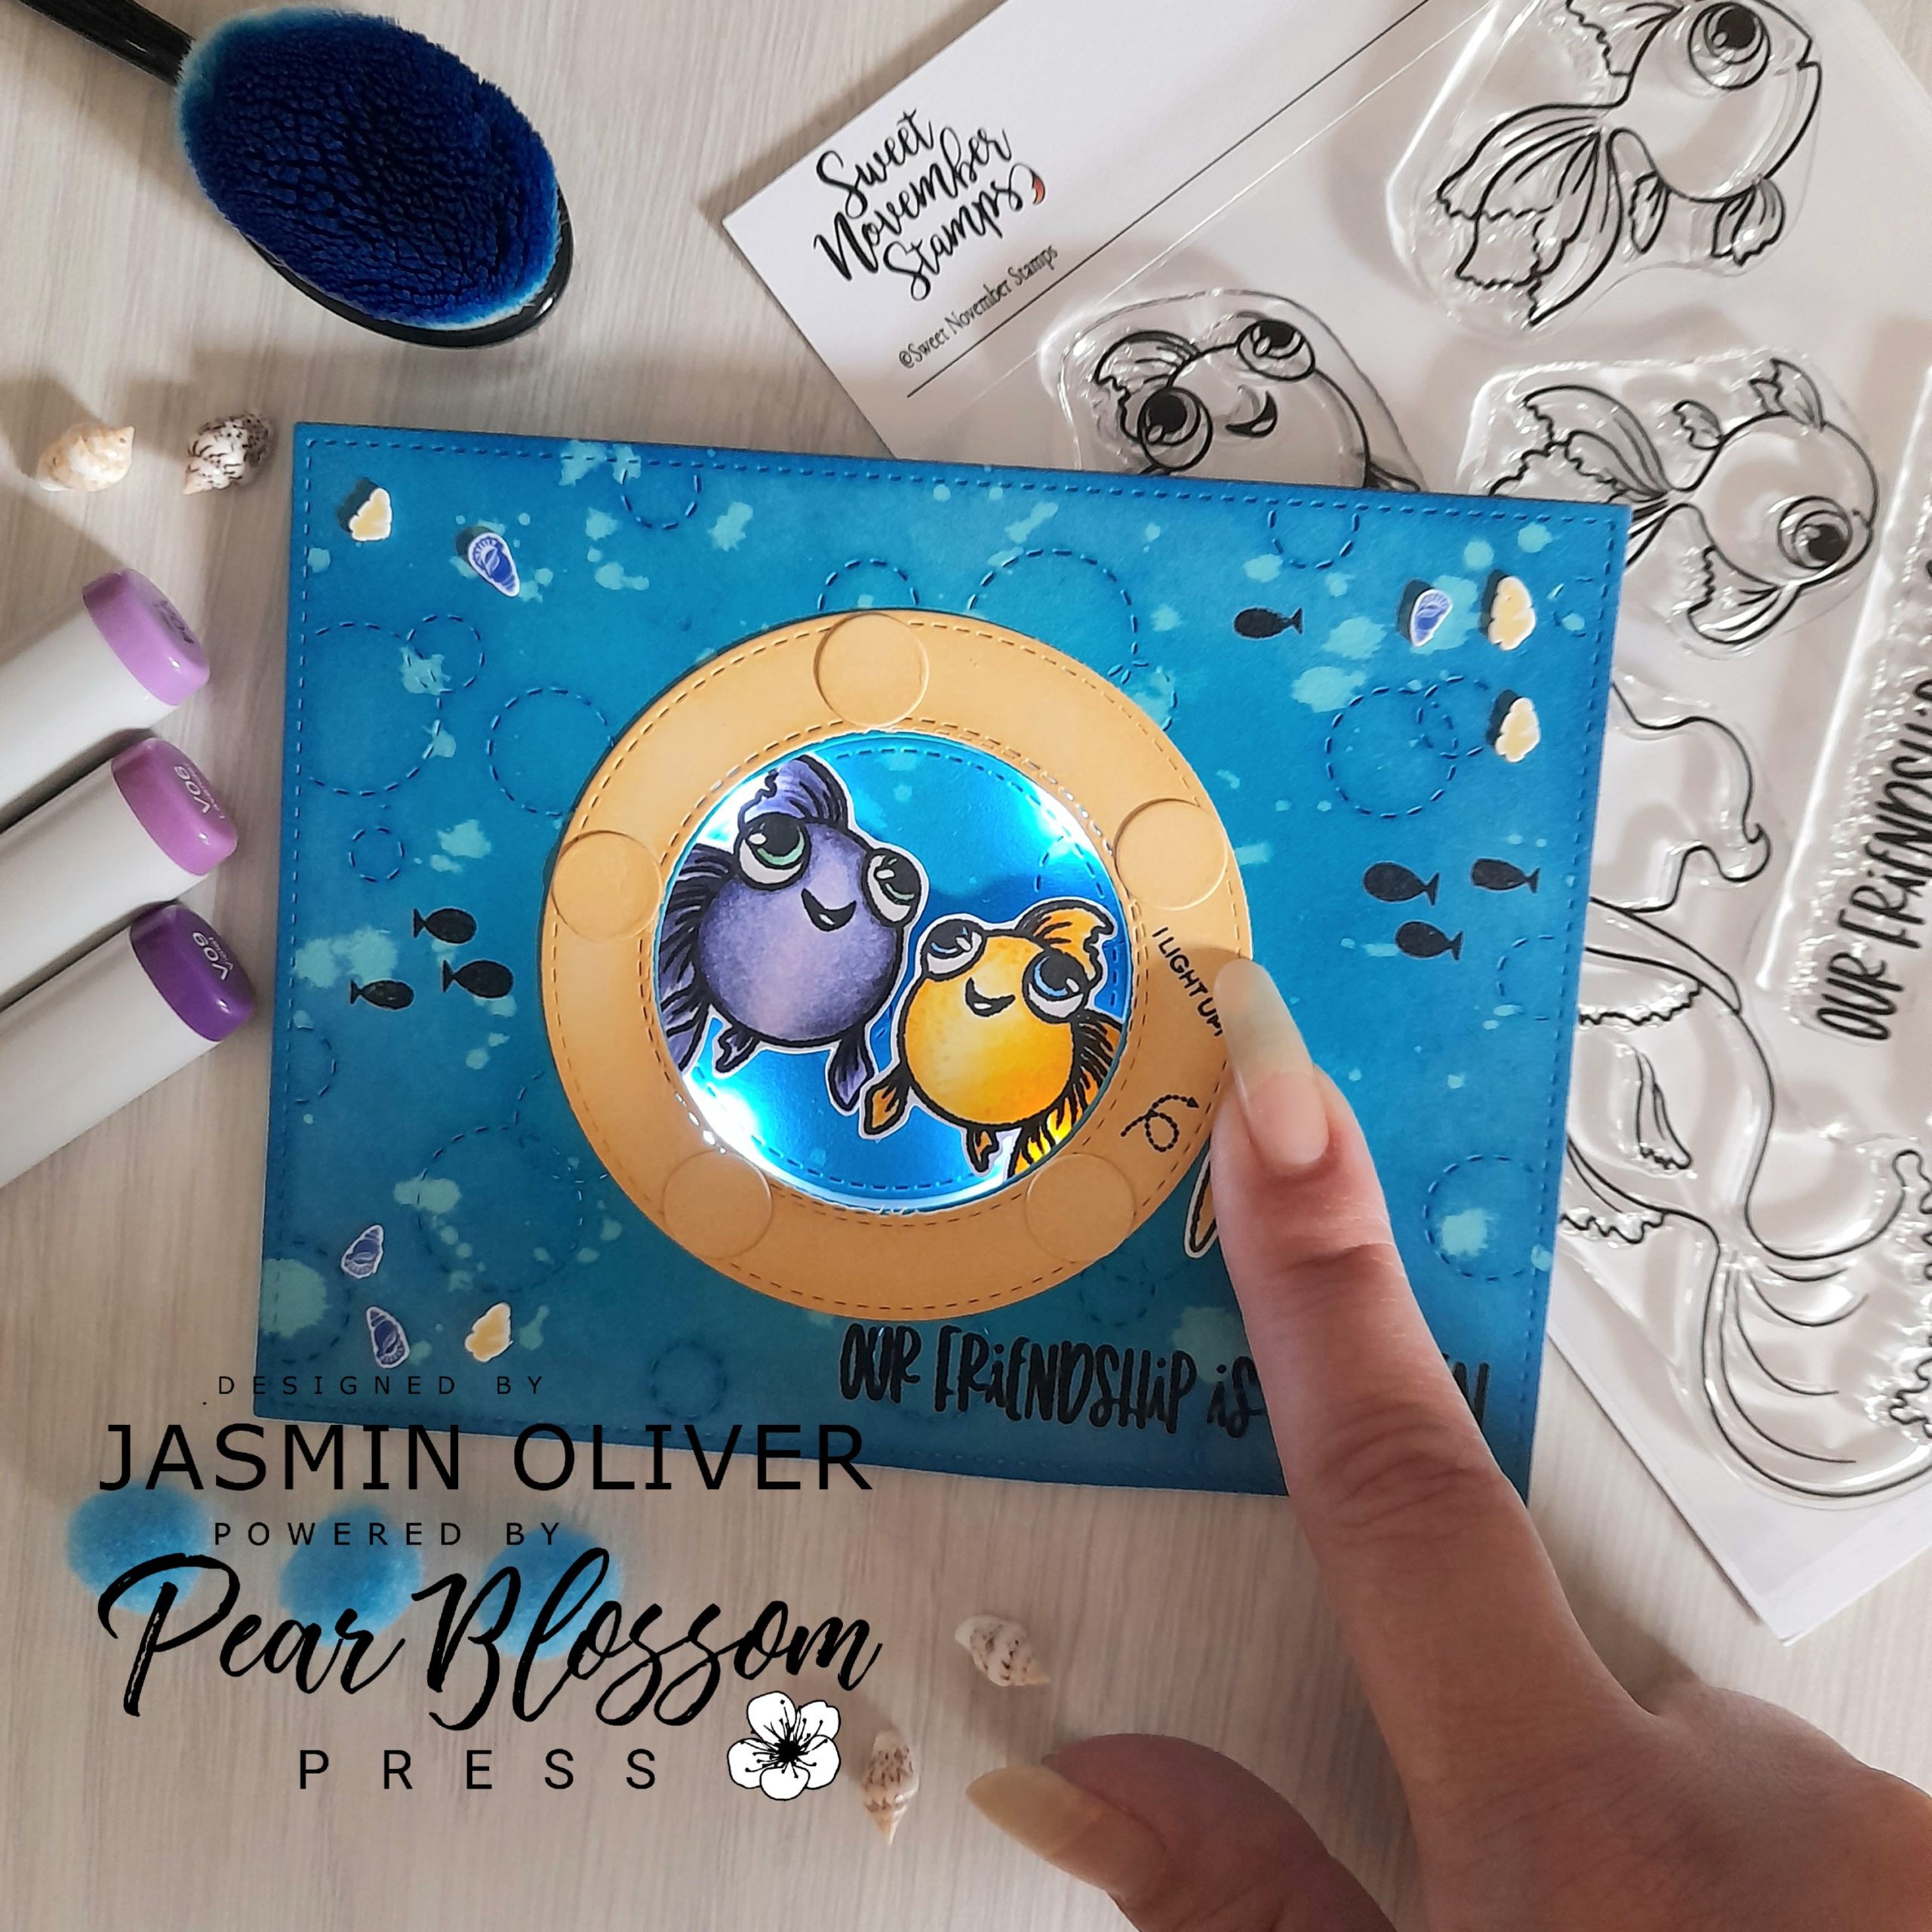
Hey Crafty Friends, it’s Jasmin here, from @jasmincraftymakes. I’m excited to be back guest designing for Pear Blossom Press again! Today’s card features Halo Lights. These are super easy to use and give that something extra to your projects! For this card I wanted to use a stamp set and sentiment that would relate to us all. I think all friendships in the craft world are golden! This stamp set is from Sweet November Stamps called Goldie. So let’s get started! (Light up photo at the end of my post.)

For my background, I started by inking up some coloured card stock; using coloured card stock gives you a primed base to ink up. For additional texture, I flicked water on to react with the inks, and create a splatter effect. Then I used the stitched bubble background die from Heffy Doodle to cut the panel down. Next, I used a stitched circle die that was the same size, or near as, to the Halo Light and cut this centrally from my panel.

Before I start sticking anything together, I coloured my images and stamped my sentiment onto the front of my inked panel. By stamping the sentiment on the card, before sticking it down, it allows for less mistakes later as I prefer to use foam tape, which creates depth between the card base and front panel. I also created an element for the front of the card, almost like a porthole. To do this, I used the same size circle die as above, as well as another from the same set that is two sizes larger. Then I cut a smaller circle five times, and inked all of then with scattered straw. 
With all of the pieces ready, it was time to stick the Halo Light in place. To help line everything up, I used the corner of my waffle flower media mat. (Alternatively, you could use the corner of your stamping platform without the foam insert.) First, I lined up the inked panel on top of my card base, and adhered only the central circle in place for now, setting the rest of the top panel aside. Then, I applied double-sided sticky tape to the back side of the Halo Light and placed it around the middle circle. Next, I applied double thick foam tape around the outside of the Halo Light.
[row]
[column size=”1/2″ stack=”sm”] [/column]
[column size=”1/2″ stack=”sm”] [/column]
[/row]
Before adhering the rest of the front panel to the card base, I used a black pen to mark a dot over the button. (It will get covered up later.)

After adhering the panel in place, I stamped an interactive sentiment and arrow from Heffy Doodle’s Interactively Yours stamp set on the porthole, with the arrow pointing toward the mark for the button. I adhered the images in place, with a little starfish covering the button. To finish up, I added some clay seashell pieces. I love how this came out! Don’t those fish look just mesmerised by those lights?

If you would like to see more details of my card, or links to UK retailers, you can do so here.
Crafty Hugs,
Jas
A great big thanks to Jasmin Oliver for guest designing for us today! If you missed her previous guest post, you can see it here. For more inspiration, check out her blog, and if you’re not already following Jasmin on Instagram, you will definitely want to! Please make sure to use her links above, if you’d like to purchase any of the items used today. Some are affiliate links, and that helps to support her hobby. Don’t worry, there is no additional cost to you; it’s just an awesome way to thank her for the inspiration.
