Hello my crafty friend. It’s that time again; time for a new Heffy Doodlers Challenge! This month, the theme is Bright Ideas. And what better way to kick off the Bright Ideas challenge than with a light-up card, right? Check it out…
[one_half] [/one_half]
[one_half last] [/one_half]
Isn’t it cool? Masculine cards can be hard, but not this one! I’ve broken it down into a few easy steps…
STEP 1.
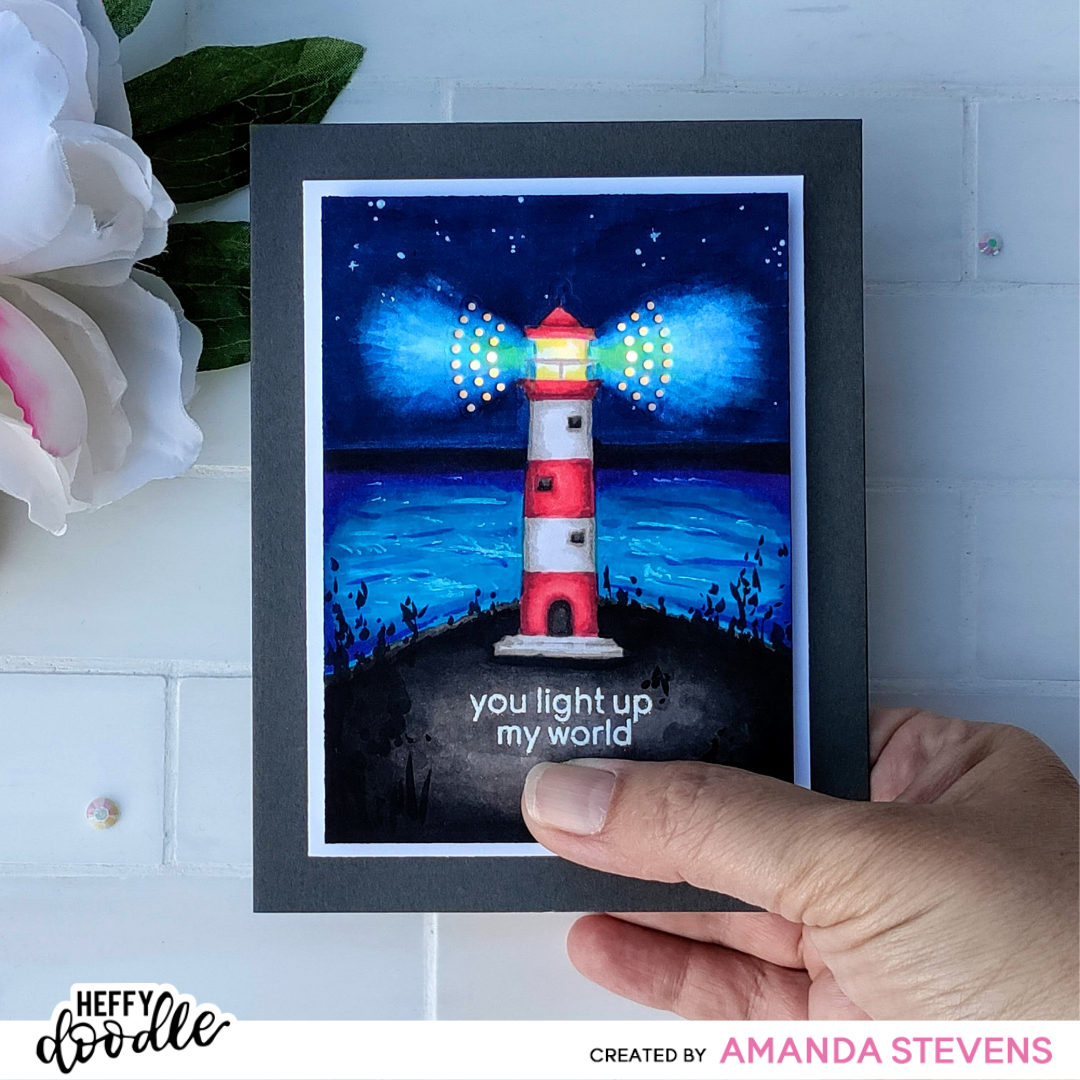
Stamp and Copic color the lighthouse scene, die cut holes for lights.

I stamped the Lil Lighthouse in Warm Glow ink, for a no-line coloring effect. To create the scene around it, I taped off a straight line for the horizon and started coloring the sky first (it’s the furthest away, and I like to color objects from the back to the front). I used multiple shades of blue Copic markers for the sky, leaving lighter colors, and a bit of yellow near the light. Next, I drew a curved line near the base of the lighthouse to separate the cliff from the ocean. Using a black marker, I drew the ocean side of the horizon. Adding a bit of purple, and more blue markers, I colored a bright ocean. It was hard to tell where the horizon was, so I used a pale blue marker to draw a line at the bottom of the sky to lighten it up a bit. The cliff was filled in with several shades of grey markers, and I added a few black dots and squiggles to look like beachy plants. When I think of lighthouses, I see red and white stripes, so that’s how I colored this one. I used the coordinating die to cut out the holes for the light to shine around the top of the lighthouse. After embossing the sentiment and PRESS in white, I used a white gel pen to create stars in the sky (just dots and tiny crosses), and wave caps in the ocean (draw a short line and smudge it with your finger). The white accents really make the scene come to life! The panel is cut to 3½” x 4¾.”
STEP 2.
Tape EZ-Light onto card base.

This part is easy. Glue a 3¾” x 5″ white panel to a dark grey A2 card base. Line up the colored scene on top, and use a pencil to mark through the center holes on either side of the lighthouse. Hover your pencil over the center of the light, remove the colored panel and mark a third dot in between the first two (these three dots mark where the lights will sit). Line the panel back up again, and hover your pencil over the word PRESS. Remove the panel, and mark a dot where the button will sit. Now adhere your EZ-Light in place, using the pencil marks as guides. I prefer clear tape to hold the lights in place, and Skor-tape to adhere the battery unit. Any extra wire can be coiled up and taped down. The hard part is done (actually, the hard part was the coloring; this was easy).
STEP 3.
Add double thick foam tape and vellum to the back of the scene.

Now that the lights are in place, you can cover the holes in your panel with scraps of vellum to help diffuse the light. Add double thick foam tape (finally back in stock, yesss!!!) around the panel, avoiding the battery pack area. Notice the small piece of foam tape just below the button on my battery pack? It can be hard to line things up on the scene, so don’t be afraid to put foam on the card base if it’s easier for you.
STEP 4.
Attach scene to card base, and press the button.
[one_fourth][/one_fourth]
[one_half]
[/one_half]
[one_fourth last][/one_fourth]
Last step – remove the release paper from the foam tape and adhere it to the card base. You’re done! Press that button and watch it light up!!!
Here are some better photos of the finished card…
[one_half][/one_half]
[one_half last][/one_half]
[one_half] [/one_half]
[one_half last] [/one_half]
What do you think? Not hard, right? Are you inspired to play along? (Don’t worry, you don’t need to make a light-up card, or even use the same stamp set.) Head on over to the Heffy Doodlers Facebook group and enter your card in the May 2021 Challenge Album; it will be pinned to the top. Visit the Heffy Doodle blog for more information, contest details, and to see who won the April Challenge!

Thanks so much for stopping by today! I’ll be back later this week with several more fun cards to share. See you then…
This site uses affiliate links whenever possible (at no additional cost to you), but only for products I actually use and love.
