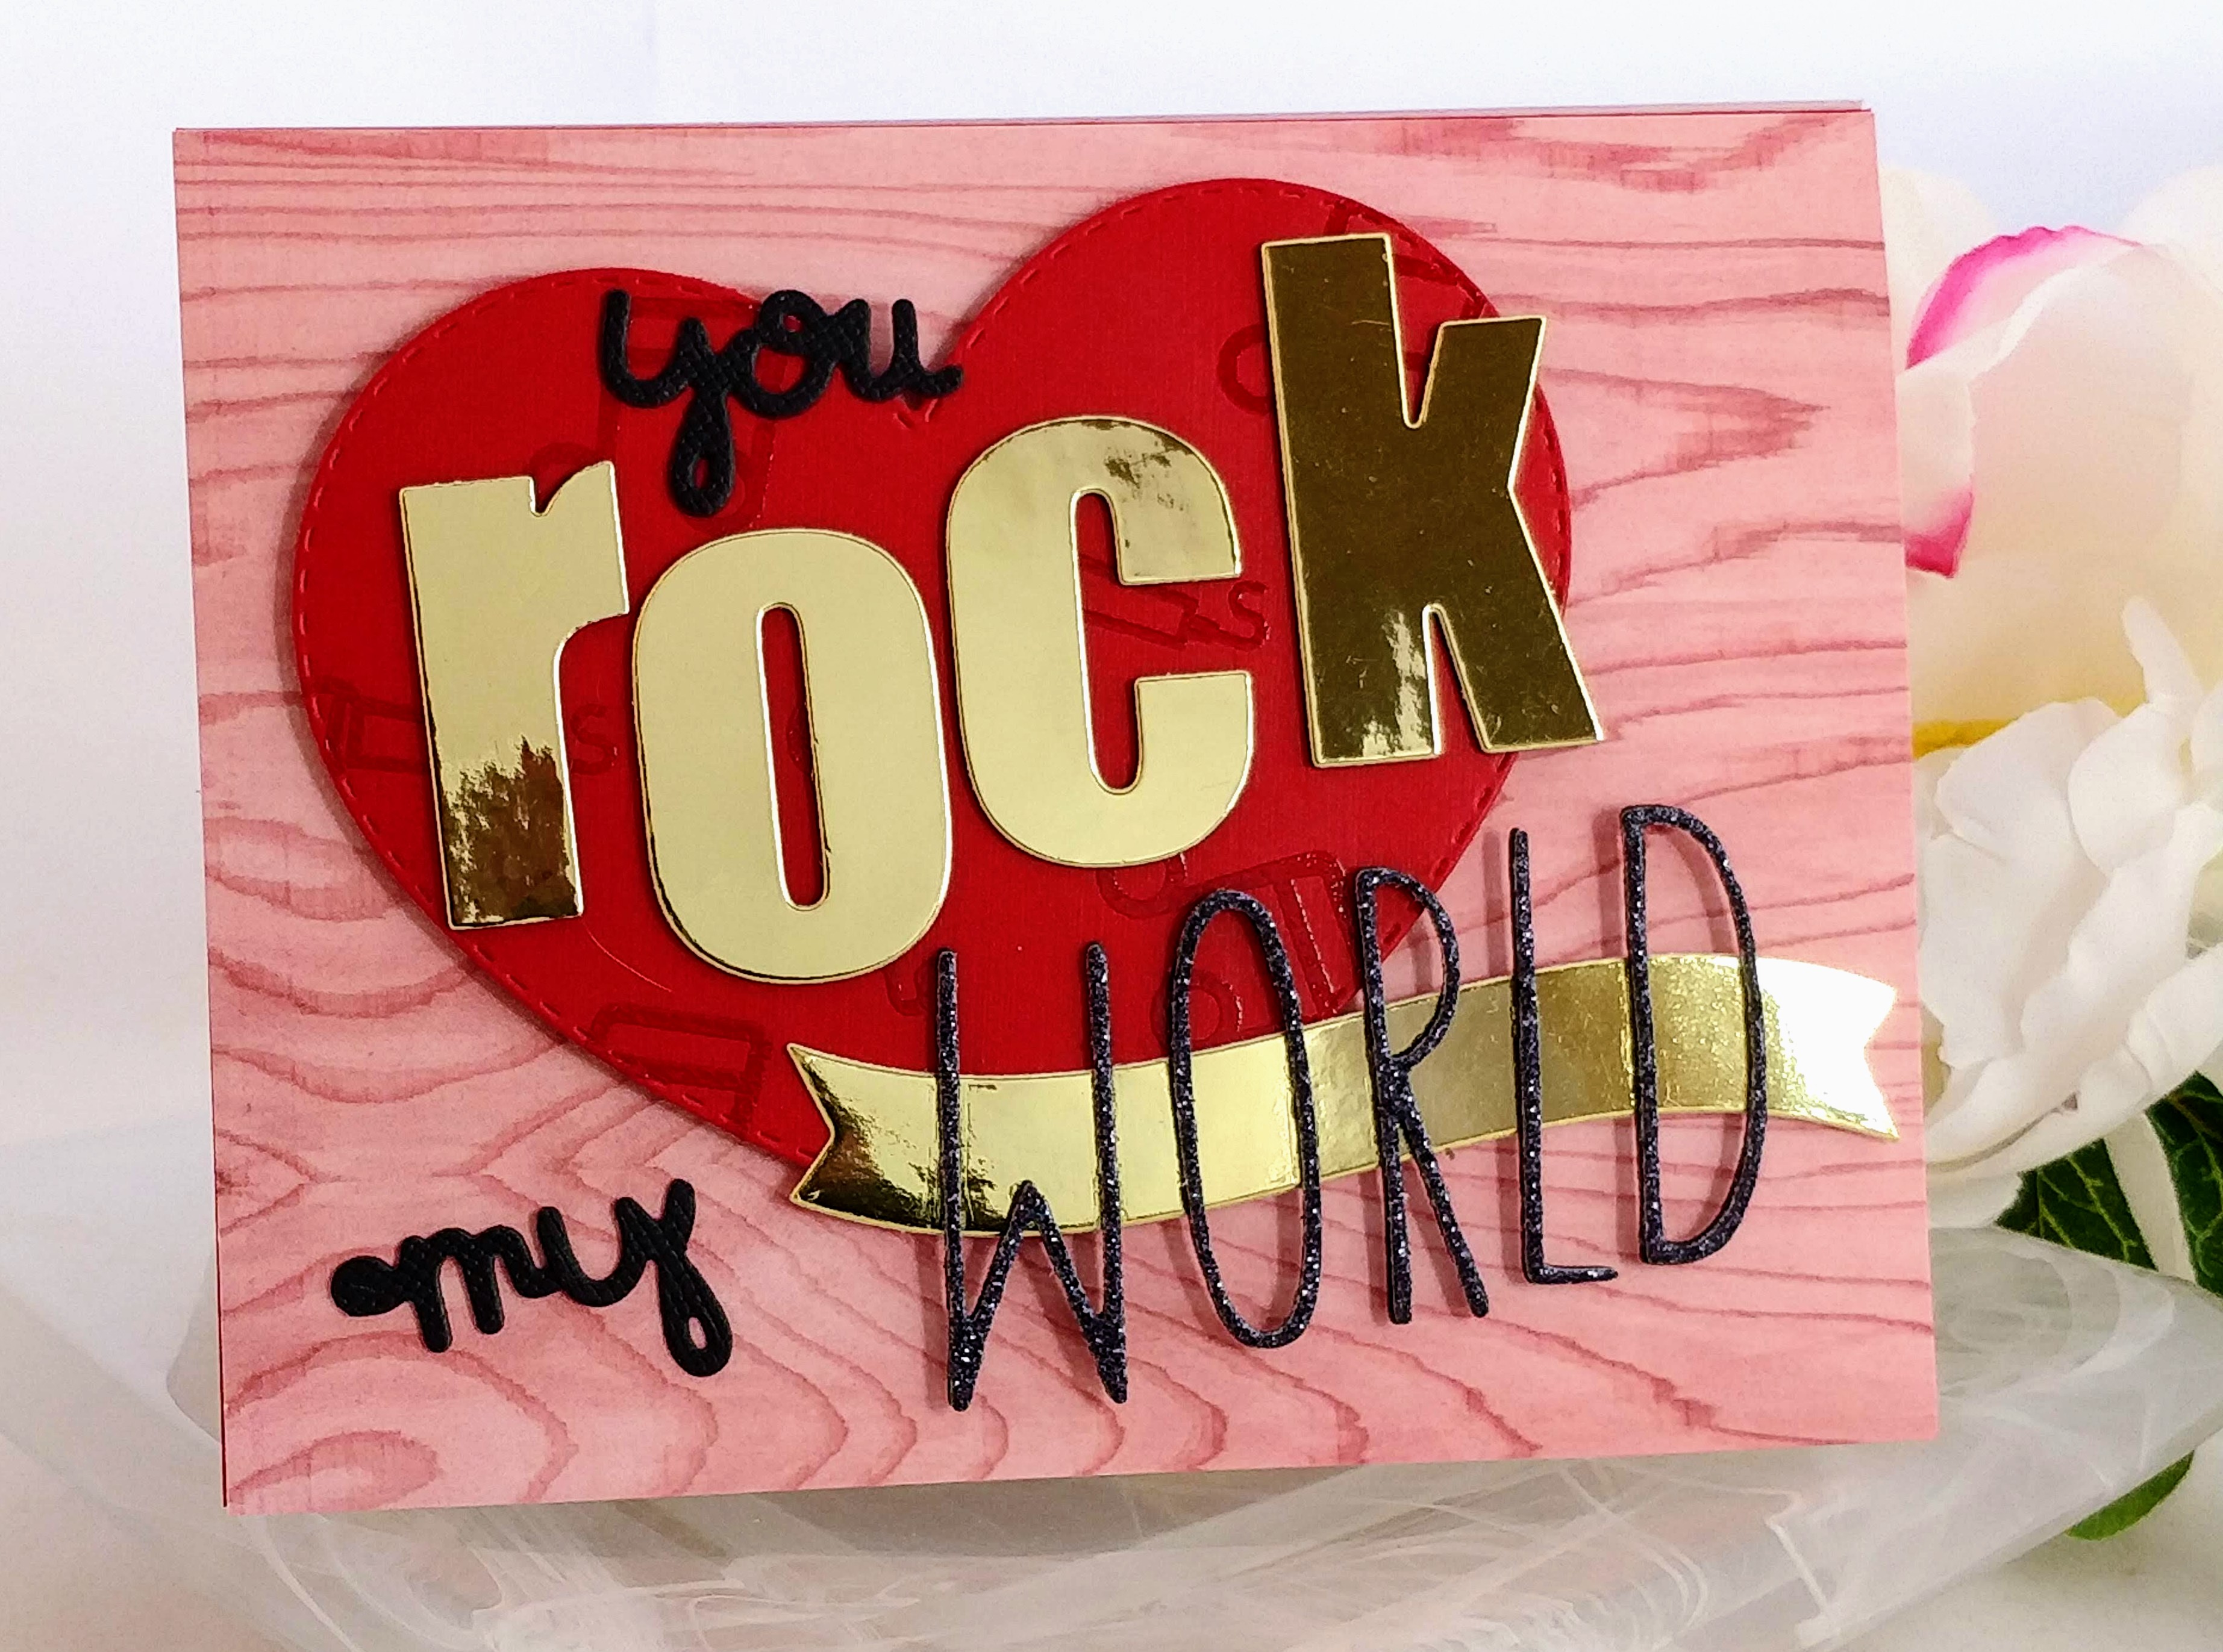
Hello my crafty friend! Today I’m sharing the valentine I made for my husband this year. As is, it would work great for an anniversary or even a special thank you card, but if you switch out the heart for a star, and change the sentiments, you could make it perfect for lots of other occasions too. (You rock, hope your birthday rocks, etc.)

The key to making the record spin when you pull the cord, is to build it on a yo-yo. You know, the toy on the string? Unfortunately, I haven’t figured out how to make it self-wind though. (If you do, please let me know! 😉 )
I’d made a yo-yo spinner years ago, and when I saw MFT’s new Turntable die set, I immediately thought of this technique. I didn’t have the set, so I decided to get creative and pull from my stash to come up with my own version. I Googled record player images and tried to match up dies to the main parts. I also tried to keep the proportions accurate, as much as possible. If you don’t have the MFT set, go through your dies and see if you can find pieces that will get the gist across. Honestly, if you’ve got nesting circles, you’re good. In this video, I’ll walk you through the dies I used and the whole process…
Now I won’t lie, this card took me a few hours to put together, and as you could see in the video, I had to adjust and redesign a little as I went. It’s been at least 15 years since I made the last yo-yo card, so before I started, I searched for a refresher video. I found this one from France Martin, it was almost exactly the same way I remember, except she added a clear acetate washer to help the yo-yo spin. Great idea! So I incorporated it; thanks France!!! (Be sure to check out her video, she makes an absolutely gorgeous snowflake spinner in it!)
I decided to use Jennifer McGuire’s Inside Shadow Box design to build my record player on. It makes it look more like a record player when you open the card and the turntable pops up. Plus, the little box created is the perfect spot to hide the brads underneath, so you don’t have them poking through the back. I adjusted some of the measurements for the score lines to create a slightly larger platform to build the record player on.
You need two pieces of cardstock to make up a shadow box card, the top piece and the bottom piece. Cut both to 8 ½” x 5 ½.” Score the top piece in the center (at 4 ¼”) to create an A2 sized notecard. Then open your notecard and trim a 3/8″ strip off the back edge. Take your bottom piece and score it at 3/8,” 4 ¼,” and 4 5/8.” When you fold along each score line, you will create a little four-sided box. Trim a sliver from the 3/8″ edge to help it nestle perfectly inside the top portion of your card. While you still have your trimmer out, cut another piece of cardstock to 4 ¼” x 5 ½” for the card front.
In the video, I showed you how to assemble the turntable pieces onto the shadow box base and then how to assemble and decorate the card. The dies I used are as follows…
Card Front:
- Stitched Heart die from Pink & Main (2nd largest in the set) – cut (1)
- “You” and “my” from Paper Smooches (I pieced “my” together from the words “handsome” and “you”) – cut (2) sets
- “Rock” from Altenew’s Bold Alphabet – cut (3) sets
- “World” from Waffle Flower’s Cutaway Alpha set (I used punctuation pieces for the toggle switch inside the card too) – cut (3) sets of letters, cut (1) straight accent mark, and (1) degree mark
- Banner from Lawn Fawn’s Shadow Box Card Ocean Add-On (I used the bubbles from this set for knobs inside the card too) – cut (1) banner, (1) large bubble from red stock, (2) smaller bubbles from red stock and (2) from the gold bar across the bottom of the turntable
Turntable & Yo-Yo:
- Nesting Circle dies from We R Memory Keepers – cut (1) circle 3 ¾” from gold, (2) circles 3 ½” from black, (1) circle 1 ¼” from white, (2) circles 1 ¼” from black, (1) circle 1 ¼” from acetate, (1) circle 1″ from gold, (3) circles 1/2″ from gold
- Gold bar across bottom of turntable from MFT Speech Bubble (I partially cut the bubble, then turned it 180º and cut the other side) – cut (1), then cut the small bubbles mentioned above out where you want knobs
- Needle head from the bird in Lori Whitlock’s Waterfall set (I cut the bird, then I cut it down with the end of the speech bubble above) – cut (1)
- Needle arm and scalloped base pieces from Lynda Kanase’s Flower Basket Die – cut (2) flower stems, (1) black flower center, and (1) red flower center
- Heart from Simon Says Stamp – cut (2)
In addition to the dies, I used the Pitch Please stamp set from Ink Road Stamps. I stamped my images with a combination of Versamark ink, Festive Berries Distress Oxide ink, and VersaFine Clair Nocturne ink, then embossed them all with clear embossing powder. To help make the job easier, I used a needle tool, locking tweezers, and an anti-static powder tool. For adhesives, I used PVA glue in a Fineline bottle, red Super Tape, foam tape, and foam dots. I ended up using (2) gold brads that were 3/4″ long for the record and needle arm to spin around. The twine I used measures 21″ long. Lol, maybe that was part of the reason I needed to switch the foam dot in the yo-yo to fun foam!
In the video, you often saw me working on a clipboard that I wrapped my Ranger Craft Mat around. I got that idea from Mary Polonco. Definitely check out her YouTube channel; she makes great cards and has tons of fantastic tips to share!
Okay, what did I forget? I think I covered it all. If I missed anything, or you have questions, please leave them in the comments below. And if you make a yo-yo spinner card, please tag me on Facebook or Instagram! I’d really love to see your creations!!! If you’d like to make sure you don’t miss any of my new cards, you can subscribe to my newsletter (in the upper right corner of this page) or my YouTube channel. Until next time, stay crafty my friend! Here’s a clip of my finished card in action again…
This site uses affiliate links whenever possible, but only for products I actually use and love.

Holy moly woman! I thought you were using the MFT die, but you designed this record player all on your own! (Though, I should have known better. lol) Brilliant card and design; I am sure your husband LOVED it!
Thank you Marcia! Yep, he loves it. Lol, didn’t want to give it back to me to photograph and fix.
I really love this idea ! Came out awesome
Thanks Enie! <3 <3 <3
What an amazing card! So cute and clever! Thanks so much for sharing your creativity!