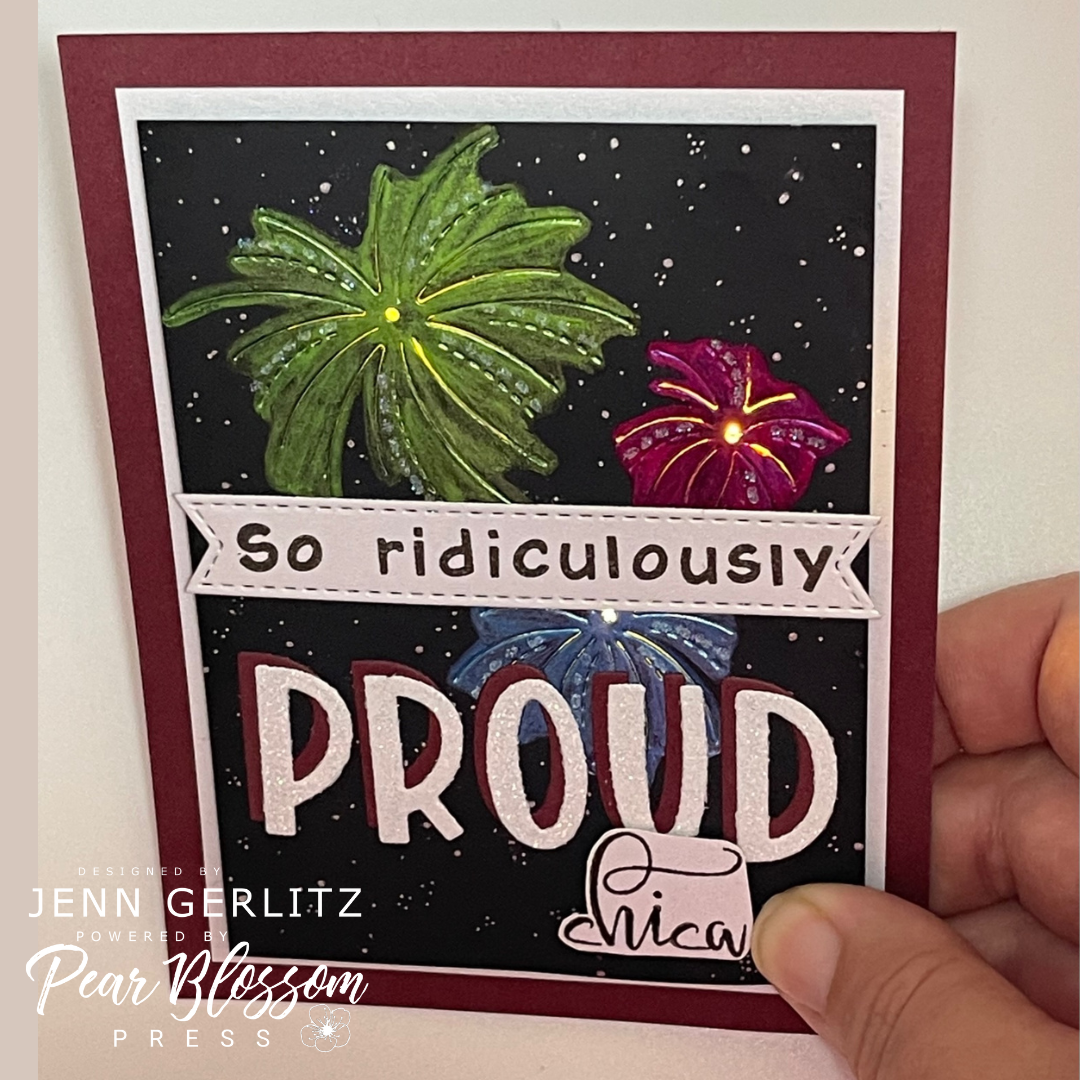
We’re pleased to welcome Jenn Gerlitz from CaliGerl Creations as a guest designer! Today, she’s sharing a gorgeous light-up card, featuring our EZ-Lights. Take it away Jenn…
This sparkling gem of a CONGRATS card is easy to create. Adding EZ-Lights will bring these fireworks to life and a smile to their faces… A great card for grads, engagements, new jobs, or any circumstance that calls for next level celebration by simply changing the sentiment.
Supply List
First things first, let’s gather the supplies:
[row]
[column size=”1/2″ stack=”sm”]
EZ Lights (5 pack) – PBP
Double Thick Foam Tape – PBP
Perfect Sentiment Paper Black – PBP
Essential Gel Pen – PBP
White Shimmer Paper Metallic – AMZN
Chili Pepper Cardstock – SBC
Sparkle Cardstock (Pixie Dust) – SBC
Double Sided Tape – SBC
Kokuyo Dotliner Strong Adhesive Tape Runner – AMZN
[/column]
[column size=”1/2″ stack=”sm”]
Metallic Watercolor (Christmas Series Dot Card) – Iuile
Water Brush – SBC
Prisma Glitter – LF
Sakura Quickie Glue Pen – SBC
Lawn Fawndamentals Glue Tube – SBC
Tsukineko VersaFine Ink (Onyx Black) – SBC
Lawn Fawndamentals Pigment Ink (Yeti) – SBC
Stitched Fireworks Die – SBC
Henry’s ABCs Die – SBC
[/column]
[/row]

Construction (a.k.a. the “how to”s)
Cutting & Die Cutting
- Cut Chili Pepper Cardstock to 4 ¼ & 5 ½ and set aside, White Shimmer Paper to 3 ¾ & 4 ¾ and Perfect Sentiment Cardstock (Black) 3 ½ & 4 ½.
- Using Stitched Fireworks dies, stagger them on the Perfect Sentiment Cardstock so that they are almost touching one another in a cluster layout over the top ⅔ of the panel.
- Using Henry’s ABCs dies to cut two sets of P-R-O-U-D
- Using Essential Stitched Sentiment Strips dies to cut stitched banner.
Stamping
- Stamp your banner with Harold’s ABCs stamps, “Push Here” with Yeti Lawn Fawn Ink and “chica” with Calli Alphabet. Any blank spots where you feel the letters need to be joined can be fixed with using a Copic Fineliner.
Quick Tip: if your stamp pad is really juicy, lightly tap the stamp with the ink pad and gently press onto cardstock. Too much ink or pressure will cause smudging.
Painting & Embellishing
- Paint the fireworks with metallic paint. Repeat until you’re happy with coverage.
- With the Essential Gel Pen, create random dots on the firework panel.
- Use the Quickie Glue Pen & Prisma Glitter to add sparkle beside the stitched lines in the fireworks.
HINT: After die cutting, there was a subtle outline around each firework and I used this to create “edges” of the fireworks. A heat tool will help speed up drying.
Assembly & Electrical
- Center the firework panel on top of the White Shimmer panel, using a pencil and a light pressure, trace the corners of the firework panel and add a small mark in the center of each firework on the White Shimmer panel.
- With double sided tape, position the battery pack, purple button down, in the right corner. Leave space between the battery pack and lines.
- Place one light on each small mark and secure wires with wider double sided tape toward the center of the card.
- Use Double Thick Foam to create space for the battery between the fireworks panel and the white panel. Don’t take the non-stick paper off the Double Thick Foam until you’ve double checked the position of the lights.. Then secure the firework panel to the rest of the card.
- Finish by adding sentiments.
And there you have it, attach your masterpiece to a card base and it’s ready to light up somebody’s day!
Here are photos of the finished card…
[row]
[column size=”1/2″ stack=”sm”] [/column]
[column size=”1/2″ stack=”sm”] [/column]
[/row]
A great big thanks to Jenn Gerlitz from CaliGerl Creations for guest designing for us today! She’ll be back soon with another fun card to share! If you are not already following Jenn on Instagram, you will definitely want to. You can also visit her Etsy shop! Please make sure to use her links above, if you’d like to purchase any of the items used today. Some are affiliate links, and that helps to support her hobby. Don’t worry, there is no additional cost to you; it’s just an awesome way to thank her for the inspiration.
