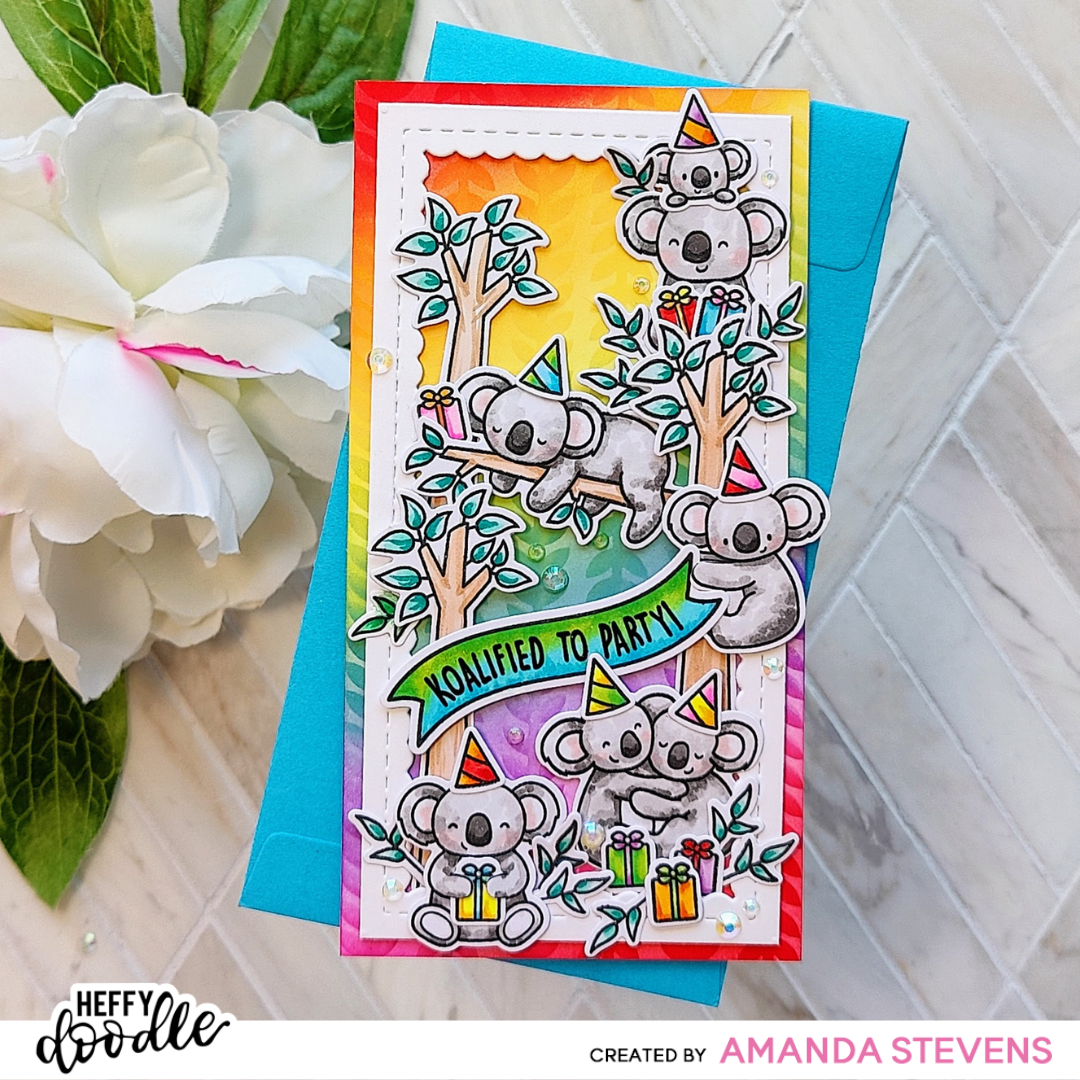
There are few things in the cardmaking world that have a more striking effect than a full panel rainbow background, right? But they can also pose a challenge if your intended focal point is colorful too. The best way to let your bright rainbow shine is to top it with neutral images or sentiments so they don’t compete. Let me show you how I balanced a fun birthday scene on my bright ink blended panel for this card…

Isn’t it cute? I just love it! Would you like to see how I created it? I’ll show you, but before we head into the craft room, grab your supplies…
SUPPLY LIST
Koality Hugs Stamp Set
Koality Hugs Die Set
Vertical Vines Stencil
Wavy Banner Dies
Slimline Scalloped Peekaboo Dies
Distress Oxide Ink Pads
Blending Brushes
Copic Markers
Iridescent Gems
Let’s start with the background. Begin by ink blending a rainbow of colors onto your panel in diagonal lines. The more colors you use, the more of a bold gradient you can create. (Be sure to order them so you don’t end up with two colors next to each other that will turn brown when blended.) Because we will be stenciling on top, your blend doesn’t have to be overly smooth. Often times, people are afraid of applying too much ink when they know they will be layering more on top. Don’t worry about that. The stenciling will still show up, even on top of a heavy coat of ink. I do suggest tapping excess ink off your brush anytime you re-ink it though, before touching your panel. This will help you avoid hot spots and brush marks. Again, this blend doesn’t have to be perfect.
Once you feel like you have a good base coat of color on your panel, position your stencil on top and begin to ink through using the same colors. I’ve found it helpful to use a silicone stencil mat on a clipboard, and Pixie Spray on my stencils. For this particular stencil, instead of using circular motions, lightly brush in the same direction as the vines to help prevent it from shifting. Since I chose to make a mini-slimline card, my panel is longer than my stencil. I started at the top and blended about three quarters of the way down, before cleaning and repositioning my stencil to cover the bottom portion of the panel. Be sure to choose a stencil that repeats when you want to extend the pattern. (If your stencil doesn’t have a repeating pattern, consider only partially stenciling your panel and allowing the pattern to fade.) You can see the rainbow of Distress Oxide pads I used below.
[row]
[column size=”1/2″ stack=”sm”] [/column]
[column size=”1/2″ stack=”sm”] [/column]
[/row]
[row]
[column size=”1/2″ stack=”sm”] [/column]
[column size=”1/2″ stack=”sm”] [/column]
[/row]
With my panel blended and stenciled, I trimmed it down to 3¼” by 6¼” and glued it to a mini-slimline card base, measuring the same size. Then it was time to stamp and color my images. As I mentioned above, colorful images would compete with the bold rainbow background, so I chose to color soft grey koalas for my party scene. There are pops of color for the birthday hats, gifts, and sentiment banner, but the white border from the coordinating dies helps keep them visible. You can see the Copic markers I used for my images below…
[row]
[column size=”1/2″ stack=”sm”] [/column]
[column size=”1/2″ stack=”sm”] [/column]
[/row]
With the images colored, and cut with the coordinating dies, I just needed to die cut the scalloped frame before building the scene. The die I used is designed for full length slimline cards, but is easy to trim down to fit a mini with partial die cutting. I popped it up onto the rainbow background with thin foam tape, then tucked in my images. Some have more foam tape to pop them up too. After that, a few scattered iridescent gems finish the card and add radiance to my rainbow. What do you think? It’s even cuter when you see it paired up with a colorful envelope!
[row]
[column size=”1/2″ stack=”sm”][/column]
[column size=”1/2″ stack=”sm”] [/column]
[/row]
I loved the rainbow background so much that I decided to use it as inspiration for this month’s Heffy Doodlers Challenge! I hope you are inspired to give this a try and join us for the challenge! Head on over to the Heffy Doodle blog for all of the details… heffydoodle.com

Thanks so much for stopping by today! I shared another fun birthday card earlier today. Be sure to check it out; it lights up! I’ll be back later this week with more cards to share. See you soon!
This site uses affiliate links whenever possible (at no additional cost to you), but only for products I actually use and love.

Such a party on a card! Wooo FUNN!