Hello my crafty buddies! It’s time for another Lynda Kanase Design Team Hop and I’ve got a fun light-up card for you today! I’m also going to show you an easy way to build your own background with tiny dies. If you’re like me, you love the look of background dies, but they can get pricey. Especially, if they have multiple layers. This trick is perfect for the little dies you already have in your stash!
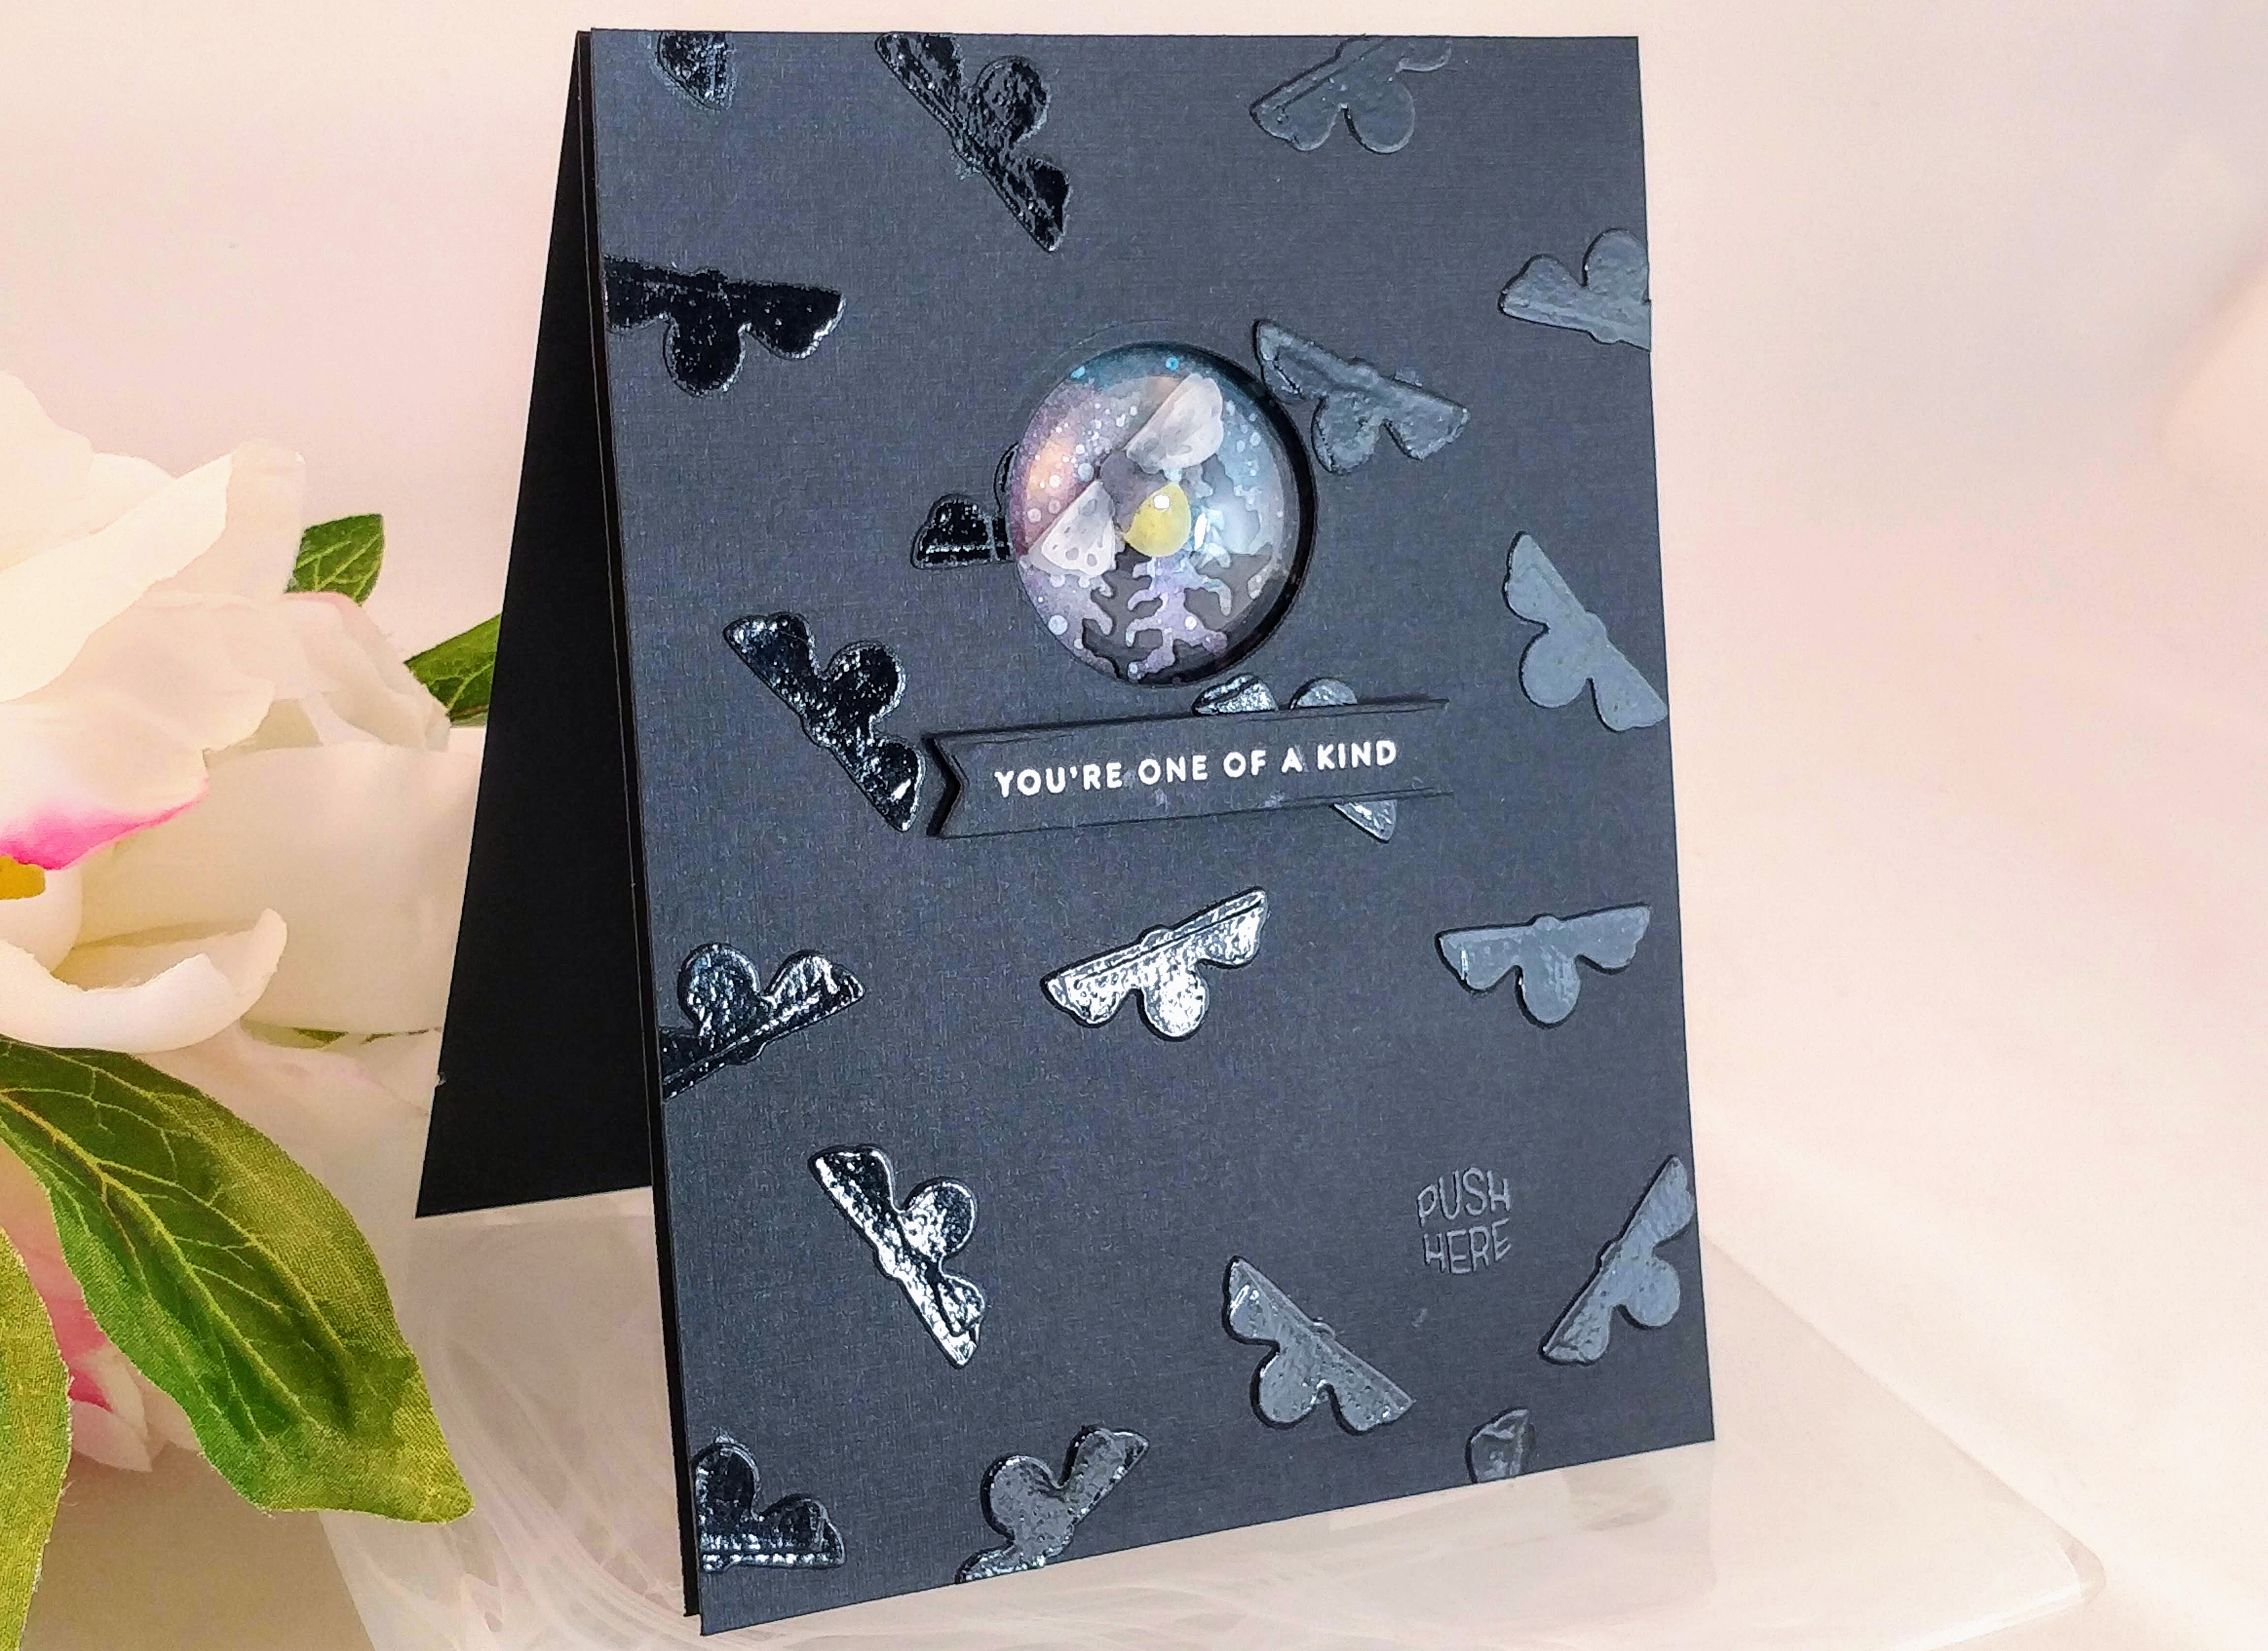
I’m working with Lynda’s Tiny Nature Die Set. All of the pieces were designed to fit under Dimensional Domes, so of course I wanted to put one of the cute critters under a dome. I decided to turn the bee into a firefly and create a small nighttime scene behind him. Then I thought it would be really fun if his rear end actually lit up. I knew that if the scene was going to fit under the dome, it would have to be small, so I decided on a monochromatic background and tiny sentiment, to keep the focus on the dome area. That’s when I came up with the idea of using the same bee die to create the background too! Here’s a short video showing you how I made this card…Here’s a short video showing you how I made this card…
Easy, right? I really like the way this one turned out. I plan to make another one kind of like this, but substituting butterflies for the fireflies and using a white on white background.
I promised links to the products I used in the video. To recreate this card, you’ll need Lynda’s Tiny Nature Die Set, a Big Shot (or similar die cutting machine), Dimensional Domes, a banner die, white and clear embossing powders, a sentiment stamp, a push here stamp, and Versamark ink. To light up the card, I used a Power Pack Kit. It comes with everything needed to light up three cards, but if you already have Chibitronics lights, you can get the Power Packs by themselves and avoid having to create your own paper switch. In the video, you saw me using PVA glue in a Fineline bottle; that’s my favorite wet glue for paper to paper. I used this foam tape, but I really wish I had the black, extra thick foam tape from Brutus Monroe (it comes in white too). As far as paper goes, I grabbed black cardstock and vellum from my stash. The galaxy background was part of a bigger sheet I created with Color Burst watercolor powders, Black Distress ink, and white acrylic paint.

I hope I’ve inspired you to play with the small dies in your stash to create your own backgrounds, and maybe to make a light-up card or two! As I mentioned earlier, this is part of the Lynda Kanase Design Team Hop for June. For more inspiration using the Tiny Nature Die Set, hop along with us and check out the beautiful projects the rest of the team has created!
Amanda Stevens – you are here
This site uses affiliate links whenever possible (at no additional cost to you), but only for products I actually use and love. Also, I’m really excited to see one of my favorite scrapbook stores has an online shop now! I used to teach at Scrapper’s Edge when I lived in Northern California, and I can honestly say, it is one of the coolest shops I’ve ever been in! It’s huge and full of papercrafting supplies! You may notice that some of my links direct you to Scrapper’s Edge. These are not affiliate links, just me letting you know of another awesome online retailer available to you! Sondra ships orders fast, and if there is something you’re looking for, give her a call and she’ll do her best to get it in for you! Iif you’re ever in Eureka, California, stop in and tell them I sent you 🙂

Great card, Amanda! Thanks for metntioning Scrapper’s Edge. I appreciate your kind words!!!
So excited to see the Scrapper’s Edge online store!
I love this !