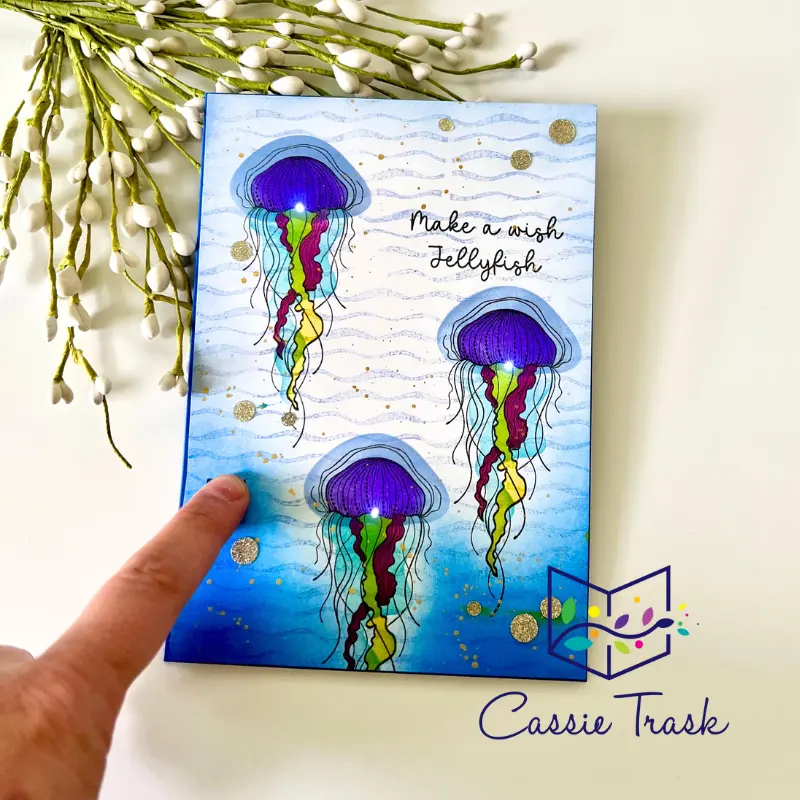
As soon as I saw these jellyfish stamps and stencils, I knew I had to make them twinkly using the Twinkle Light! It’s Cassie Trask here, sharing another video tutorial here on Amanda’s Blog! I started out by stamping my background using the Wavy Lines background stamp onto a piece of cardstock that measures 5×7 inches. I’ll trim that down a tiny bit later on. After stamping my background and blending my edges, I stamped my jellyfish and the sentiment from the Jellyfish Wish stamp set. What’s great about this set is there is a matching stencil to make ink blending super easy. I got a little carried away with my blending of the yellow ink and ended up with a bit of a blunder, but I didn’t start over. I love trying to come up with creative ways to cover mistakes or working with what you have. I ended up splattering some gold paint on the background and then eventually covering my mistake with some embellishments at the very end.

If you’d like to see exactly how this came together with those amazing Twinkle Lights, you can watch it here or over on my YouTube Channel.
I hope this inspires you to want to get a little inky and pop some lights on your projects!
Thanks for stopping by!
Cassie Trask
*affiliate links are used when possible at no additional cost to you. . .thanks for your support!

