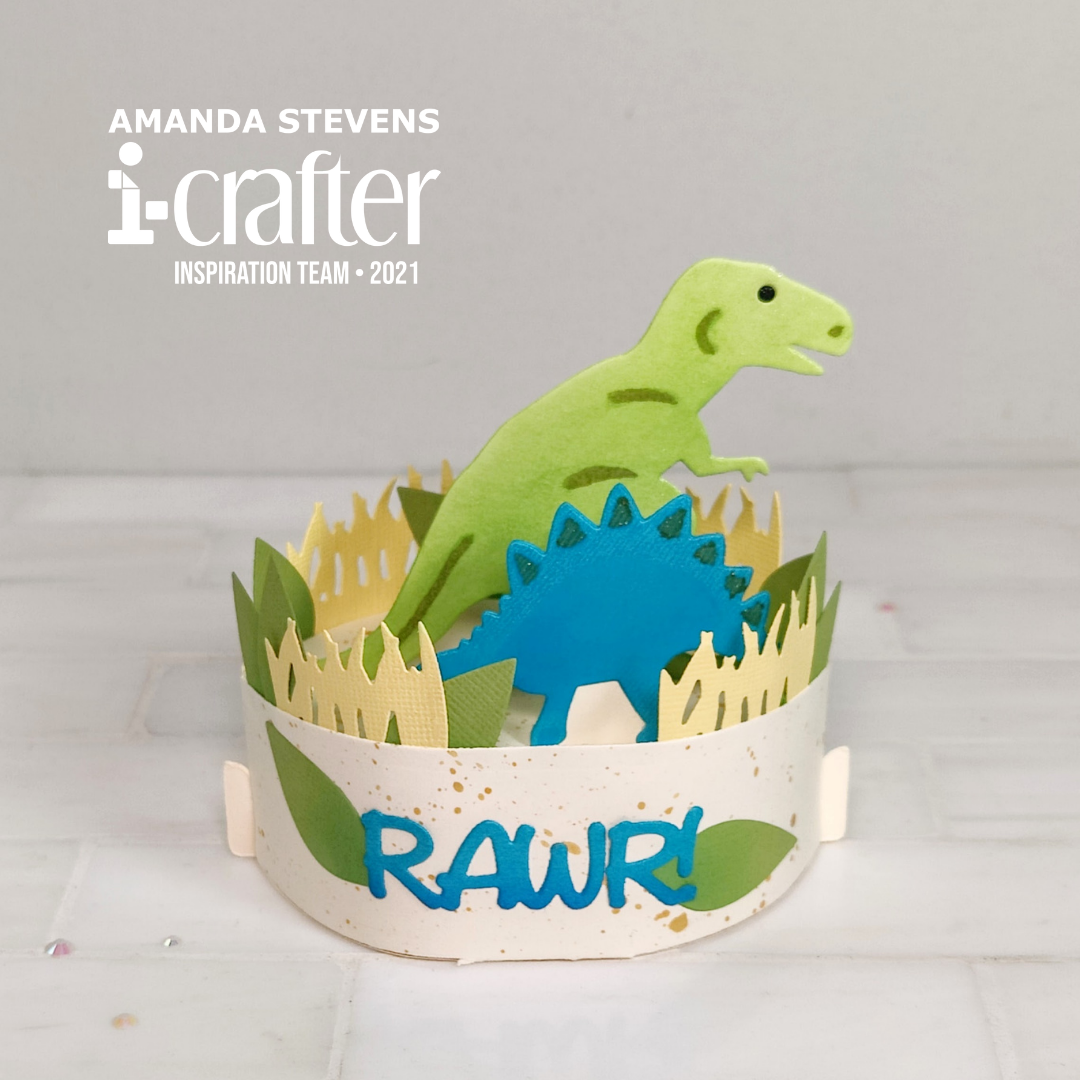
Have you ever made an oval box card? It’s easier than you might think, and really cool! Let me walk you through the steps, as we create an awesome dinosaur card, using dies from i-crafter. Look at how fun it is when it pops up…
I’m sending this card to my nephew for his birthday. I hope he likes it! I took step-by-step photos so I could show you how simple it was to assemble. Let’s dive in!
First, die cut your pieces. You’ll need a pair of the Oval Box Pops base, one with the side slot cut in the top. You’ll also need a tab to fit into the slot (I trimmed it down a little), and some leaves (included in the Oval Box Pops set). From the Dinosaur Add-on set, cut a pair of large and small dinosaurs (you want two of each). Cut several pieces of grass, and the word RAWR! too. Before assembly, I blended darker ink to the bottom of the word, and leaves for shading. Using the dies as stencils, I added details to the front of one green and blue dinosaur, and the back of the other two (they will end up glued together). In the photo below, you can see the two blue dinosaurs. The green ones are already glued together, with a piece of tape inside, holding the eyes in place. I also added gold splatter to the base pieces, for interest and texture.
 To assemble the box base, you’ll want to fold all four score lines away from you (mountain folds) on the two larger pieces. This will allow them to form what looks sort of like square tubes. Apply glue on the small flap and adhere it to the long wide end, folding it flat. Notice that the flap doesn’t sit at the top of the long end. It’s not supposed to.
[row]
[column size=”1/2″ stack=”sm”] [/column]
[column size=”1/2″ stack=”sm”] [/column]
[/row]
[row]
[column size=”1/2″ stack=”sm”] [/column]
[column size=”1/2″ stack=”sm”] [/column]
[/row]
You’ll want to repeat the steps for the second base piece, and when you butt them up against each other, you’ll see how the card comes together.

Before gluing it together, add in the tab and sandwich it between the two small dinosaurs. It helps to fold everything flat as you glue.
[row]
[column size=”1/3″ stack=”sm”] [/column]
[column size=”1/3″ stack=”sm”] [/column]
[column size=”1/3″ stack=”sm”] [/column]
[/row]
Then, you can add the large dinosaur to one half, making sure his tail doesn’t extend beyond the base, before gluing the oval halves together.
[row]
[column size=”1/3″ stack=”sm”] [/column]
[column size=”1/3″ stack=”sm”] [/column]
[column size=”1/3″ stack=”sm”] [/column]
[/row]
At this point, I like to glue on the decorative pieces, before I glue the side tabs together. It’s easier to get things lined up. Locking tweezers help too. I glued the leaves, grass, and word into place, making sure things looked good from all sides. Then, to glue the sides together, apply adhesive to the tabs, and overlap them. I suggest doing this with the card popped up for a better fit. You can pinch them together, then fold the card flat while it dries.
[row]
[column size=”1/2″ stack=”sm”] [/column]
[column size=”1/2″ stack=”sm”] [/column]
[/row]
[row]
[column size=”1/2″ stack=”sm”] [/column]
[column size=”1/2″ stack=”sm”] [/column]
[/row]
And that’s it! If you would like to see a full length video, Lynnea assembles a similar card in this video.
Here’s another look at my finished card…
[row]
[column size=”1/2″ stack=”sm”] [/column]
[column size=”1/2″ stack=”sm”] [/column]
[/row]
[row]
[column size=”1/2″ stack=”sm”] [/column]
[column size=”1/2″ stack=”sm”]
[/column]
[/row]
Thanks so much for stopping by today. I hope you’re inspired to give an Oval Box Card a try! In addition to the Dinosaur Add-on, there are several other add-on sets that coordinate, and you can always mix in stamps and dies from your stash for unique cards. Head on over to i-crafter and check out the whole Oval Box Pops collection! I’ll be back soon with another fun card to share.
This site uses affiliate links whenever possible (at no additional cost to you), but only for products I actually use and love.

4 thoughts on “Dinosaur Oval Box Card”