Hello again my crafty friend. Today, The Rabbit Hole Designs has an incredible new release and as soon as I saw it, I couldn’t wait to play! The Wonderland collection has three sets full of fun characters, an awesome sentiment set, and two whimsical background stamps. In addition, there are some gorgeous new hot foil coverplates that coordinate nicely. I’ll show you three of the cards I’ve made so far…
[row]
[column size=”7/10″ stack=”sm”]
[/column]
[column size=”3/10″ stack=”sm”][/column]
[/row]
The first thing I did when these goodies arrived, was to stamp out the backgrounds and all of the characters to Copic color. I wasn’t sure what size cards I was going to make yet, so I stamped the backgrounds on 6″ square panels and used a black pen to extend some of the lines to the edges. I colored over the course of a few nights while watching TV (and I still have a bunch of characters ready to use on future cards). If you enjoy coloring, you’ll want to give these images a try!
Before I show you closeups of each card, it might be handy for you to see the supplies I used…
[row]
[column size=”1/2″ stack=”sm”]
WONDERLAND SUPPLIES
Wonderland 1 Stamp Set and Die Set
Wonderland 2 Stamp Set and Die Set
Wonderland 3 Stamp Set and Die Set
Heard in Wonderland Stamp Set
Path to the Castle Background Stamp
Tea Party Background Stamp
Rhombus/Diamond Hot Foil Coverplate
Amanda Hot Foil Coverplate
Garden Trellis Hot Foil Coverplate
[/column]
[column size=”1/2″ stack=”sm”]
OTHER SUPPLIES
EZ-Lights
Double Thick Foam Tape
Crystal Clear Foam Tape
Interactive Labels Stamp Set
Iridescent Gems
Heart-shaped Gems
Gold Pearls
Copic Markers
Glimmer Hot Foil System
[/column]
[/row]
With my images colored and the characters die cut, I quickly turned them into cards. Starting with the Path to the Castle background, I created an easel card. Using my largest circle dies, I cut out three 5½” circles. I cut the background image out with a 5¼” circle die to layer on top. Then I die cut a pair of vellum circles large enough for a sentiment and one character. Thin foam tape pops the cat up and the sentiment is subtle, embossed in white on the vellum. Inside, another sentiment is embossed and I nested a pair of small circles cut from the scraps, and popped them up with more foam tape to create the catch, or stopper. A few round and heart-shaped gems finish the card. (If you haven’t assembled an easel card, it’s very simple. You can see step-by-step photos of the process here.)
[row]
[column size=”1/2″ stack=”sm”] [/column]
[column size=”1/2″ stack=”sm”] [/column]
[/row]
I knew the Tea Party background would be a fun scene to light up, so I stamped an extra set of the lamps and colored them at the same time I colored everything else. After fussy cutting them, I set them aside with my die cut bunny and sentiment strip so I could work on the light-up part. I decided to make the card a 5½” square, so I trimmed the background down to 5⅛” and matted it onto a 5¼” white panel. I stamped the word PUSH on the yellow teapot, so the recipient will know what to do. Then, I poked holes in the center of each lantern. To add lights, I flipped the panel over and adhered the button of an EZ-Light in place behind the word PUSH. I lined up each light over the holes I had poked, and taped them in place. Then, I added double thick foam tape around the panel and adhered it to my green card base. The trick to spread light out through the lanterns is to add clear foam tape on top, before sticking the fussy cut lanterns on top.
[row]
[column size=”1/3″ stack=”sm”] [/column]
[column size=”1/3″ stack=”sm”] [/column]
[column size=”1/3″ stack=”sm”] [/column]
[/row]
I really love the way this one turned out! It’s a little hard to tell from the photos because I’m playing with new lighting in the studio, but the lanterns actually glow very bright…
[row]
[column size=”1/2″ stack=”sm”] [/column]
[column size=”1/2″ stack=”sm”] [/column]
[/row]
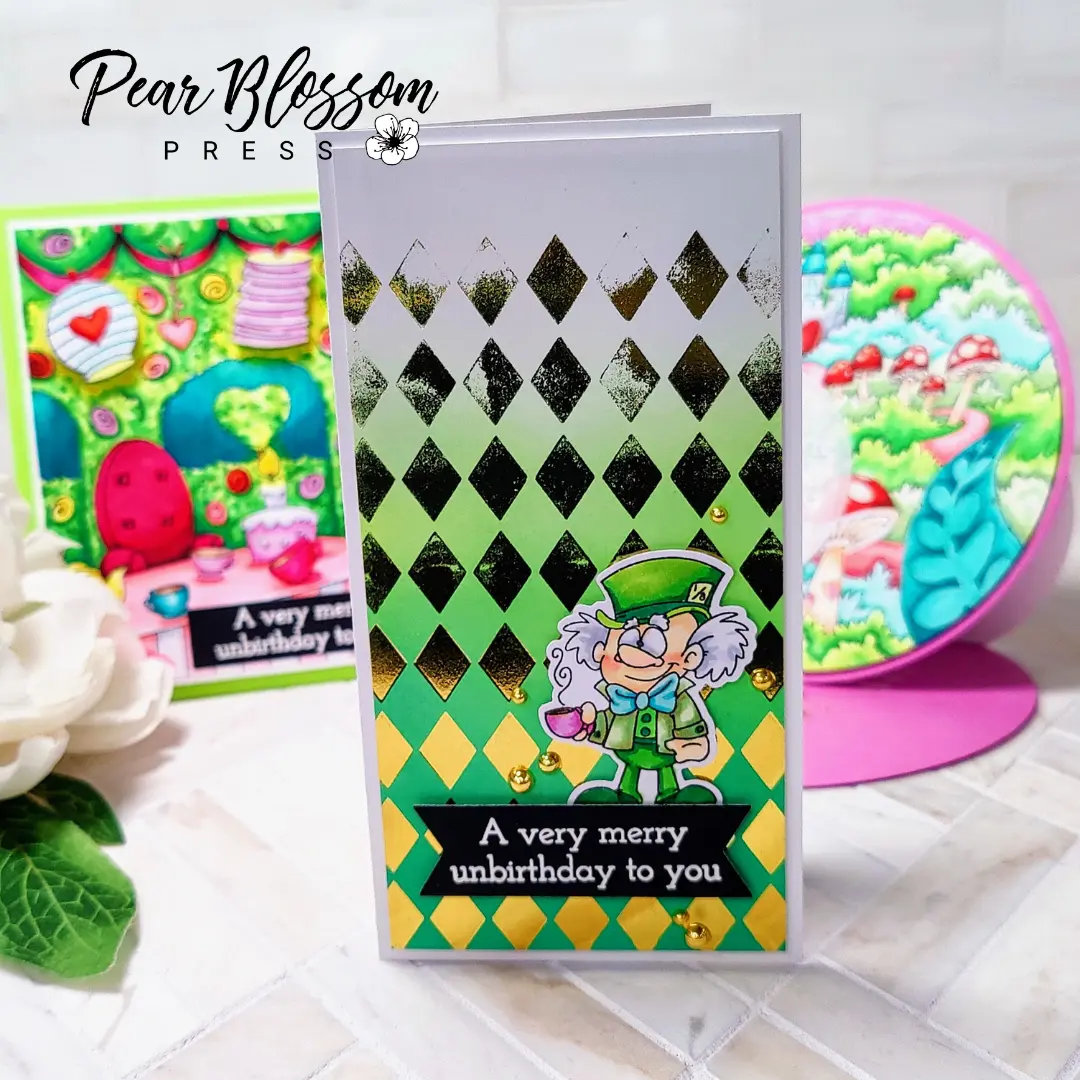
I really wanted to play with the hot foil plates, so I ink blended two shades of green onto a panel, then foiled it in gold with the Rhombus/Diamond coverplate. During the process, I had a happy accident happen. The foil stuck to the top plate of my Glimmer Foil System as I removed it, and since it wasn’t cool yet, not all of the image transferred. Luckily, it was at the top of my panel where I’d let the ink blending fade to white. I ended up with a neat, distressed look that I really liked! After trimming the panel down to 3″ x 6,” I mounted it to a white mini-slimline card base (3¼” x 6¼”) with thin foam tape. I popped another character up above a sentiment strip and added gold pearls. This card isn’t interactive, but it sure has lots of glitz. It might be my favorite of the three! What do you think?
[row]
[column size=”1/2″ stack=”sm”] [/column]
[column size=”1/2″ stack=”sm”] [/column]
[/row]
I’d love to know which is your favorite, and I’d love to know what you think of the new Wonderland release from The Rabbit Hole Designs! Are there any particular sets you like, or do you need them all like me? If you’d like more inspiration, head on over to their blog and see what the design team has created. I think they were just as excited to play with these new stamps as I was! I’ll be back soon with more fun cards to share, including a few more with these sets. See you then!
Oh, before I go, I wanted to let you know that The Rabbit Hole Designs is celebrating their release with a giveaway! Details can be found on their blog. Good luck my friend!
This site uses affiliate links whenever possible (at no additional cost to you), but only for products I actually use and love.
