Hi everyone!!! It’s Amanda Wilcox, from Twiddler’s Nook, joining you today as a guest designer for Pear Blossom Press. I have always loved their products and they just keep getting better! Today I’m sharing a fun way to use the new Halo Lights.

Here’s a look at my finished card. I have broken things down just a bit to show just how easy these new Halo Lights are to use! Let’s get started!

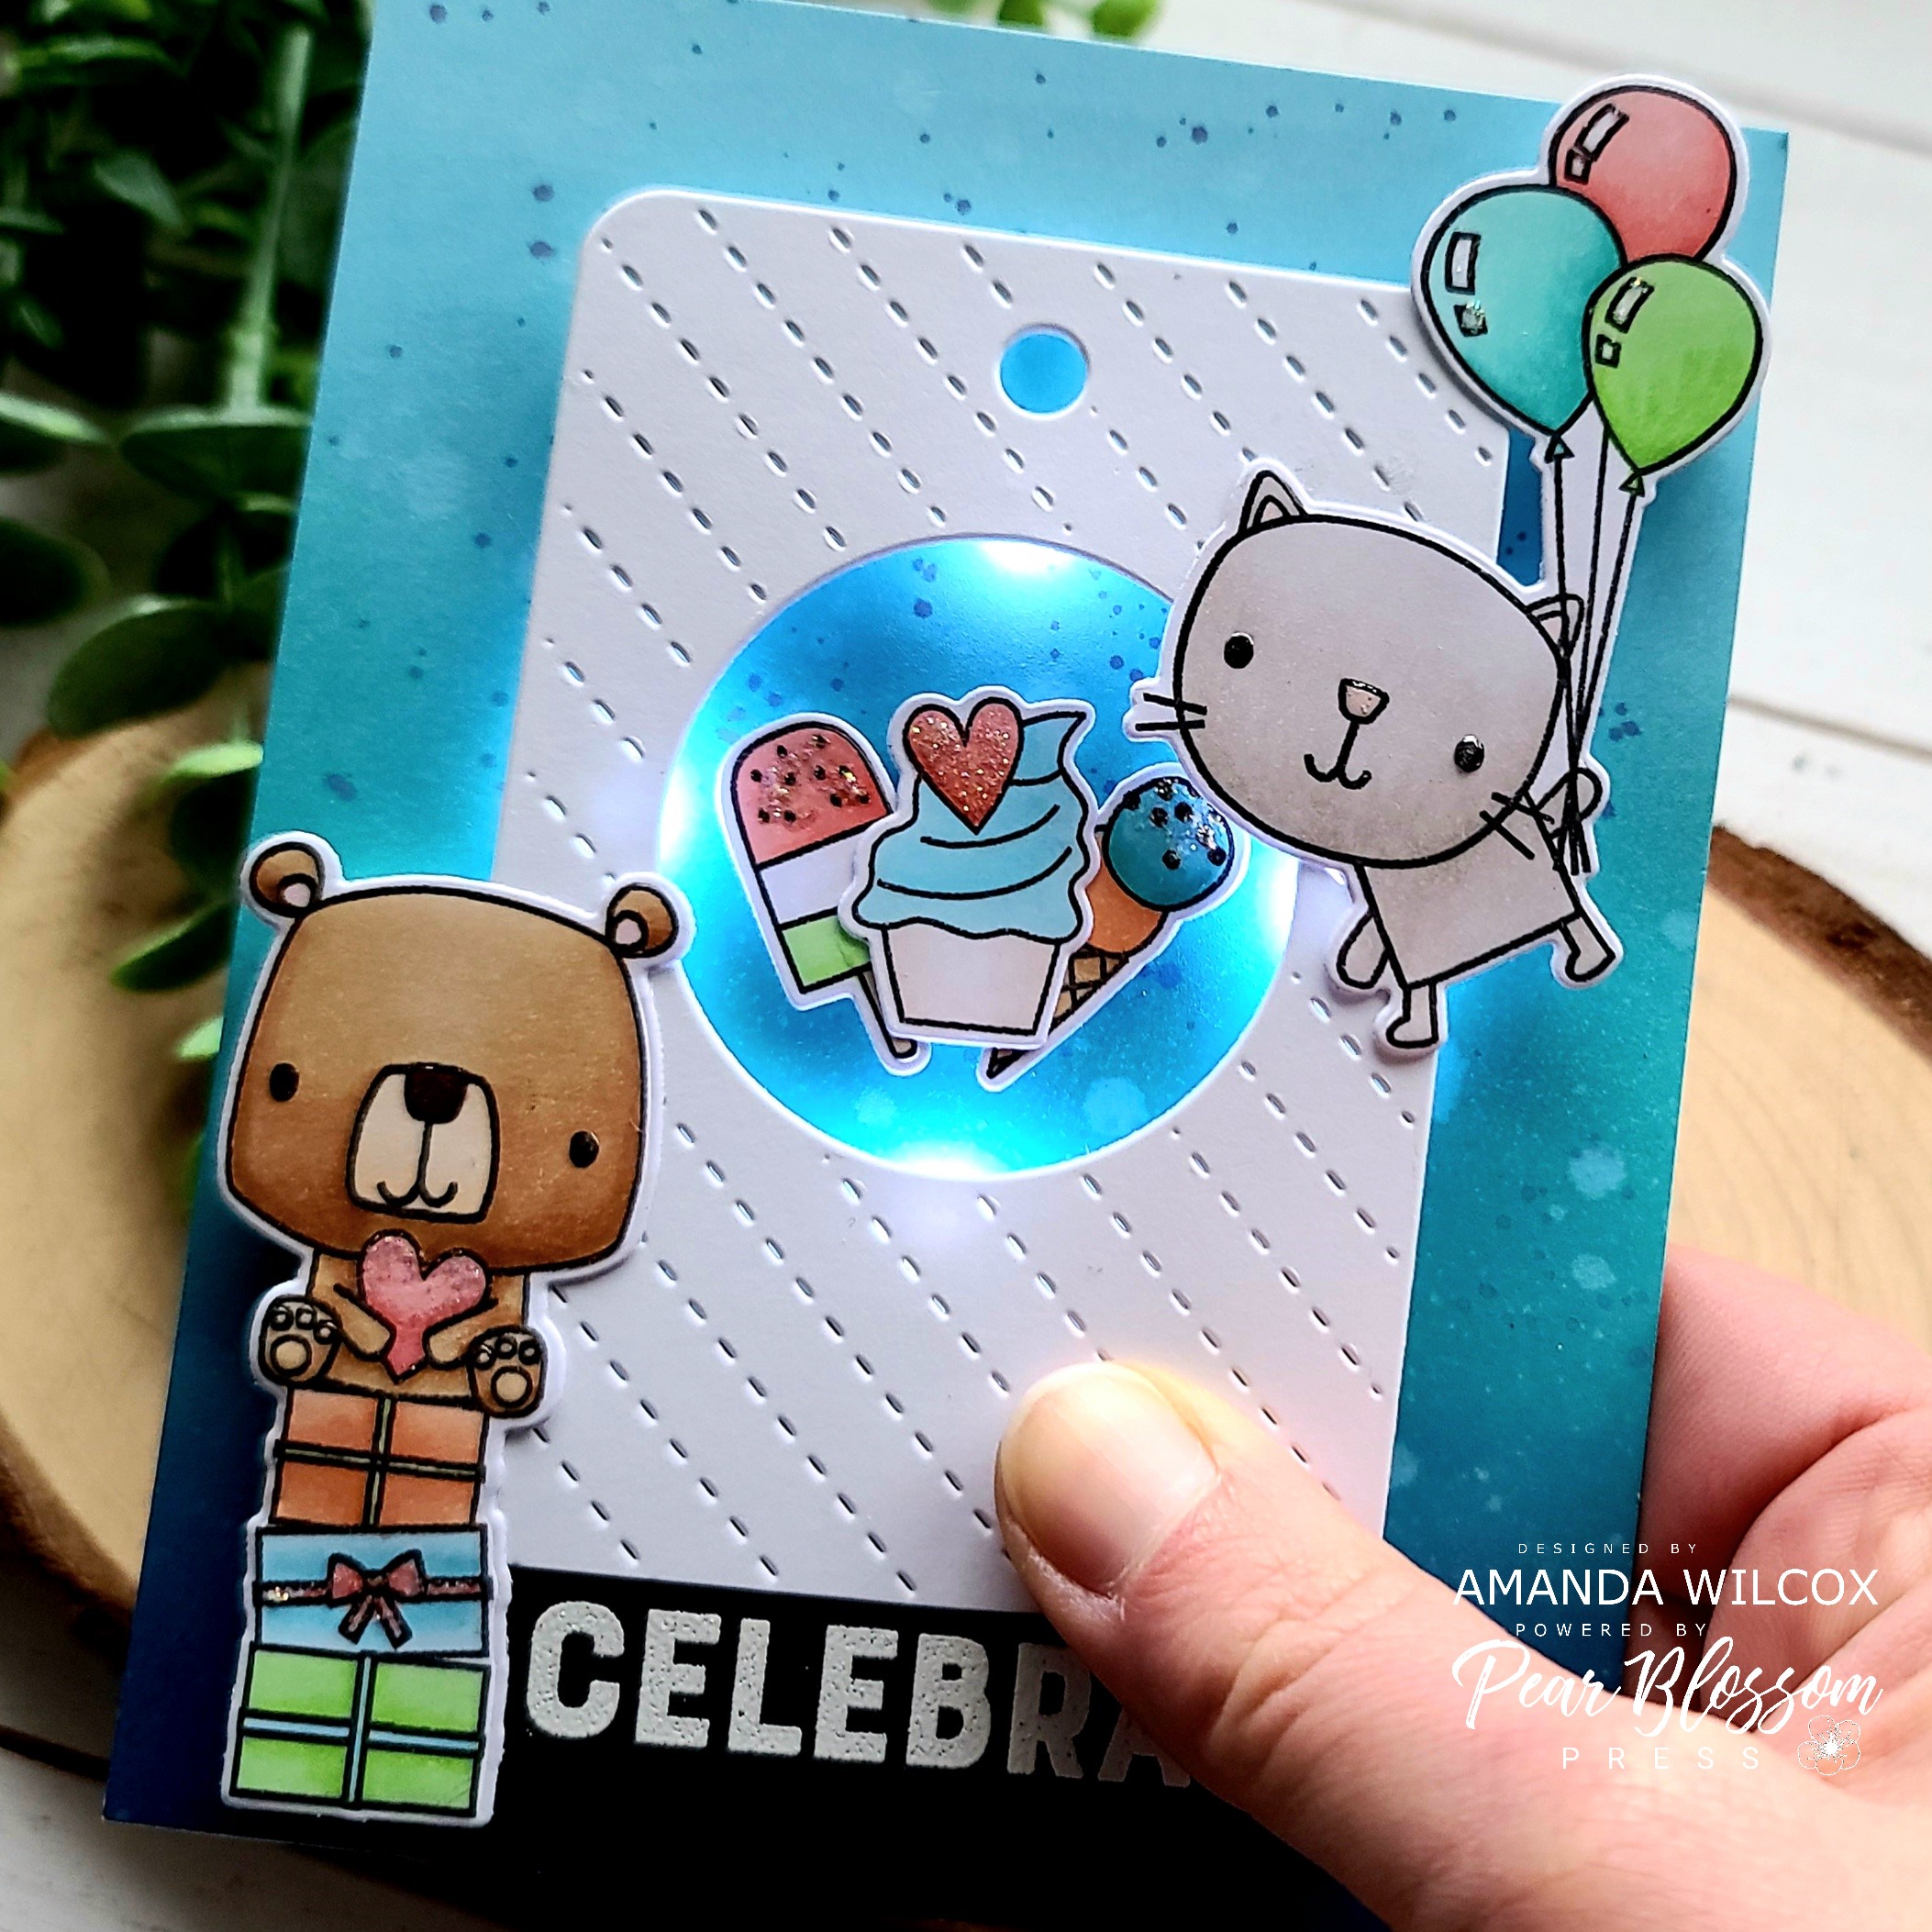
I inked up an A2 size panel with distress oxides in chipped sapphire, peacock feathers and tumbled glass. I spritzed it with water and flicked some watered down chipped sapphire on the whole panel. I die cut 2 of the Reverse Confetti see through tag die so it was thick and sturdy. I temporarily attached the Halo Light to the tag with post-it tape, added liquid glue to the back and adhered it to my ink blended panel.
I stamped and colored images from Reverse Confetti Ice Cream Social and Party Pals stamp sets. Then I used the coordinating dies to cut them out. I also stamped and heat embossed a sentiment from Party Pals and trimmed it into a strip.

With my light in place, I added a double layer of foam squares all around it and then adhered my tag on top. Next, I used a combination of liquid glue and foam squares to adhere my images and sentiment strip.

Before moving on to my finishing touches, I stamped and heat embossed a push here sentiment from Lawn Fawn on vellum and die cut it with a small circle die. I added it with a dab of liquid glue.

For finishing touches on my card, I added unicorn Stickles to the hearts, sprinkles, bow on the gift and balloons. Then I added glossy accents to the critter noses and eyes.
Check out how cute this little scene is and how much extra fun it is all lit up!!! These lights are absolutely the EASIEST product to use and add so much to your card! It’s just so much fun!

I can’t get over how simple this was to create! It was so much fun and I just love how perfect the Reverse Confetti see through tag worked with the size of the Halo Lights! They were practically meant to be together. Lol!
I appreciate you sharing your time with me. Have a fabulous day!
A great big thank you to Amanda Wilcox for guest designing! You can find more inspiration on her blog, Twiddler’s Nook. She also has a fantastic selection of embellishment trays, magnetic die stands, shaker fillings, and more in her Etsy shop; check it out!
This site uses affiliate links whenever possible (at no additional cost to you). If you click on one of the links in this post, Amanda may receive a small commission. Thank you for helping support our crafty heros that keep us inspired!
